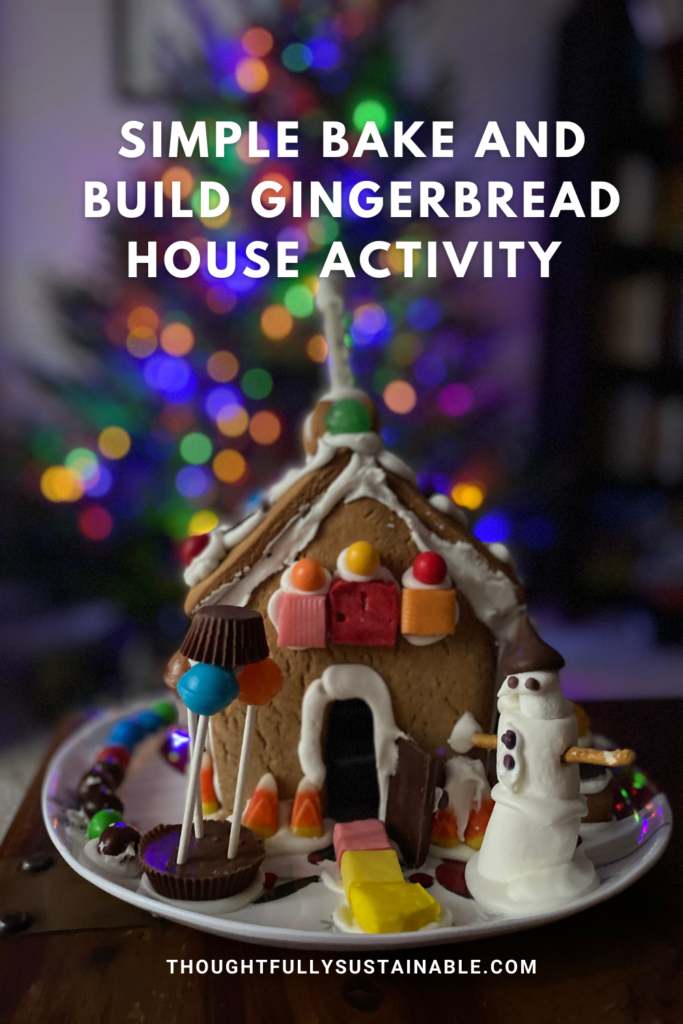
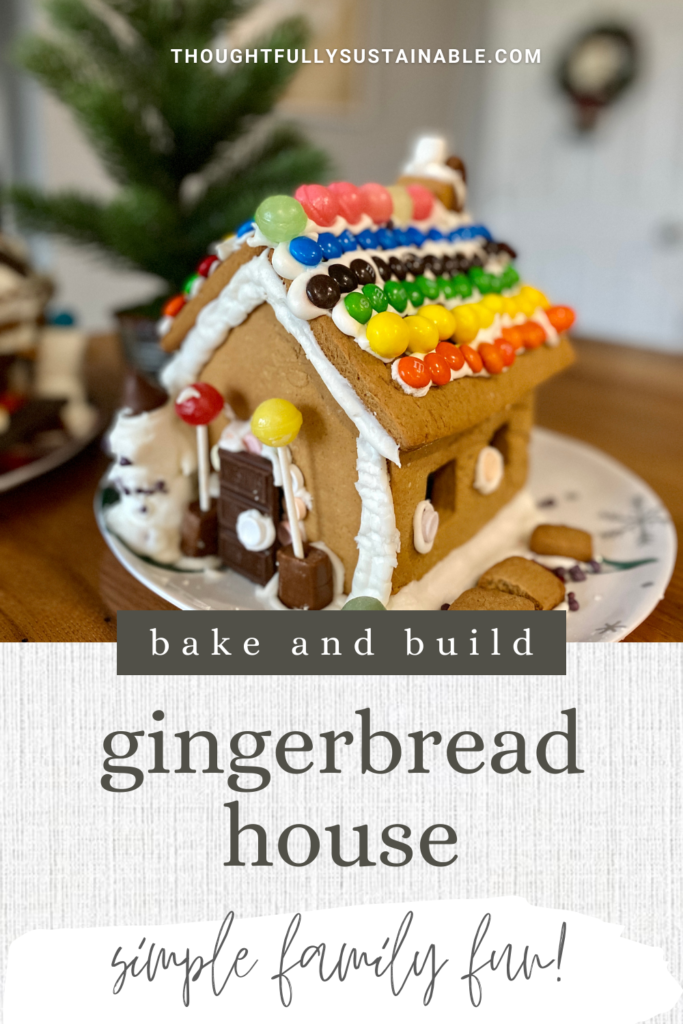
Simple Bake and Build Gingerbread House Activity for Families
Looking for a simple, sustainable STEM activity to kick off the holiday season with your family? Bake and build a structurally sound gingerbread house and decorate it with all of the candy that’s cluttering your cupboards!
This post contains an affiliate link. Thank you in advance for supporting my free educational content if you choose to make a purchase.
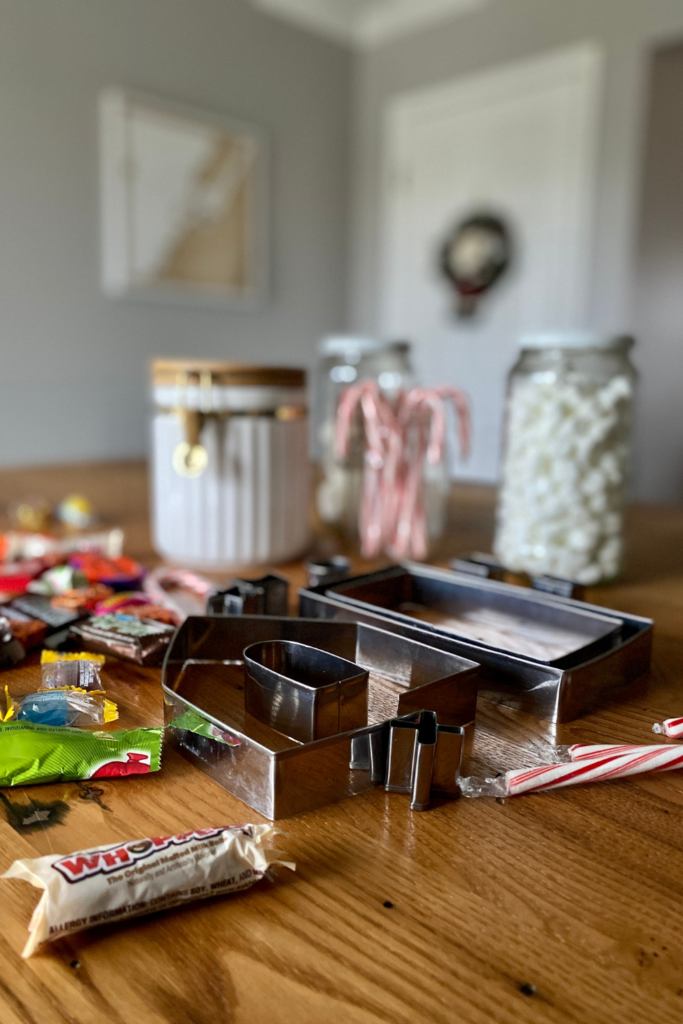
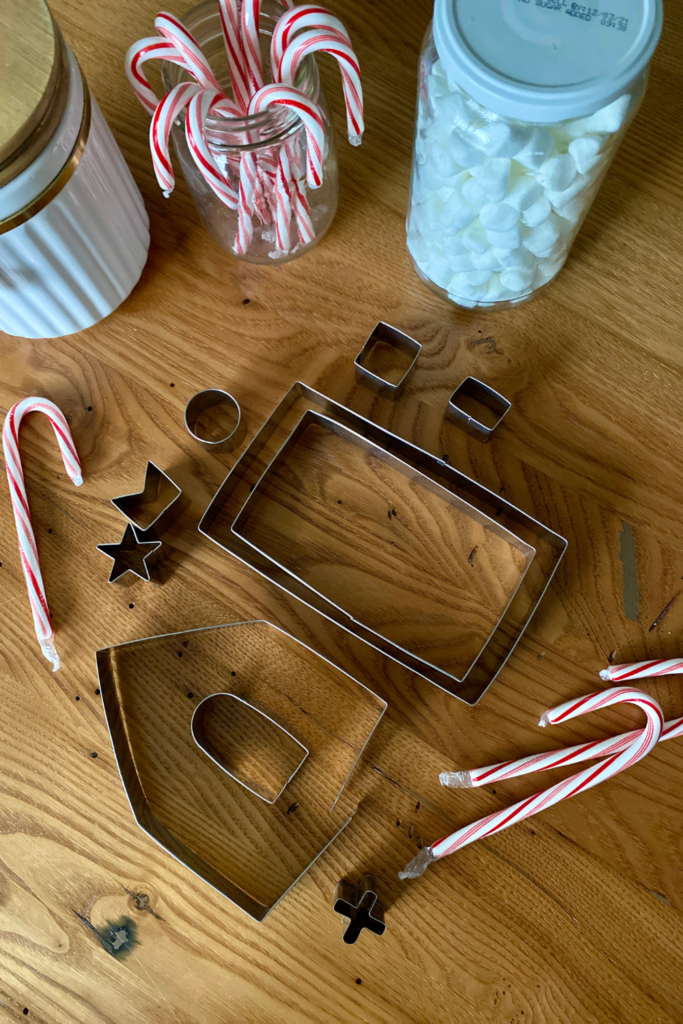
We accumulate a lot of uneaten candy over a year’s time. At any given moment you can discover candy canes from the previous Christmas, Valentine’s Day lollipops, mini chocolate Easter eggs, and an assortment of Halloween sweets in my cupboard. Why save all that candy?
To use for gingerbread house decorating, of course!
Now, let me be clear – we are a maker of gingerbread houses, not a consumer of the holiday treat, which means we really don’t care if the candy we use is well past its prime. I’m not advocating for you to eat stale, sugary snacks, but to instead use them for decorating purposes. I wouldn’t want anyone getting a stomach ache on my behalf!
A Sustainable Holiday Tradition
My family has kicked off the Christmas holidays by making gingerbread houses since I was a little girl. My mom would save all of our unopened candy in a few jars under the kitchen countertop until the day after Thanksgiving when she would spill out their contents on our dining room table and we’d begin our gingerbread house builds.
I call them gingerbread houses, but really they were graham cracker houses, like the kind most kids make at some point in school. I’ve continued this tradition with my own family until this year when they requested we make “real” gingerbread houses in lieu of the graham cracker kind.
I decided to honor their request and pulled my mom’s recipe for gingerbread cookies, thinking this might do the job. To my pleasant surprise, the recipe worked brilliantly! So well, in fact, that I wanted to share it with you, along with her recipe for strong as nails gingerbread house icing.

Ingredients Needed for Gingerbread House Icing
Here is a simple list of ingredients needed to make the “glue” for your gingerbread house construction. This creates enough icing for the construction and decoration of one gingerbread house. If you plan to make more than one, adjust the volumes accordingly.
- 3 Egg whites
- ½ tsp. Cream of tartar*
- 4 cups Confectioner’s sugar (Powdered sugar)
*if you don’t have the cream of tartar, you may use salt as a substitute.
Instructions to Make the Gingerbread House Icing
Once you’ve gathered all the ingredients, follow these instructions to make your gingerbread house icing.
- In a large mixing bowl, add the egg whites and cream of tartar and beat with an electric mixer on high speed until foaming.
- Gradually beat in the confectioner’s sugar until stiff peaks form.
- Store in a tightly sealed container at room temperature for up to five days.
Fun Chemistry note – the addition of cream of tartar, which is acidic, helps the beaten egg whites hold their shape by trapping air between the unwinding protein strands. Without the addition of cream of tartar, the egg whites would fall flat, preventing the stiff texture needed for the gingerbread house icing.
Ingredients Needed for Gingerbread House Cookies
This recipe comes from my mom, who has been baking gingerbread cookies for me since I was a little girl. The volumes of ingredients shown below create enough dough for one gingerbread house. Be prepared for your kitchen to smell amazing while these cookies bake!
- ½ cup Shortening
- ½ cup Granulated sugar
- ½ cup Dark molasses
- ¼ cup Water
- 2 ½ cups Flour
- ¾ tsp. Salt
- ½ tsp. Baking soda
- ¾ tsp. Ginger
- ¼ tsp. Nutmeg
- ⅛ tsp. Allspice
- Gingerbread house cookie cutter set
Designing the Shape of the Gingerbread House
Depending on the age and ability level of your child, you can tackle the design portion of the gingerbread house in a variety of ways. All options allow your learners to practice their STEM skills, it just depends on how challenging you want to make the project!
I chose to purchase gingerbread house cookie cutters for the ease and convenience of creating uniform shapes for the sides and roof of the house. Additionally, my children are early elementary school-aged and my objective was for them to practice their creation of right, acute, and obtuse angles when piecing together the roof and sides of their houses.
To increase the challenge of this STEM project, have your learners create their templates for their houses, stressing the importance of accurate right and acute angles for the sides and peaks of their structural pieces.

Instructions to Make the Gingerbread House Cookies
Follow these steps to create the pieces for your gingerbread house construction project.
- In a large bowl, cream together the shortening and sugar.
- Blend in the molasses, then the water. The mixture will be thin.
- In a medium bowl, mix the dry ingredients together (flour, salt, baking soda, ginger, nutmeg and allspice).
- Stir the dry ingredients into the wet ingredients.
- Cover and refrigerate for at least two to three hours.
- Heat oven to 375℉
- Roll dough ¼ inch thick on a floured surface.
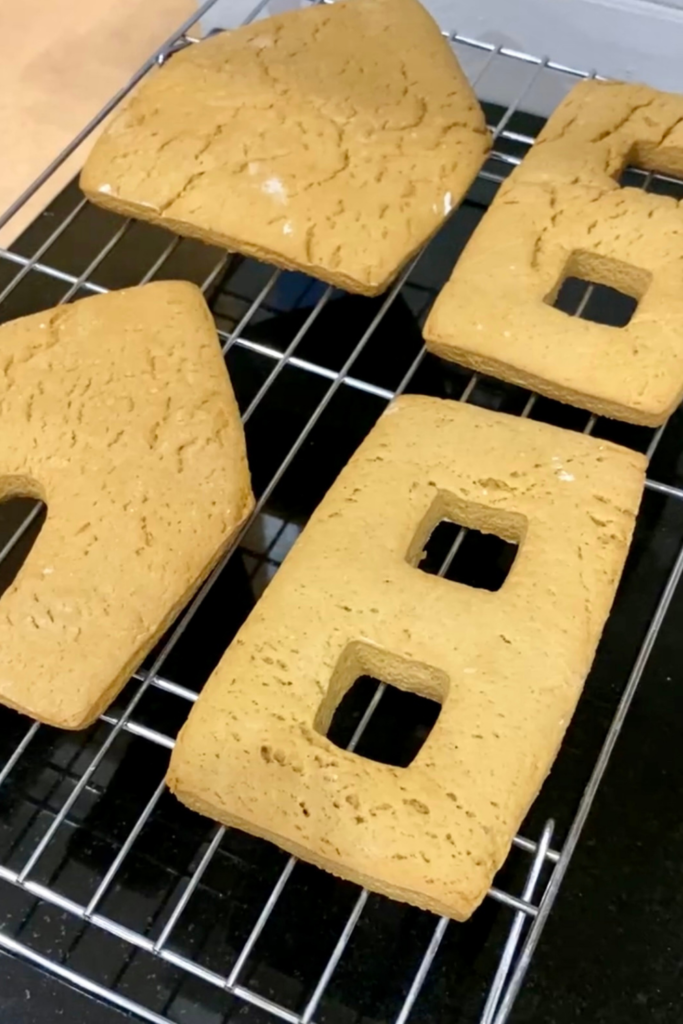
- Cut out sides and roof of the gingerbread house using cookie cutters or your design template. If using your template, use a knife to trace around the outer edge of your design, being careful not to shift the template while tracing. If you want to cut out windows and doors for your house, be sure to do it at this step.
- Place your gingerbread house cookies on parchment paper on a baking sheet.
- Bake the cookies on the middle rack of the preheated oven approximately 10-12 minutes, until cookies are golden brown.
- Remove immediately from the baking sheet and place on a cooling rack.
- Do not attempt to build your gingerbread house until the cookies are completely cool.
Personally, I like to bake my gingerbread house cookies the day before I plan to construct the house, leaving them out to cool and harden on the kitchen counter overnight. However, I do not have a dog that would snag the cookies and eat them off of my countertop, so adjust this technique to fit your situation!

Building the Gingerbread House
Once you have all of the supplies needed for your gingerbread house construction, you’ll want to choose a base to build your house upon. This could be a large, flat dinner plate or a piece of cardboard covered in aluminum foil – use what you have and consider the space you plan to display your finished product.
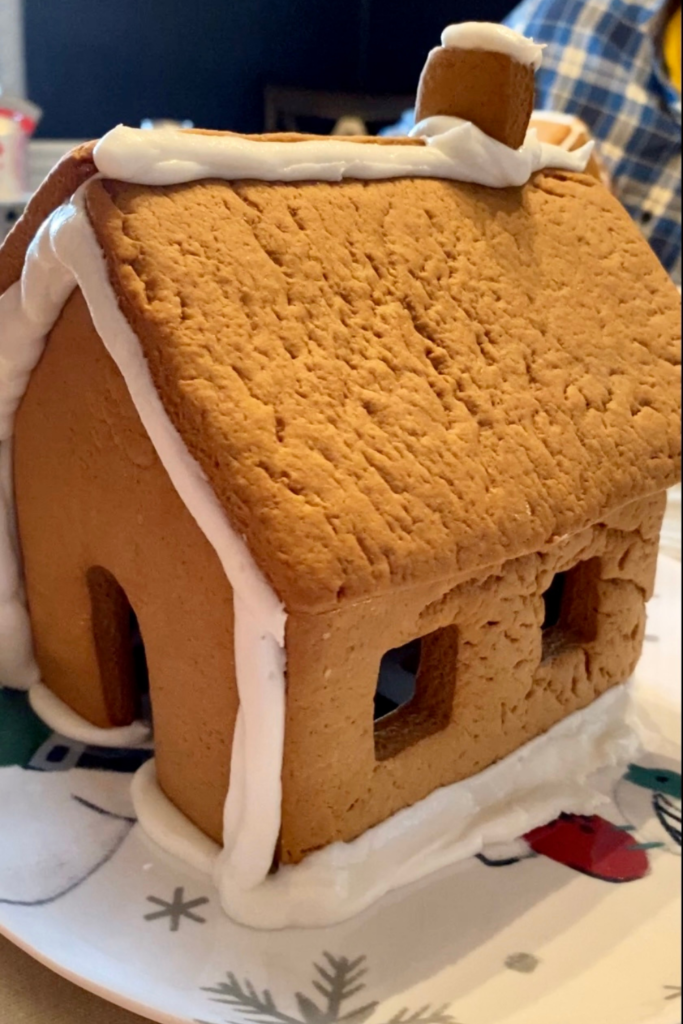
Next, grab the gingerbread house icing, an icing piping bag, and your icing piping bag tips. If you don’t have an icing piping bag or tips, no big deal! You can substitute these baking tools with a simple small plastic storage bag, cutting off the tip of one bottom corner of the bag to use to squeeze out the icing. Fill your piping bag half-full with icing and begin building the base of your gingerbread house, piping icing on the bottom and sides of each base piece, one at a time.
You may want to have a few unopened food cans on hand, as these can help stabilize the sides of the house by holding up each side at a 90° angle from the base while you slowly ice the sides to one another. Once all four sides are iced and attached to each other and the base, allow the icing to harden a few minutes before proceeding to attach the roof.
While you wait for the icing to harden, take this opportunity to examine the angles created between the sides of the house, as well as the angles between the sides and the base. Point out that 90° angles will create a structurally superior build, while acute (less than 90°) or obtuse (greater than 90°) angles may cause the sides to collapse once the roof is added. These simple engineering skills will prove essential to a proper build.
When the icing has hardened between your base pieces, remove any cans used for stability and ice your roof pieces. Attach them to the base, being sure to ice all sides liberally to ensure a solid attachment. You may want to hold each roof piece in place to prevent them from sliding as they dry and harden.
Allow your house to sit untouched for a few minutes to allow the roof to firmly attach to the base. Use this drying time to collect the candy and edible treats you plan to use to decorate your house!

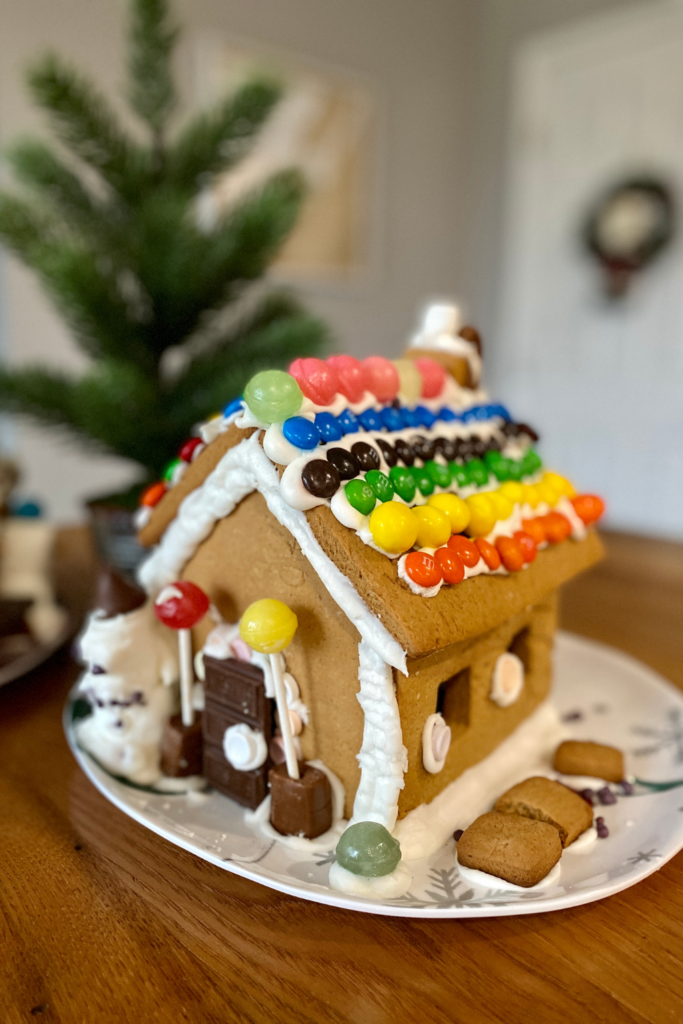
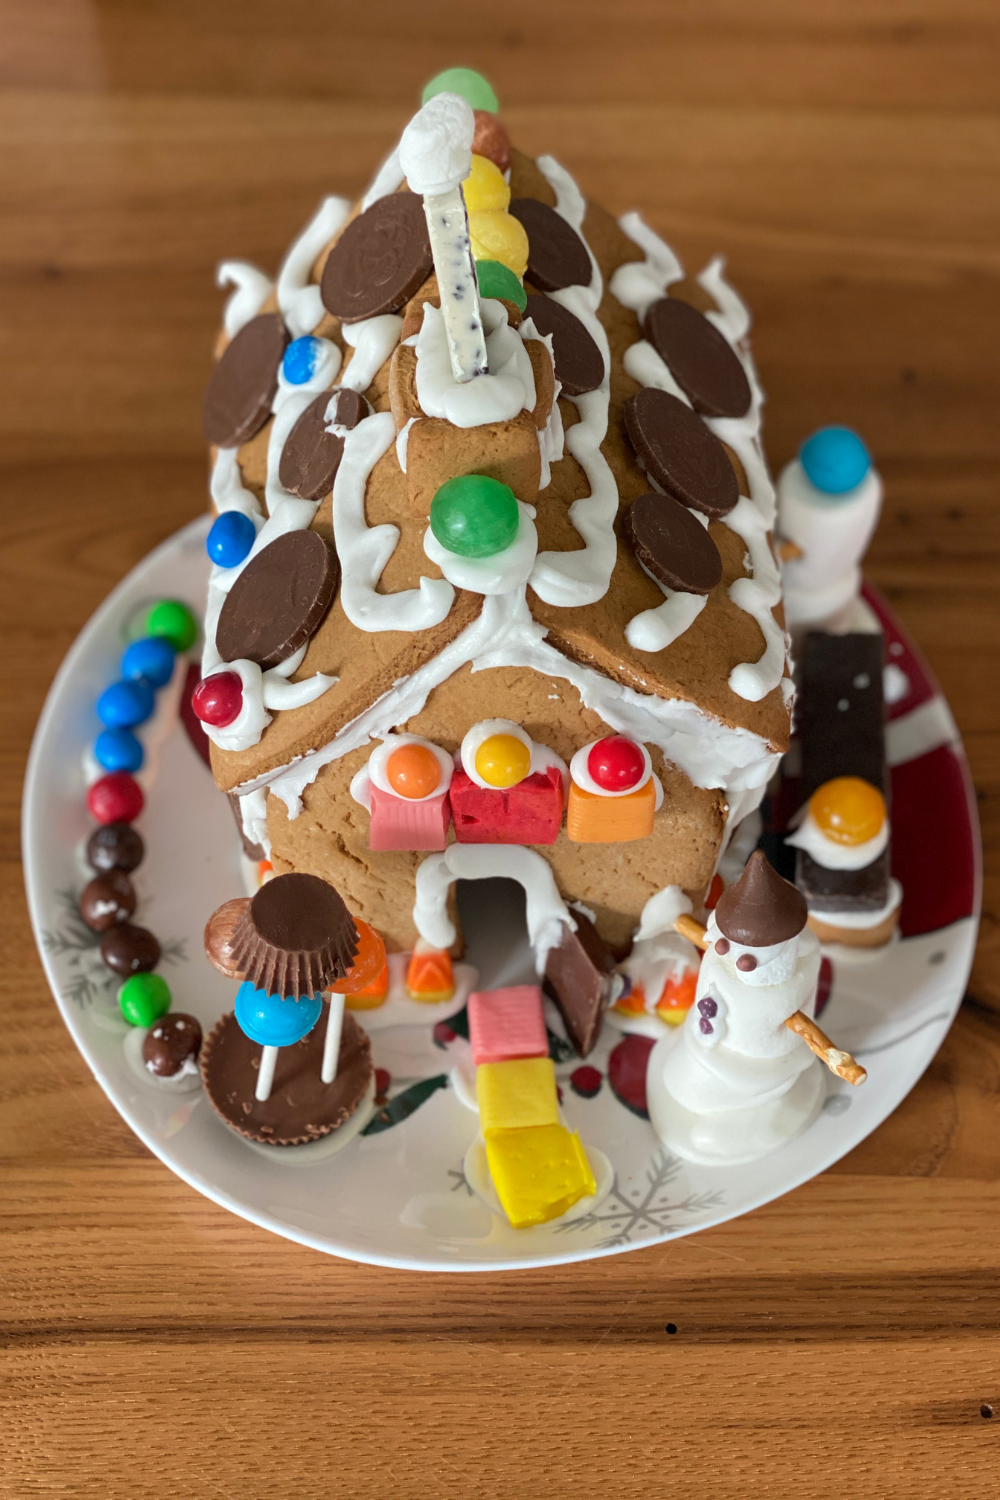
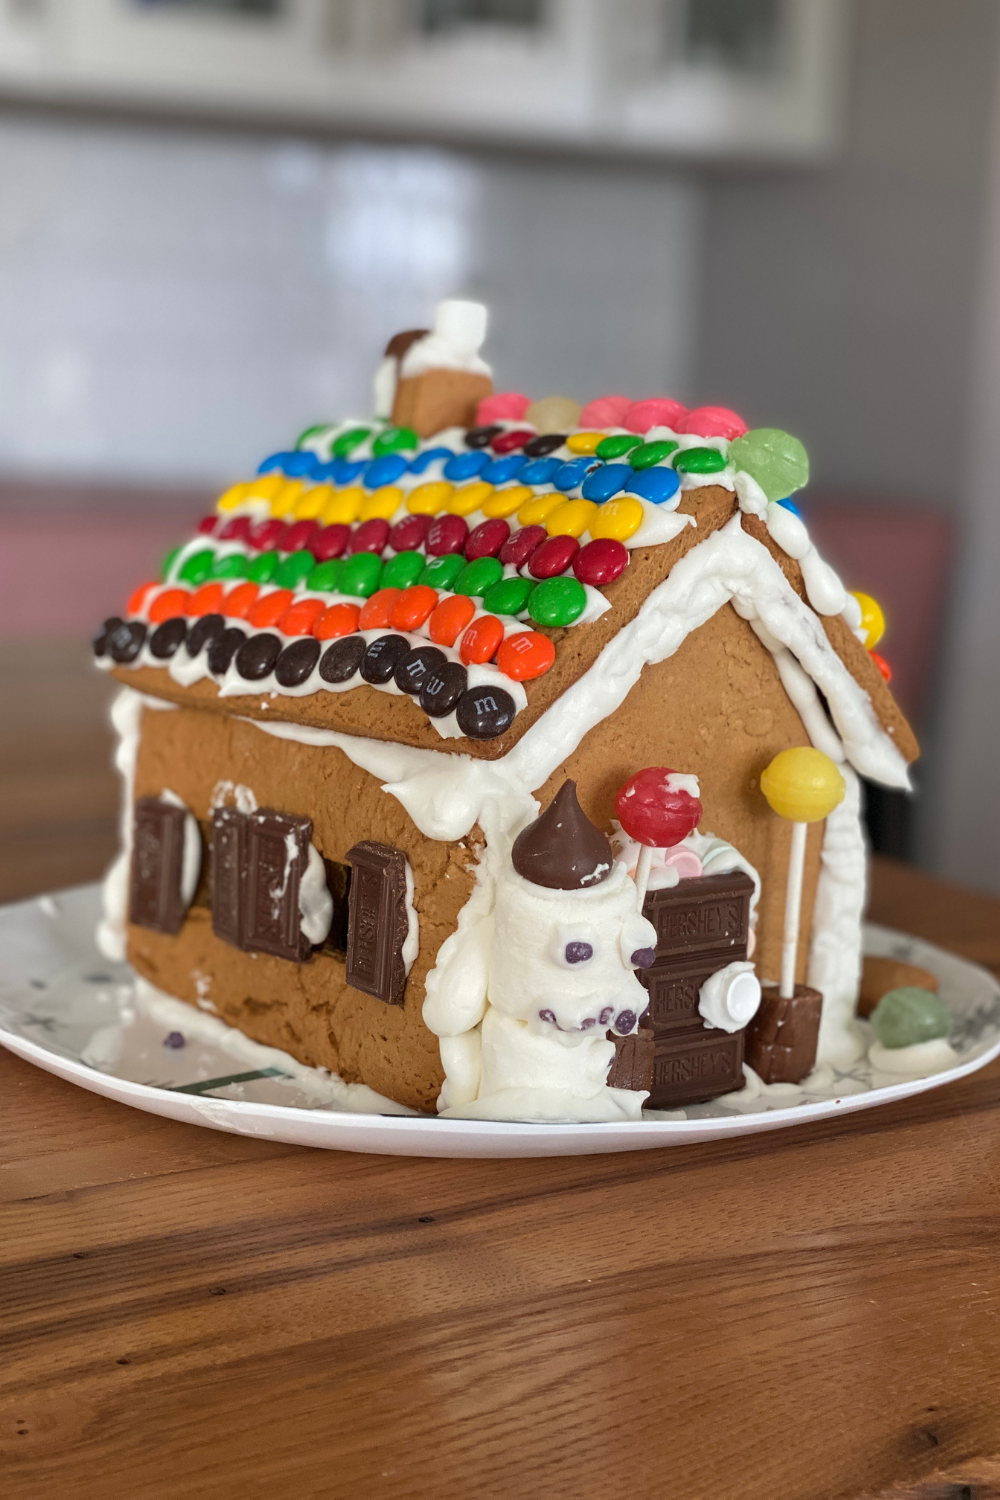
Decorating the Gingerbread House, Sustainably!
Here comes the best part – decorating the gingerbread house! Pull out all of the old, forgotten candy from the year; the confections that no one actually eats in your home but that would make for delightful gingerbread house decor! Got stale pretzel sticks? Use them for fencing around your house or a thatched roof look. Marshmallows that are past their prime? Stack three on top of each other and create a miniature snowman!
The possibilities are endless for decorating your gingerbread house. Just be sure to use an ample amount of icing when attaching your embellishments to your structure. Let imaginations take flight and transform your gingerbread house into a three-dimensional masterpiece, all while repurposing snacks that would otherwise be sent to the landfill.
If you choose to make a gingerbread house, I’d love to see your creations! Share them on Instagram or Facebook and tag me @thoughtfullysustainable, or email them to me. And as always, if you have any questions, feel free to leave a comment below!
Simple Gingerbread House Icing Recipe
Here is a simple recipe to make the “glue” for your gingerbread house construction. This creates enough icing for the construction and decoration of one gingerbread house. If you plan to make more than one, adjust the volumes accordingly.
Ingredients
- 3 Egg whites
- ½ tsp. Cream of tartar*
- 4 cups Confectioner’s sugar (Powdered sugar)
- *if you don’t have the cream of tartar, you may use salt as a substitute.
Instructions
1. In a large mixing bowl, add the egg whites and cream of tartar and beat with an electric mixer on high speed until foaming.
2. Gradually beat in the confectioner’s sugar until stiff peaks form.
3. Store in a tightly sealed container at room temperature for up to five days.
Notes
Fun Chemistry note - the addition of cream of tartar, which is acidic, helps the beaten egg whites hold their shape by trapping air between the unwinding protein strands. Without the addition of cream of tartar, the egg whites would fall flat, preventing the stiff texture needed for the gingerbread house icing.
Easy Gingerbread House Recipe
This recipe comes from my mom, who has been baking gingerbread cookies for me since I was a little girl. The volumes of ingredients provided create enough dough for one gingerbread house. Be prepared for your kitchen to smell amazing while these cookies bake!
Ingredients
- ½ cup Shortening
- ½ cup Granulated sugar
- ½ cup Dark molasses
- ¼ cup Water
- 2 ½ cups Flour
- ¾ tsp. Salt
- ½ tsp. Baking soda
- ¾ tsp. Ginger
- ¼ tsp. Nutmeg
- ⅛ tsp. Allspice
Instructions
- In a large bowl, cream together the shortening and sugar.
- Blend in the molasses, then the water. The mixture will be thin.
- In a medium bowl, mix the dry ingredients together (flour, salt, baking soda, ginger, nutmeg, and allspice).
- Stir the dry ingredients into the wet ingredients.
- Cover and refrigerate for at least two to three hours.
- Heat oven to 375℉
- Roll dough ¼ inch thick on a floured surface.
- Cut out the sides and roof of the gingerbread house using cookie cutters or your design template. If using your template, use a knife to trace around the outer edge of your design, being careful not to shift the template while tracing. If you want to cut out windows and doors for your house, be sure to do it at this step.
- Place your gingerbread house cookies on parchment paper on a baking sheet.
- Bake the cookies on the middle rack of the preheated oven for approximately 10-12 minutes, until the cookies are golden brown.
- Remove immediately from the baking sheet and place it on a cooling rack.
- Do not attempt to build your gingerbread house until the cookies are completely cool.
Notes
Personally, I like to bake my gingerbread house cookies the day before I plan to construct the house, leaving them out to cool and harden on the kitchen counter overnight. However, I do not have a dog that would snag the cookies and eat them off of my countertop, so adjust this technique to fit your situation!