
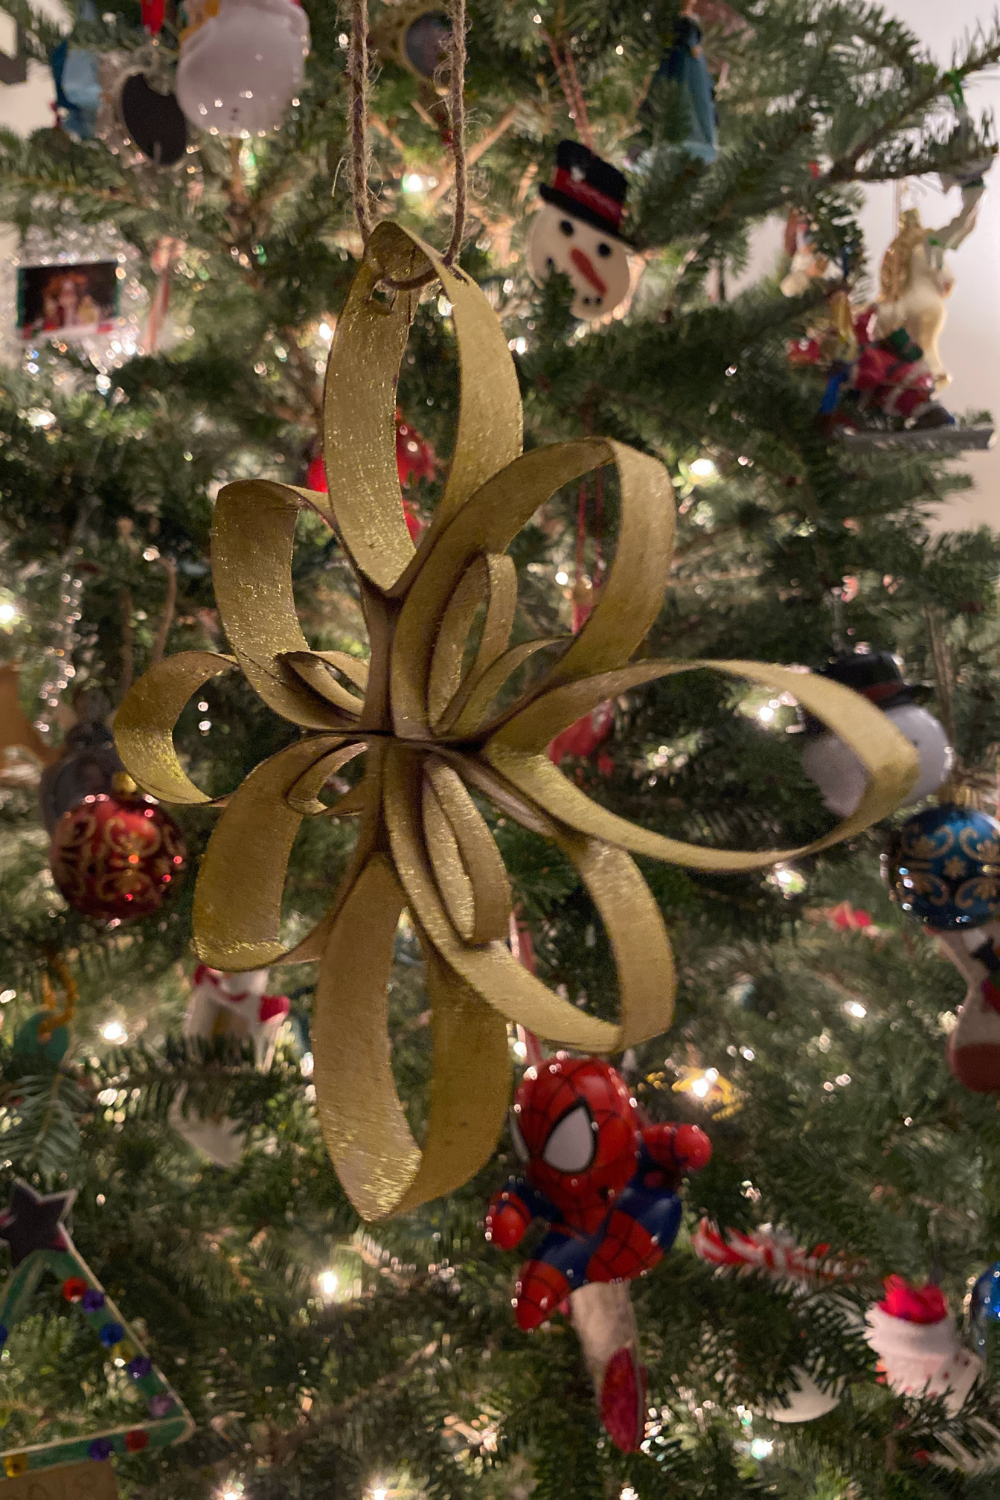
How to Create Cardboard Tube Star and Snowflake Ornaments
Looking for a simple way to involve your kids in sustainably decorating your home for the winter holidays? Transform cardboard tubes into stars and snowflakes with these simple, step-by-step instructions!

Did you know that Americans throw away 25% more trash between Thanksgiving and New Year’s holiday than any other time of the year? What if we turned some of that trash into seasonal treasures?
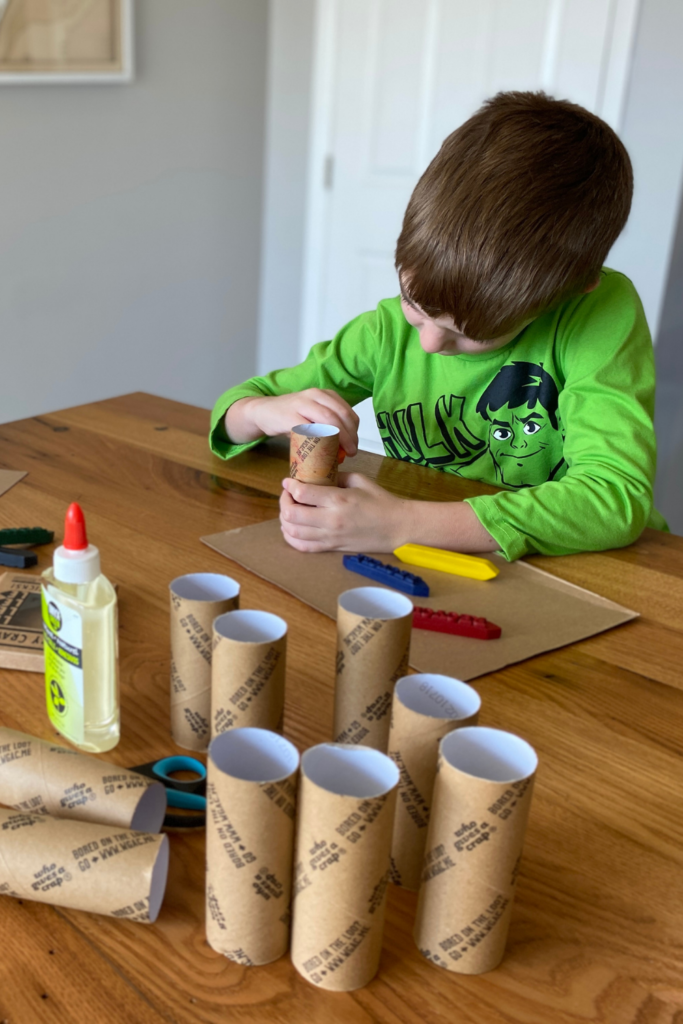
My kids lovingly refer to my craft supplies as “the trash bucket” because it is filled with things we would otherwise discard into the trash or recycling bin. Items like plastic bottle caps and lids, cardboard toilet paper tubes, metal soda can tops, random pieces of ribbon, and string can all be found in this former pretzel bucket. Add in some paint, colored pencils, glue, and a few items from our garage like safety goggles, hammers, and nails, and you’ve got the makings for endless creative activities for kids!
Kid-Friendly and Budget-Friendly Cardboard Creations
Celebrating the holidays through an eco-friendly lens is not only good for the planet but also lighter on the wallet, as you should be able to find almost if not all of the materials required for this star and snowflake cardboard tube craft in your home. Most importantly, you are demonstrating to your children that materials have value, and should not be wasted, even if they were designed to be single-use items. Additionally, because these materials are common household items, you can allow your learners to be creative, as the worry of running out of supplies is quite unlikely!

Materials Needed for Cardboard Tube Stars and Snowflakes
You’ll need the following materials to create the cardboard tube stars and snowflakes.
- Cardboard tubes such as toilet paper or paper towel rolls.
- Scissors
- Glue (regular school glue or hot glue both work well)
- Ruler
- Pencil
- String or twine
- Paint, crayons or colored pencils (optional)

How to Make Cardboard Tube Stars and Snowflakes
Once you’ve gathered all of your materials, follow these simple steps to create your cardboard tube stars and snowflakes to use as stunning holiday ornaments.
- If you’d like colored stars and snowflakes, paint the interior and/or the exterior of the tube and let it dry.
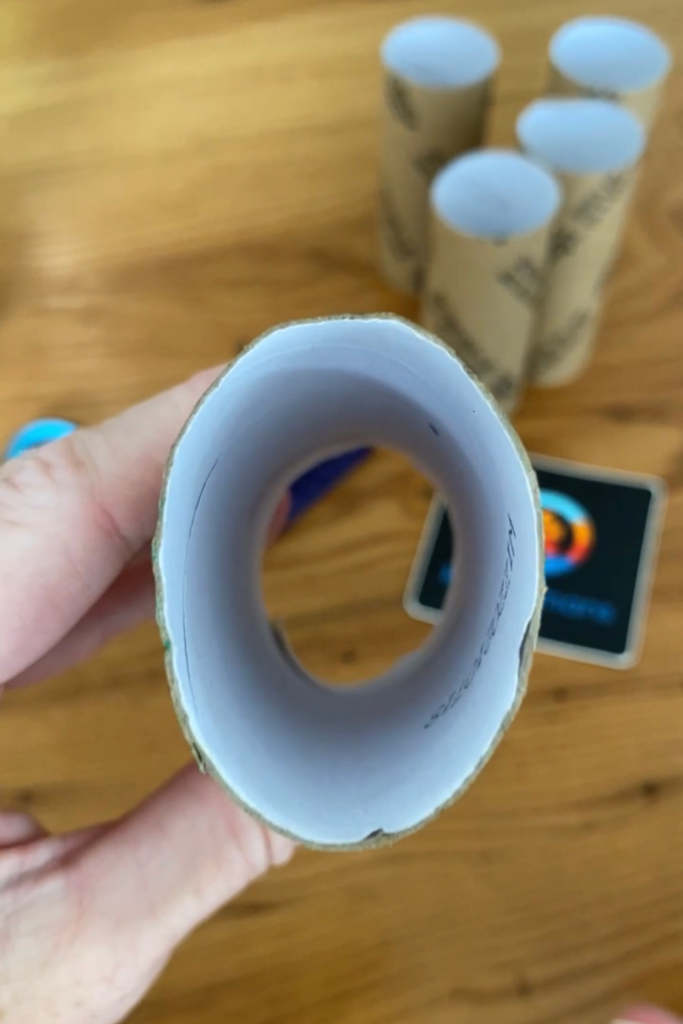
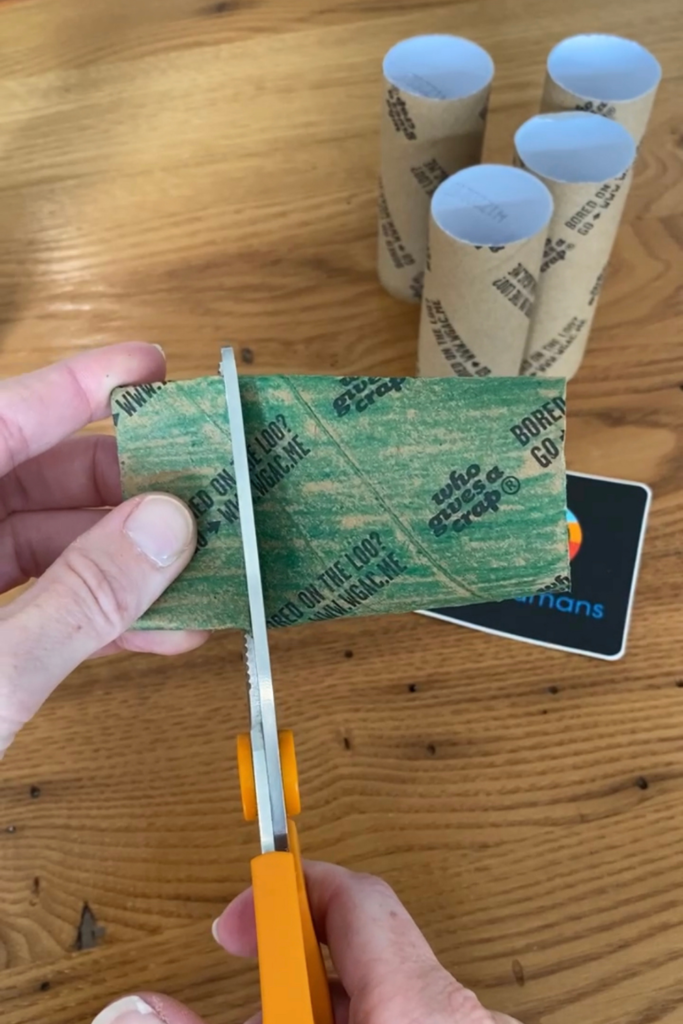
- Once dry, flatten the tube lengthwise to make it easier to cut.
- Use a ruler to divide the tube into 2 cm segments. You’ll want 5-6 segments for the basic star or snowflake.
- Cut the tube into equal segments.
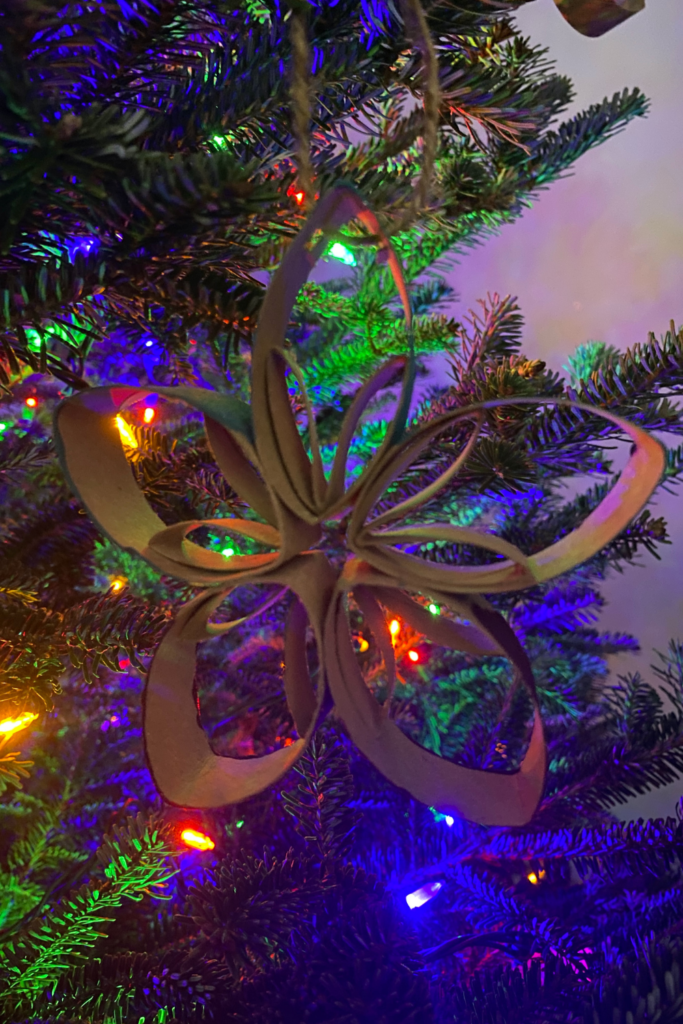
- Arrange the cardboard tube segments next to each other in a circular pattern.
- Glue the segments together. Using hot glue allows for a faster drying process, however, regular school glue works just fine.
- Once dry, tie a string around the top of one of the segments to create a hanging loop.
- If you’d like to add more detail to your star, paint and cut additional 2 cm segments, fold them in half, and glue them inside of the basic star shape to add detail.

How to Use the Cardboard Tube Stars and Snowflakes
Once you’ve made your first toilet paper roll star or snowflake, you will see how simple they are to create and will want to make more! In my house, we use these in a variety of ways to decorate our home during the winter holiday season and beyond. Here are a few ideas you can incorporate into your home:
- Hang the stars as individual ornaments to decorate a tree
- String multiple stars together horizontally to make a garland
- String multiple snowflakes together vertically to hang in a window
- Create a large star to make a cardboard tree topper or hang from the ceiling
- Use a star as a decorative gift tag, writing the name of the gift recipient on your cardboard creation
However you choose to use your cardboard creations, take pride in the fact that you have diverted a bit of waste from the bin and have made something beautiful in the process.
I’d love to see what you create! Share them on Instagram or Facebook and tag me @thoughtfullysustainable, or email them to me. And as always, if you have any questions, feel free to leave a comment below!
How to Create Cardboard Tube Stars and Snowflakes
Looking for a simple way to involve your kids in sustainably decorating your home for the winter holidays? Transform cardboard tubes into stars and snowflakes with these simple, step-by-step instructions!
Materials
- Cardboard tubes such as toilet paper or paper towel rolls.
- Scissors
- Glue (regular school glue or hot glue both work well)
- Ruler
- Pencil
- String or twine
- Paint, crayons, or colored pencils (optional)
Instructions
- If you’d like colored stars and snowflakes, paint the interior and/or the exterior of the tube and let it dry.
- Once dry, flatten the tube lengthwise to make it easier to cut.
- Use a ruler to divide the tube into 2 cm segments. You’ll want 5-6 segments for the basic star or snowflake.
- Cut the tube into equal segments.
- Arrange the cardboard tube segments next to each other in a circular pattern.
- Glue the segments together. Using hot glue allows for a faster drying process, however, regular school glue works just fine.
- Once dry, tie a string around the top of one of the segments to create a hanging loop.
- If you’d like to add more detail to your star, paint and cut additional 2 cm segments, fold them in half, and glue them inside of the basic star shape to add detail.

One Comment
Comments are closed.