How to Build a 3D Solar System Model with Kids
Looking for a step-by-step guide to building a 3D solar system model that is perfect for young learners to create? Read on to learn how my daughter and I made a rotating solar system model with simple materials we already had in our house!
This post contains affiliate links.
Building a 3D Solar System Model with My 5th Grader
When my daughter came home from school with the news that she needed to build a solar system model for science class, she read aloud the list of requirements that her model needed to meet. Here are the requirements for her model:
- The sun and 8 planets in the solar system must be created in approximate size to one another.
- The sun and 8 planets must be arranged in the correct order from the sun.
- The planets should display unique features, such as rings or spots.
- The asteroid belt that exists between Mars and Jupiter must be present in the model.
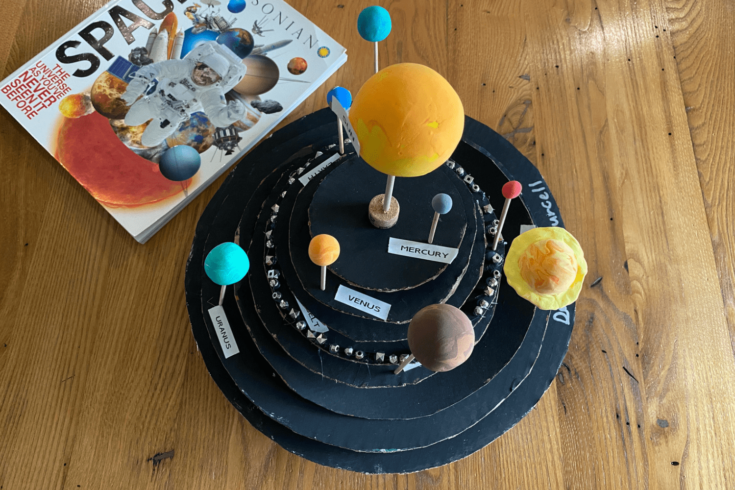
- The sun, planets, and asteroid belt must be clearly labeled.
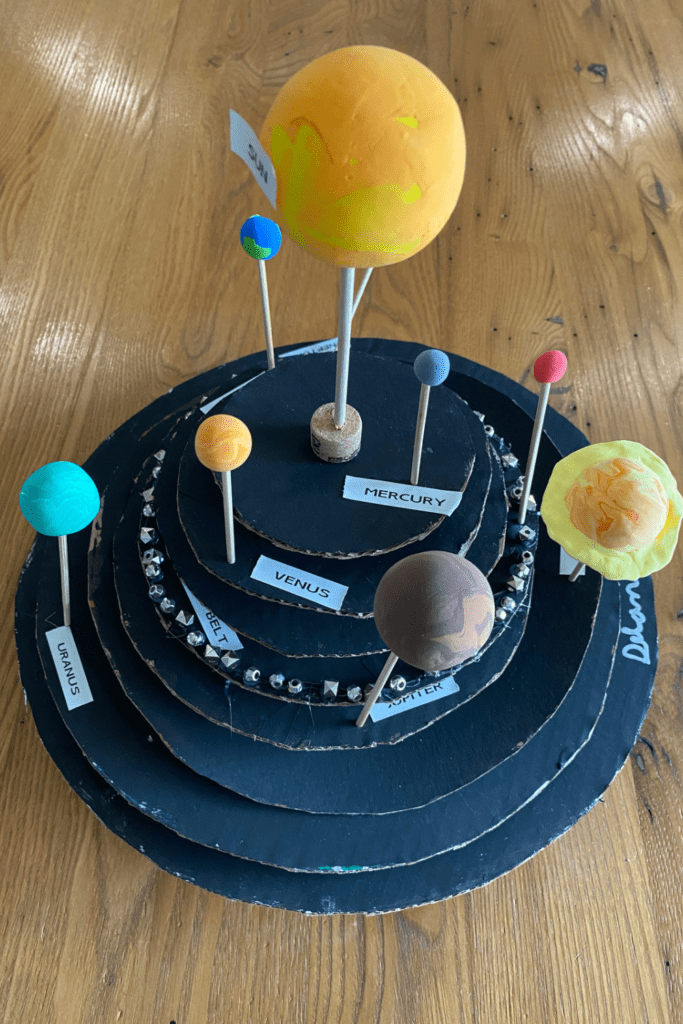
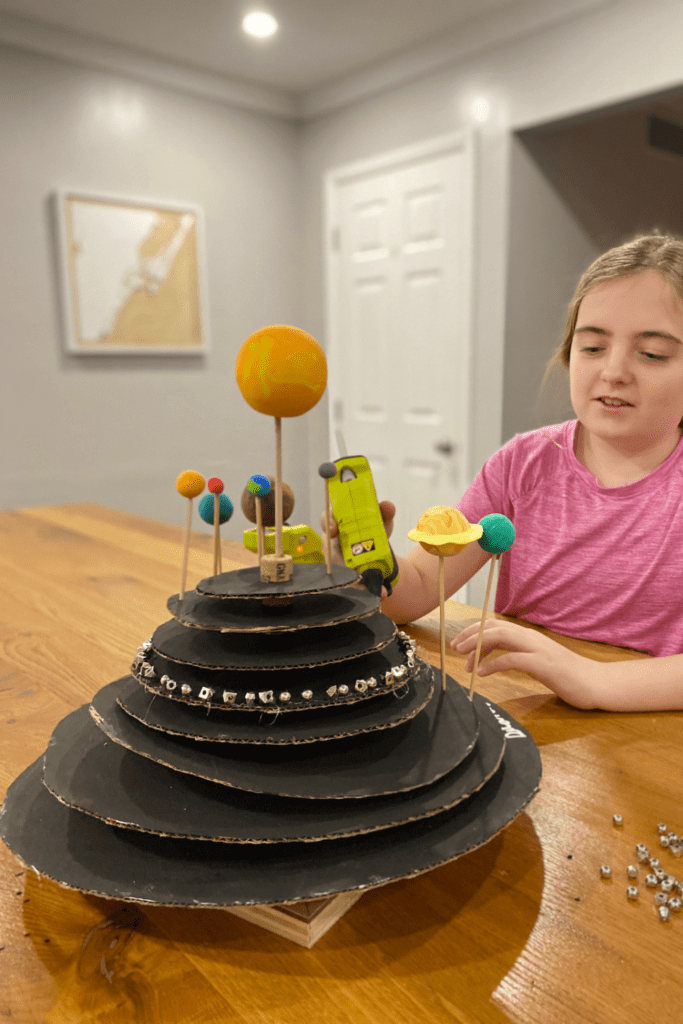
After doing a little research, she chose to step up her design game and make the model move, simulating the rotation of each planet around the sun. In actuality, planets rotate in elliptical orbits around the sun, however for simplicity, she chose to make circular orbits. Once she had her design idea in place, we began rummaging through the house to find the materials she would to bring her 3D solar system model to life.
Science Facts Necessary for Our Solar System Model
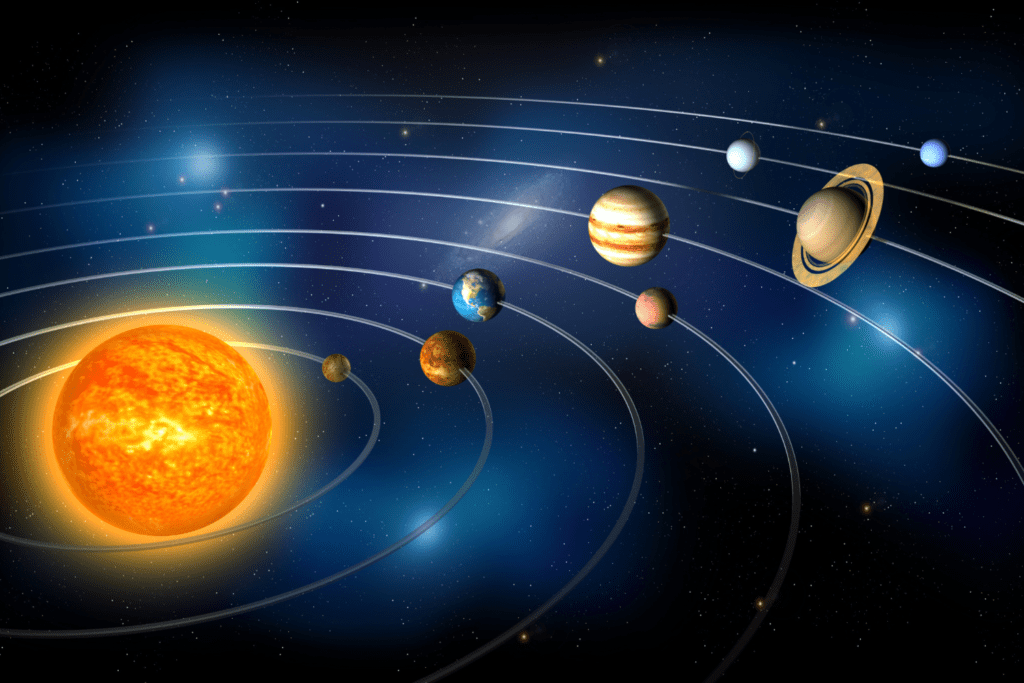
Starting from the closest planet to the Sun and moving outwards, the order and names of the planets in our solar system are:
- Mercury
- Venus
- Earth
- Mars
- Jupiter
- Saturn
- Uranus
- Neptune
Since we had to create the planets in approximate size to one another, here are the planets in our solar system arranged from smallest to large:
- Mercury
- Mars
- Venus
- Earth
- Neptune
- Uranus
- Saturn
- Jupiter
It’s important to note that size can be measured in different ways, such as by diameter, mass, or volume. In this list, the planets are arranged by diameter, which is the distance across the planet at its widest point.

Unique Features of Each Planet in Our Solar System
My daughter needed to include some unique identifying features of the planets in our solar system. Here are a few that we could include:
- Mercury – Has a heavily cratered surface, has the shortest year of any planet (88 Earth days), and has a very thin atmosphere.
- Venus – Has a thick atmosphere made mainly of carbon dioxide, causing a runaway greenhouse effect and making its surface temperature hot enough to melt lead. Also rotates in the opposite direction to most planets (retrograde rotation).
- Earth – Has a breathable atmosphere, abundant liquid water on its surface, and a magnetic field that protects it from the solar wind.
- Mars – Has the largest volcano in the solar system (Olympus Mons), a deep canyon (Valles Marineris), and evidence of liquid water in the past.
- Jupiter – Is the largest planet in the solar system, has a very strong magnetic field, has more than 75 known moons, and has a prominent atmospheric feature called the Great Red Spot.
- Saturn – Has the most extensive ring system in the solar system, has a moon (Titan) with a thick atmosphere and lakes of liquid methane and has a hexagonal-shaped jet stream at its north pole.
- Uranus – Rotates on its side, has a unique tilted magnetic field, and has a system of 13 faint rings.
- Neptune – Has the strongest winds in the solar system (reaching speeds of over 1,200 miles per hour), has a moon (Triton) that orbits in the opposite direction to Neptune’s rotation, and has dark, frozen methane clouds in its atmosphere.
These are just a few examples of the unique features of each planet. Each planet has its own set of characteristics that make it distinct from the others. My daughter chose to include Saturn’s rings and Jupiter’s Great Red Spot on her model.
Materials to Make a 3D Solar System Model
Here is a list of tools and materials we used to make my daughter’s solar system model.
- Enough cardboard to cut out 8 circles; the smallest circle will be 4 inches in diameter and each consecutive circle will be 1 inch in diameter larger than the last.
- ¼ inch thick wooden dowel rod, approximately 12” long
- A square piece of wood, approximately 5 inches wide
- 9 wooden skewers
- Silver beads
- Black paint or black crayons
- Paint brush (if using paint)
- Multi-colored air dry clay
- Mixing bowls (used for tracing circles)*
- Pencil
- Drill
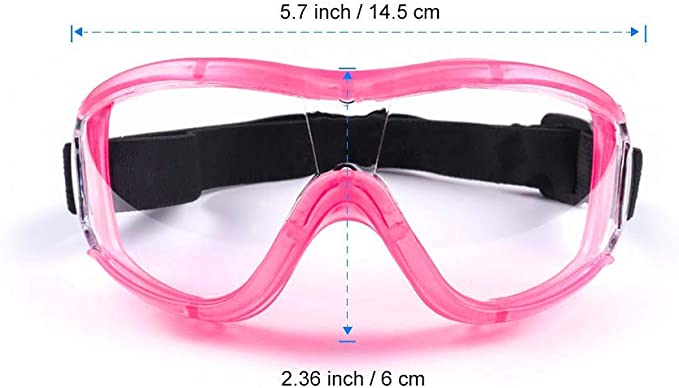
- Safety goggles
- Wood glue or hot glue
- White glue
- Box cutter
- Cutting board
*Alternatively, you can use a protractor to draw circles
You’ll notice that in the pictures we used wine corks as spacers between each cardboard circle. In retrospect, it would have been much easier to use air-dry clay in place of the wine corks, which is why I have eliminated the corks from the materials list.
Free Ways to Find the Materials You Need to Build a 3D Solar System Model
If you don’t have some of the materials to make the 3D solar system model, consider a few of the following sustainable alternatives to purchasing the necessary supplies.
Chat with Your Local Store Manager
Cardboard is a major part of this solar system build and local grocery stores usually have an abundance of boxes. Request to speak with the manager about securing a few cardboard boxes for a science project and more than likely they’ll set aside more cardboard than you’ll need!
Ask Your Friends, Family, and Neighbors
Did your grandmother ever tell you a story about how she went to the neighbor’s house to borrow a cup of sugar? As the pace of our modern lives has increased, we have forgotten or have never known what it’s like to walk across the street to ask to borrow something. Capitalize on the kindness of your neighbors, family members, and friends, and revitalize the simple act of borrowing!
Shop Your Local Buy Nothing Group or Facebook Marketplace
If you’re missing some materials to make the solar system model, consider putting a request on your local Buy Nothing Group or Facebook Marketplace. You’ll be amazed at how quickly your request is met by others looking to declutter their homes! Another option is to stop into your local secondhand or consignment shop and see what items they have available. I have successfully shopped secondhand for crafting materials more times than I can count.
Check With Your Local Library
Libraries are for borrowing much more than just books! My local library continually hosts children’s activities and crafting sessions. Put a request into your librarian for extra crafting supplies they may have left over from a workshop. My good friend Jen, the editor of Honestly Modern, has written an entire series based on ways you can capitalize on your local libraries’ resources.
Instructions to Build a Rotating, 3D Solar System Model
Once you’ve collected the necessary tools and materials, follow these simple steps to construct your three-dimensional solar system model. Adult supervision is necessary for the completion of this project and all specific tool safety guidelines must be followed.
- Trace 8 circles on flattened cardboard. You will need one of each of the following sizes:
- 4” diameter circle
- 5” diameter circle
- 6” diameter circle
- 7” diameter circle
- 8” diameter circle
- 9” diameter circle
- 10” diameter circle
- 11” diameter circle
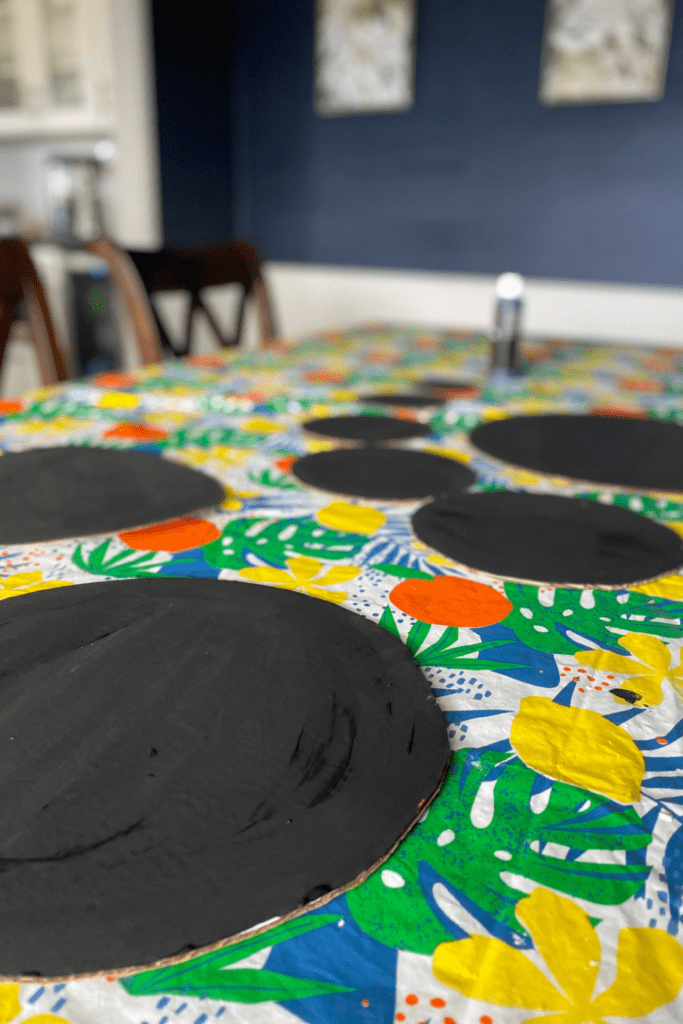
- Using a box cutter and a cutting board, cut out each of the cardboard circles.
- Cut a small hole in the center of each circle, large enough to fit the wooden dowel rod.
- Paint one side of each cardboard circle black.
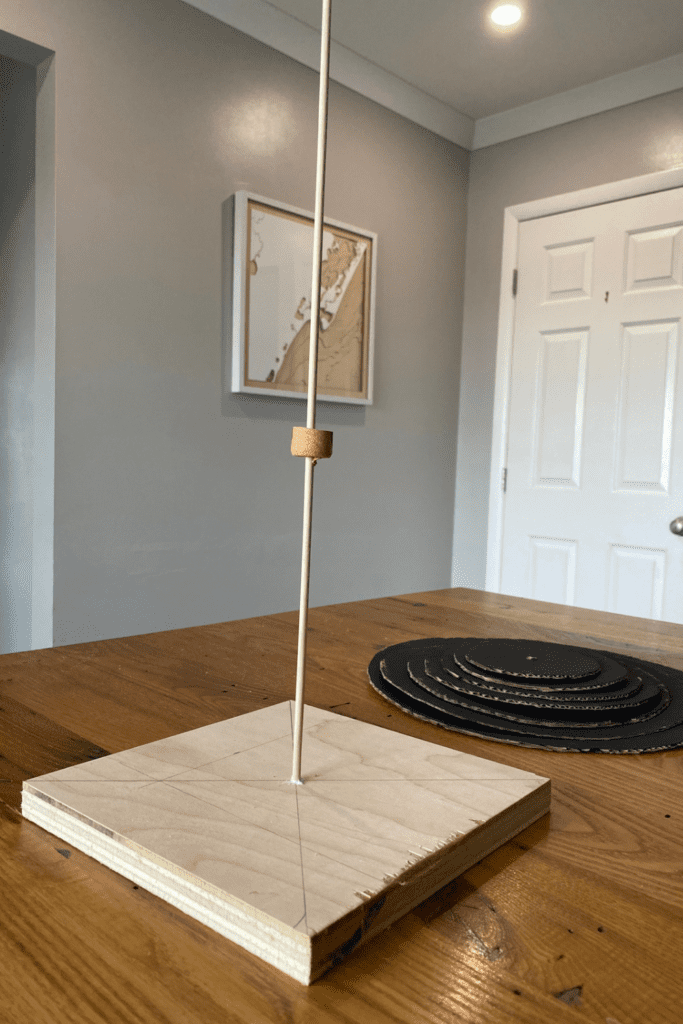
- While the painted circles are drying, put on safety goggles and drill a small indention hole in the square piece of wood. This will serve as the base of your model. Do not drill through the wood. You just need to make an indent for the wooden dowel to fit inside.
- Using wood glue or hot glue, attach the wooden dowel to the indent on the square wooden base. Hold the dowel rod in place until the glue dries.
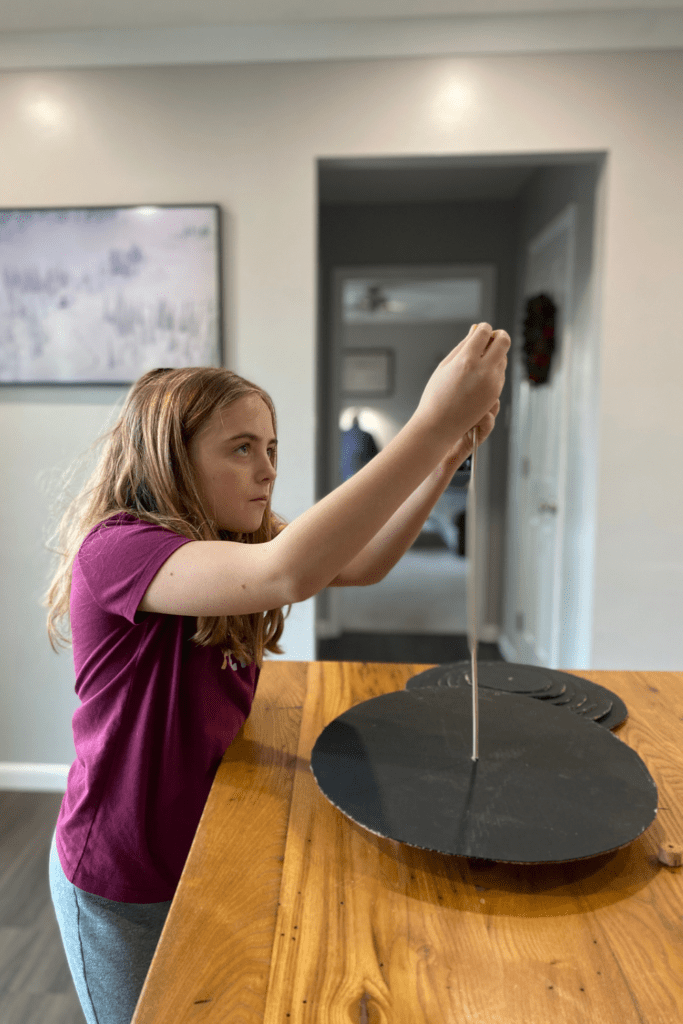
- When the cardboard circles have dried, slide the 11” diameter circle down the wooden dowel rod and let it come to rest on the square base, with the black painted side facing up.
- Place a small ball of air dry clay around the dowel rod just above the cardboard circle. This will act as a spacer between the circles.
- Slide the 10” diameter circle down the wooden dowel and let it come to rest on the clay spacer.
- Repeat steps 8 and 9 until all of the cardboard circles are threaded through the wooden dowel rod.
- The cardboard circles should be able to freely spin around the dowel rod.
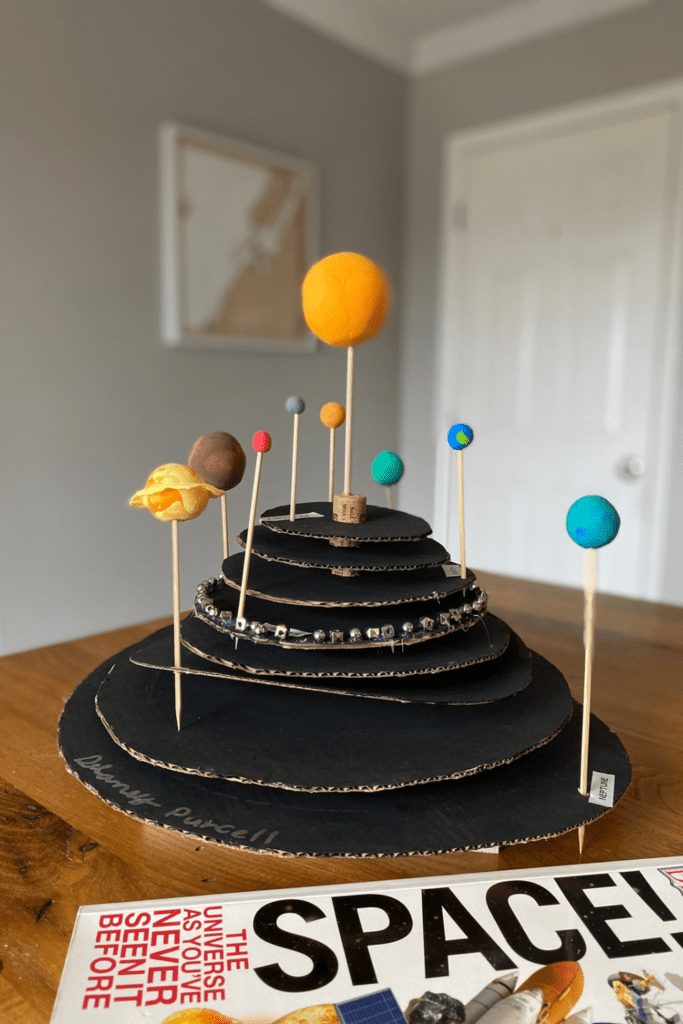
- Next, using more of the air dry clay, make a model of the sun and the 8 planets of the solar system. Be sure to make their sizes relative to each other. Hint – the sun should be larger than all of the planets. Be sure to include identifiable details for each planet, such as Saturn’s rings, Jupiter’s red spot, etc.
- Place the sun on the top of the wooden dowel rod, in the center of your stack of cardboard circles.
- Place each planet on a wooden skewer.
- Beginning with Mercury, poke the wooden skewer through the top of the smallest cardboard circle.
- Moving in order away from the sun, poke each planet’s skewer through the next cardboard circle until each circle has a planet attached to it.
- To create the asteroid belt, glue silver beads on the edge of the circle that holds Mars, as the asteroid belt exists between Mars and Jupiter.
Once your 3-D solar system model has been assembled, each ring should be able to freely rotate around the wooden dowel rod, creating the illusion of planets orbiting the sun.
How to Sustainably Dispose of Your 3D Solar System Model
Once you’ve completed your solar system model, it may become a permanent fixture in your home, proudly displayed on a mantel or shelf for years to come. However, when you are no longer in need of your display, here are some simple instructions to sustainably dispose of the materials.
- If the cardboard was painted with water-based paint it can be cut up and composted in your backyard compost bin or tossed into the recycling bin. If acrylic paint or crayons were used to color the cardboard, then it must be tossed into the trash. If you added a beaded asteroid belt to your cardboard, be sure to remove it from the board before tossing it into the compost or recycling bin.
- Remove the air-dried clay pieces from the wooden dowel rod and wooden skewers and toss them in the trash. The wooden dowel and skewers can be reused for another project, or simply broken into pieces and tossed into a compost bin.
- The wooden base can be saved and reused for another project.
I like to keep a bin of reusable craft supplies within arms reach of my children so that they can easily access supplies and find new ways to create with old things. Placing the wooden base, skewers, and wooden dowel rod into the bin reminds my kids to consider how to reuse materials rather than immediately disposing of them.
How to Build a 3D Solar System Model with Kids
Looking for a step-by-step guide to building a 3D solar system model that is perfect for young learners to create? Read on to learn how my daughter and I made a rotating solar system model with simple materials we already had in our house!
Materials
- Enough cardboard to cut out 8 circles; the smallest circle will be 4 inches in diameter and each consecutive circle will be 1 inch in diameter larger than the last.
- ¼ inch wooden dowel rod, approximately 18” long
- A square piece of wood, approximately 5 inches wide
- 9 wooden skewers
- Silver beads
- Black paint or black crayons
- Paint brush (if using paint)
- Multi-colored air dry clay
- Mixing bowls (used for tracing circles)*
- Pencil
- Drill
- Safety goggles
- Wood glue or hot glue
- White glue
- Box cutter
- Cutting board
Instructions
- Trace 8 circles on flattened cardboard. You will need one of each of the following sizes: 4” diameter circle, 5” diameter circle, 6” diameter circle, 7” diameter circle, 8” diameter circle, 9” diameter circle, 10” diameter circle, 11” diameter circle
- Using a box cutter and a cutting board, cut out each of the cardboard circles.
- Cut a small hole in the center of each circle, large enough to fit the wooden dowel rod.
- Paint one side of each cardboard circle black.
- While the painted circles are drying, put on safety goggles and drill a small indention hole in the square piece of wood. This will serve as the base of your model. Do not drill through the wood. You just need to make an indent for the wooden dowel to fit inside.
- Using wood glue or hot glue, attach the wooden dowel to the indent on the square wooden base. Hold the dowel rod in place until the glue dries.
- When the cardboard circles have dried, slide the 11” diameter circle down the wooden dowel rod and let it come to rest on the square base, with the black painted side facing up.
- Place a small ball of air dry clay around the dowel rod just above the cardboard circle. This will act as a spacer between the circles.
- Slide the 10” diameter circle down the wooden dowel and let it come to rest on the clay spacer.
- Repeat steps 8 and 9 until all of the cardboard circles are threaded through the wooden dowel rod.
- The cardboard circles should be able to freely spin around the dowel rod.
- Next, using more of the air dry clay, make a model of the sun and the 8 planets of the solar system. Be sure to make their sizes relative to each other. Hint - the sun should be larger than all of the planets. Be sure to include identifiable details for each planet, such as Saturn’s rings, Jupiter’s red spot, etc.
- Place the sun on the top of the wooden dowel rod, in the center of your stack of cardboard circles.
- Place each planet on a wooden skewer.
- Beginning with Mercury, poke the wooden skewer through the top of the smallest cardboard circle.
- Moving in order away from the sun, poke each planet’s skewer through the next cardboard circle until each circle has a planet attached to it.
- To create the asteroid belt, glue silver beads on the edge of the circle that holds Mars, as the asteroid belt exists between Mars and Jupiter.
Notes
You’ll notice that in the pictures we used wine corks as spacers between each cardboard circle. In retrospect, it would have been much easier to use air-dry clay in place of the wine corks, which is why I have eliminated the corks from the materials list.
Once your 3-D solar system model has been assembled, each ring should be able to freely rotate around the wooden dowel rod, creating the illusion of planets orbiting the sun.
Recommended Products
As an Amazon Associate and member of other affiliate programs, I earn from qualifying purchases.