
How to Make Ice Cream in a Bag Using Science
You’ve probably eaten ice cream. But have you ever made your own from scratch? Furthermore, have you ever made your own ice cream and counted it as a science lesson? Read on to learn the simple chemistry behind creating your favorite cold, creamy treat!
When I was a high school Chemistry teacher, one of my students’ favorite science activities was when we celebrated the end of our solutions unit by making ice cream. I’d bring to class the three simple ingredients we’d need to make our ice cream, along with a bag full of toppings and spoons, and I’d spend each teaching period transforming my classroom into an ice cream parlor.
To accommodate all dietary restrictions, I’d also bring alternative half-and-half options like soy milk and almond milk for students to utilize. Eating the final product was not a requirement of the science activity; it was just an option that many students chose!
You may be wondering, “Sounds fun, but HOW is this teaching students about Chemistry?”
I thought you might ask! The science of making your own ice cream is quite simple and relies on the freezing point depression that occurs when salt and water are mixed.

The Science Behind Making Ice Cream
When making your own ice cream, the science used to transform the liquid ingredients into a soft, solid treat relies on two simple substances: water and salt.
At this point, you may be thinking, “Salt and water? I don’t want to eat salty, watery ice cream!” Don’t worry, this salty mixture is not combined with the ingredients for your ice cream; instead, it is used to chill your dessert, much like a freezer is used to preserve your food.
Here’s the science of how this works.
Water is a molecule that is made up of two elements: hydrogen and oxygen. Water, also written as H2O, freezes at 0℃ or 32℉. However, when a compound like sodium chloride, NaCl, what we commonly refer to as salt, is dissolved in water, something interesting happens. The salt compound breaks apart into sodium and chlorine ions and prevents the water molecules from bonding together at their normal freezing point of 0℃ or 32℉. The addition of salt actually lowers the freezing point of water!
When this occurs, we can’t actually see the sodium and chlorine ions at work, as they are way too small for our eyes to observe. What we do notice is that, when salt is applied to ice, the ice begins to melt. This is because the composition of water is no longer plain H2O; it now has sodium and chlorine ions floating around in it, causing the freezing point to decrease.
Demonstrate how this principle works to your learners by conducting this simple science experiment prior to making your ice cream.
Materials Needed to Make Ice Cream
Here is a simple list of ingredients and supplies needed to make vanilla ice cream.
Ingredients:
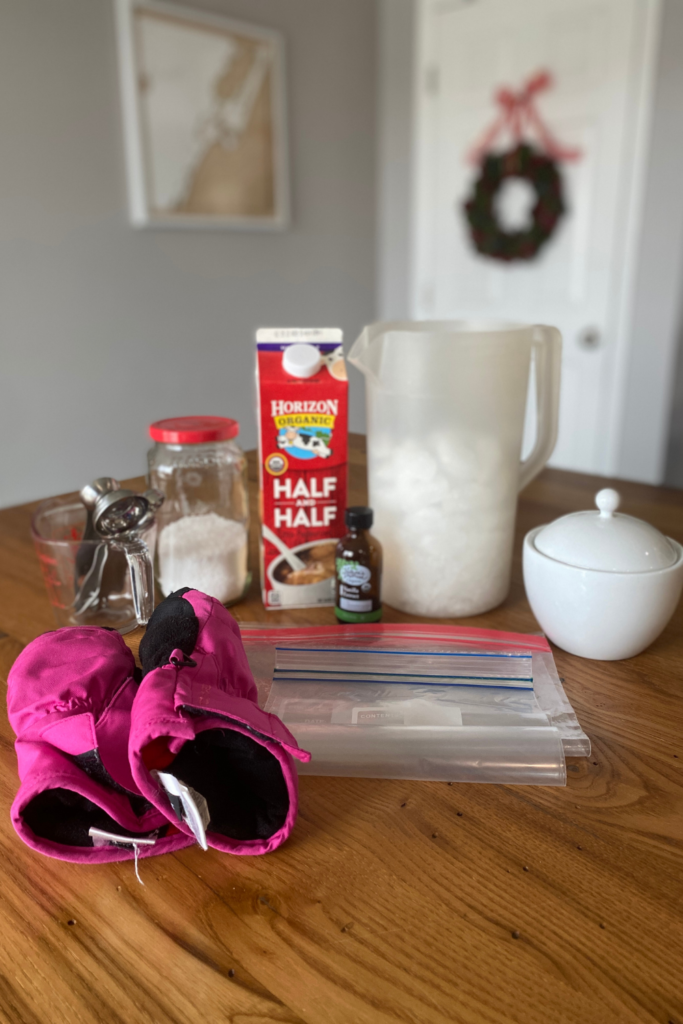
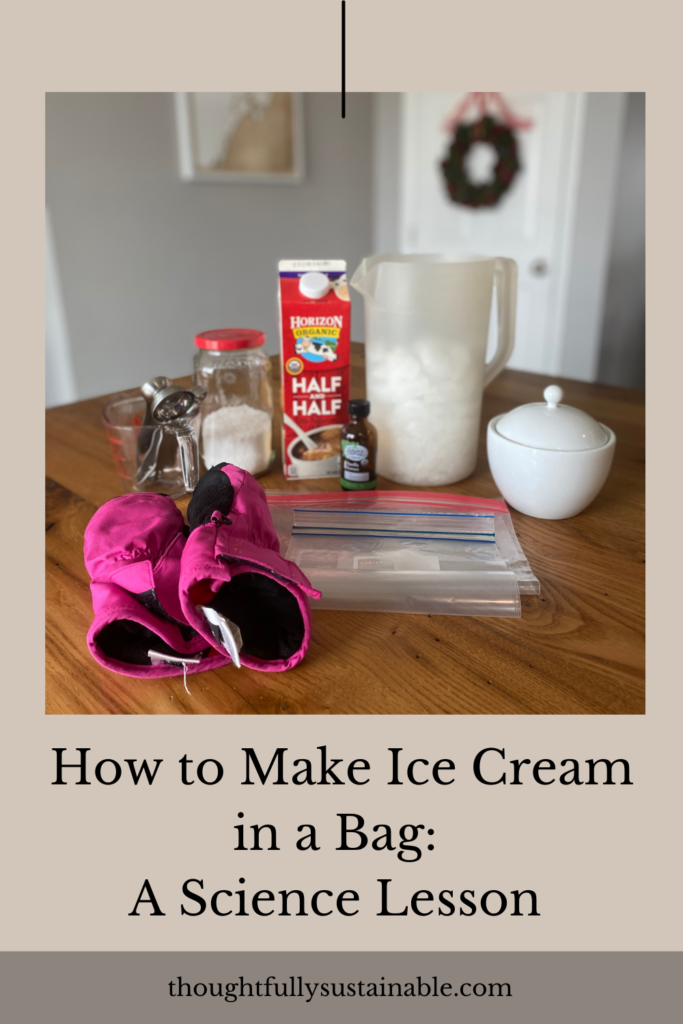
- 1 cup of half-and-half or whole milk
- 2 tablespoons of sugar
- 1 teaspoon of vanilla extract
- 3 cups of ice
- ¼ cup kosher (coarse) salt
Supplies:
- 1 small sealable plastic bag
- 1 large sealable plastic bag
- Gloves or baking mittens
Using half-and-half creates a creamier ice cream, however, if you don’t have any on hand, whole milk will work just fine. I am a huge proponent of using what you have, so no need to make an extra trip to the store if you don’t have half-and-half. That being said, the coarse salt that I used was actually leftover salt that came with a frozen soft pretzel package. Like I said – use what you have on hand!
Be sure to take into consideration any dietary restrictions of your learners. Consider using soy milk and almond milk for students to substitute for the half-and-half. This can also make for an excellent comparison experiment to see which milk option freezes first!
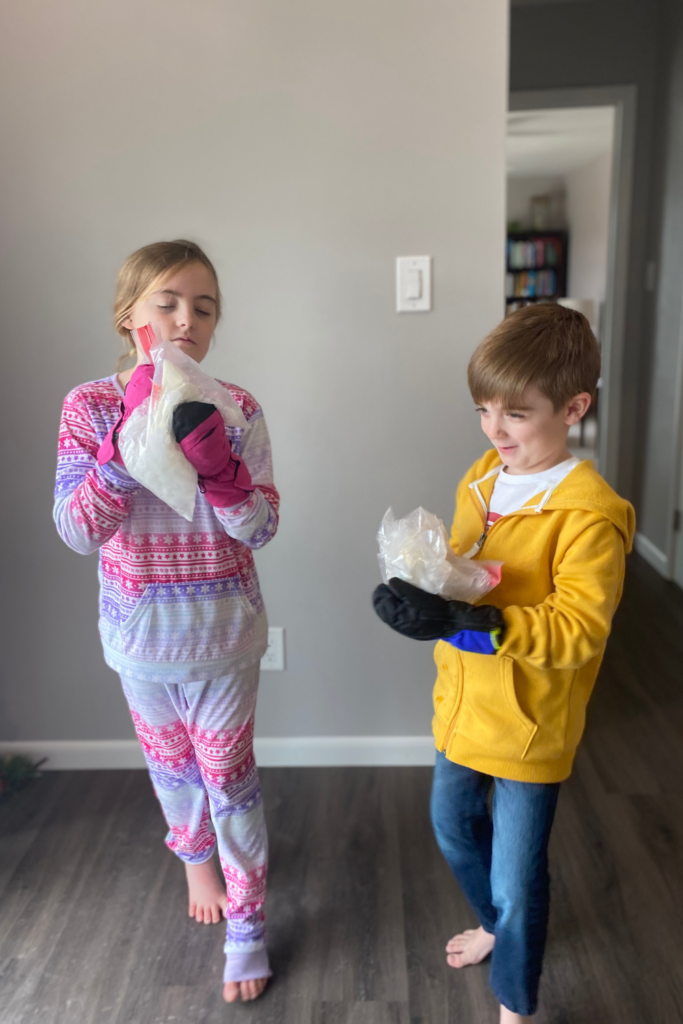
I included gloves or baking mittens in the supply list, as the salted ice gets quite cold due to the lowered freezing point of the water. I suggest wearing gloves while you are shaking up your dessert to avoid frozen fingers.

Instructions to Make Ice Cream
Utilizing the power of chemistry, transform the ingredients listed into a creamy afternoon treat by following these instructions:
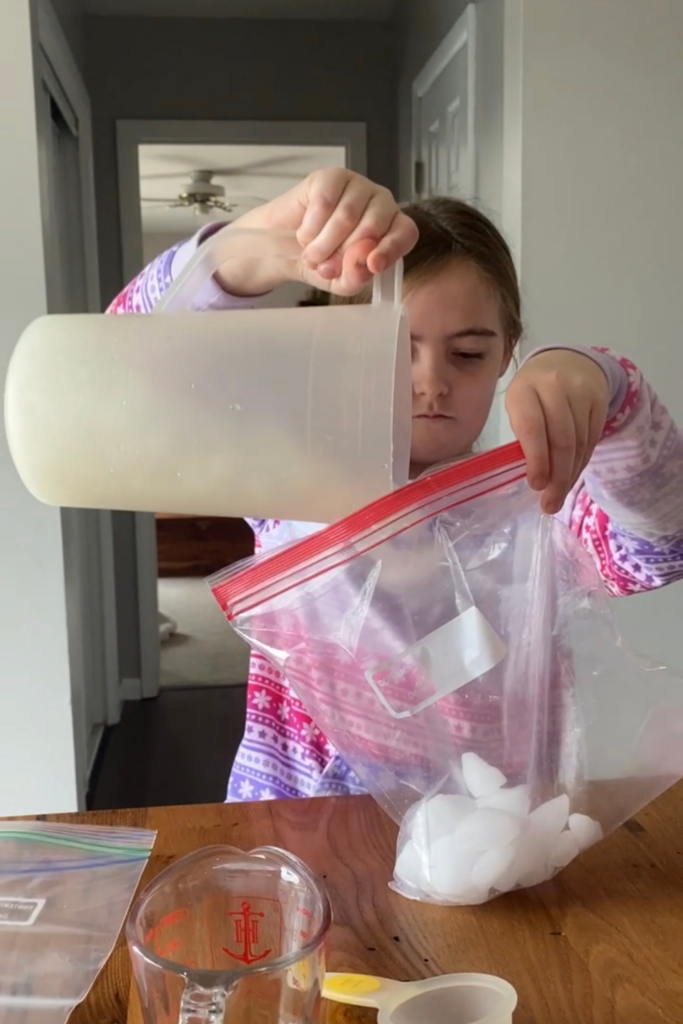
- Into the large plastic bag, add 3 cups of ice and ¼ cup of salt.
- Seal the bag containing the salt and ice and set it aside.
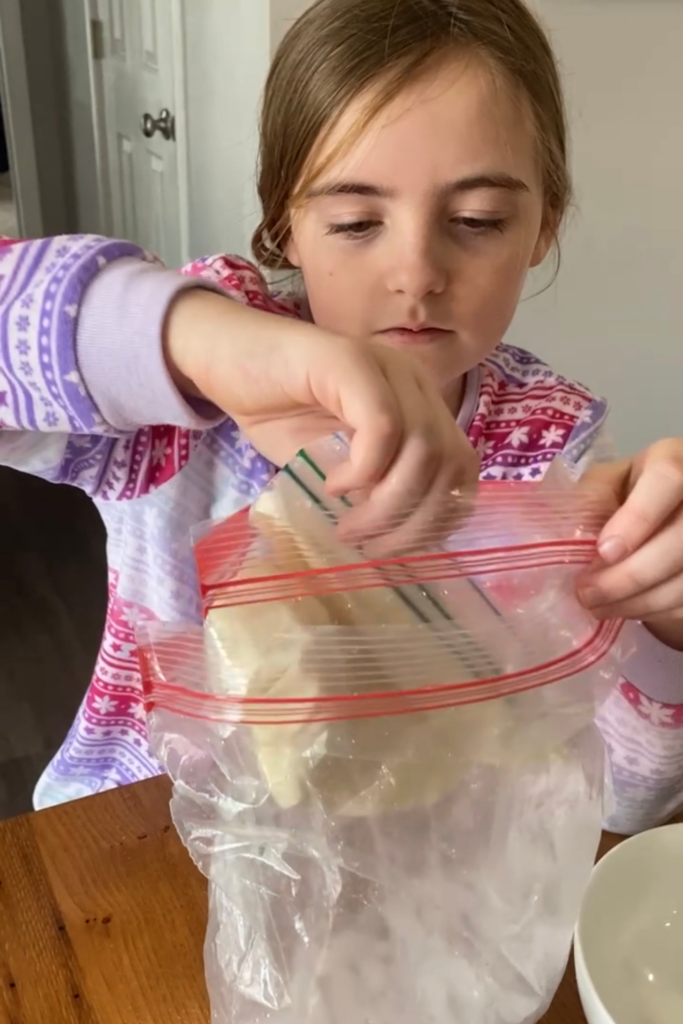
- Into the small plastic bag, add the half-and-half, sugar, and vanilla extract.
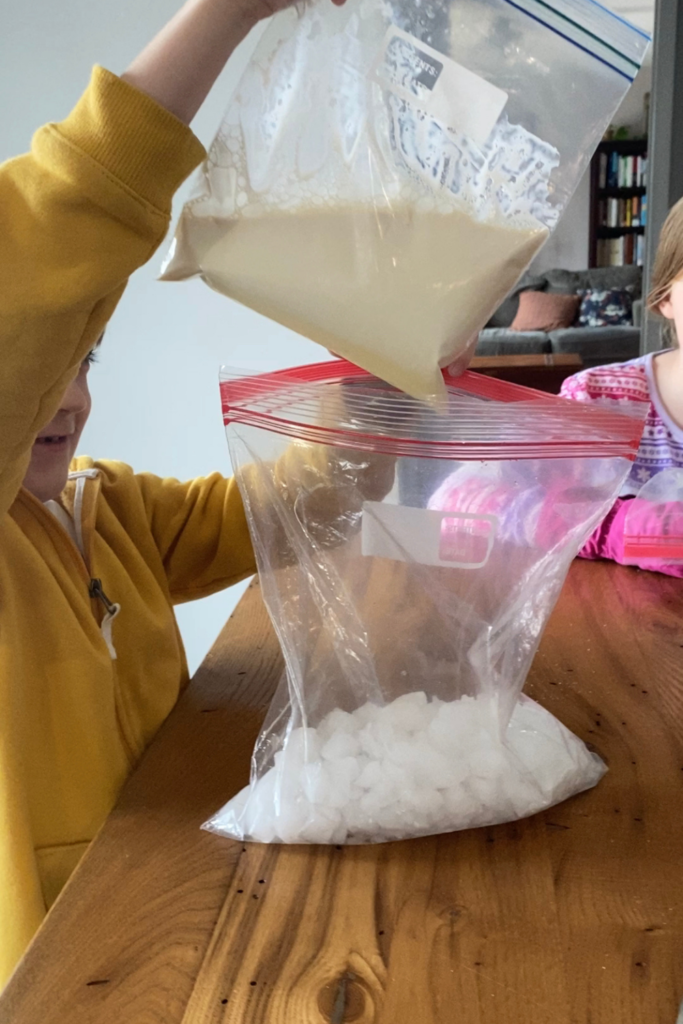
- Seal the small bag and place it inside the large plastic bag containing the salt and ice.
- Reseal the large plastic bag
- Put on a pair of gloves and shake the bags for five to six minutes, or until the ingredients in the small bag solidify.
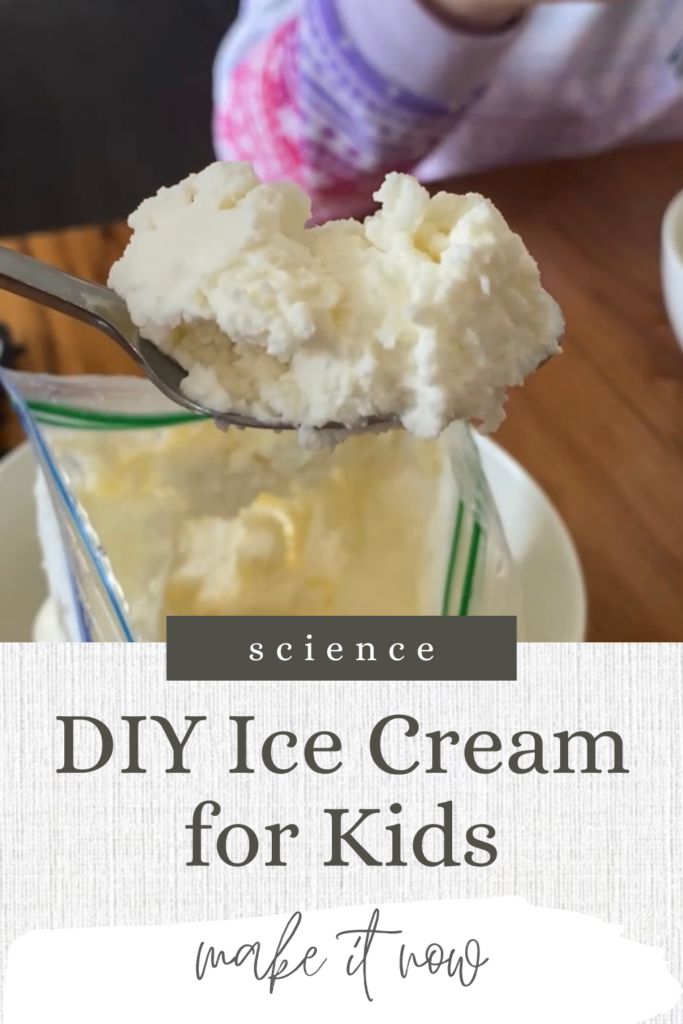
- Once the ingredients have been solidified, gently open the large bag and remove the small bag.
- Open the small bag, grab a spoon and your favorite ice cream toppings and eat!
If you are a classroom teacher or a homeschooling parent, the time it takes to shake the ice cream can count as a mini-physical education class. Turn on some music and encourage your learners to shake to the beat to keep them actively engaged in the transformation process. All that shaking can really get the body moving!
Conducting simple science activities like this one allows students to see that science is everywhere and doesn’t always require fancy equipment. Additionally, practicing the skills of following directions and making accurate measurements will enhance their ability to problem solve and think critically.
If you try making your own ice cream, please let me know by tagging me @thoughtfullysustainable on Instagram or Facebook, or by leaving a comment below! If you have any questions, feel free to email me!
How to Make Ice Cream in a Bag Using Science

You’ve probably eaten ice cream. But have you ever made your own from scratch? Furthermore, have you ever made your own ice cream and counted it as a science lesson? Read on to learn the simple chemistry behind creating your favorite cold, creamy treat!
Ingredients
- 1 cup of half-and-half or whole milk
- 2 tablespoons of sugar
- 1 teaspoon of vanilla extract
- 3 cups of ice
- ¼ cup kosher (coarse) salt
- 1 small sealable plastic bag
- 1 large sealable plastic bag
- Gloves or baking mittens
Instructions
1. Into the large plastic bag, add 3 cups of ice and ¼ cup of salt.
2. Seal the bag containing the salt and ice and set it aside.
Into the small plastic bag, add the half-and-half, sugar, and vanilla extract.
3. Seal the small bag and place it inside the large plastic bag containing the salt and ice.
4. Reseal the large plastic bag
5. Put on a pair of gloves and shake the bags for five to six minutes, or until the ingredients in the small bag solidify.
6. Once the ingredients have been solidified, gently open the large bag and remove the small bag.
7. Open the small bag, grab a spoon and your favorite ice cream toppings and eat!
Notes
Using half-and-half creates a creamier ice cream, however, if you don’t have any on hand, whole milk will work just fine. I am a huge proponent of using what you have, so no need to make an extra trip to the store if you don’t have half-and-half. That being said, the coarse salt that I used was actually leftover salt that came with a frozen soft pretzel package. Like I said - use what you have on hand!
Be sure to take into consideration any dietary restrictions of your learners. Consider using soy milk and almond milk for students to substitute for the half-and-half. This can also make for an excellent comparison experiment to see which milk option freezes first!
I included gloves or baking mittens in the supply list, as the salted ice gets quite cold due to the lowered freezing point of the water. I suggest wearing gloves while you are shaking up your dessert to avoid frozen fingers.


One Comment
Comments are closed.