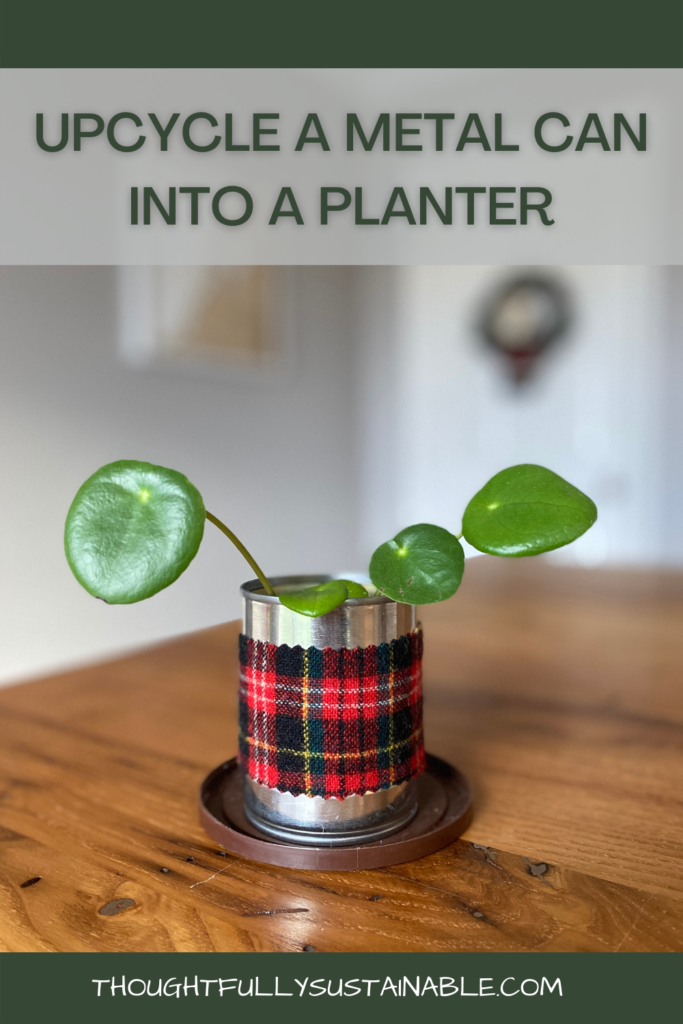
How to Transform a Metal Can into a Planter
In need of an indoor plant pot? Save yourself a trip to the store and transform a metal can into the perfect planter for your greenery!
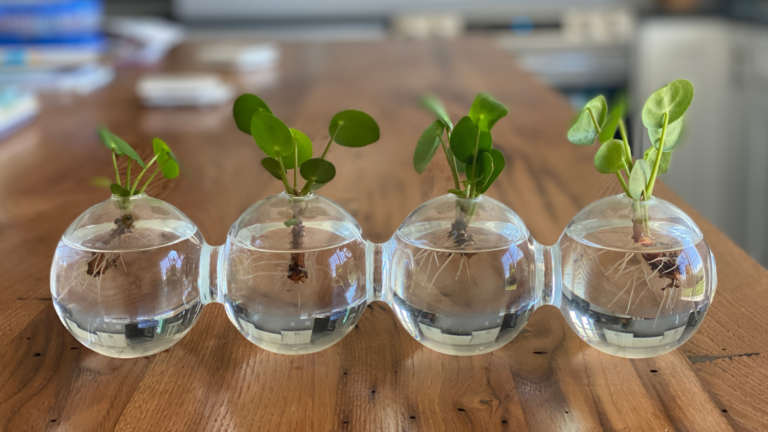
Our home is full of low-maintenance plants, many of which grow faster than I can keep up with. Recently, I’ve shown my kids how we can propagate new plants by taking cuttings of our existing plants, which has proven to be quite a fun science lesson for them. This has left us with quite an excess of indoor greenery, which requires many more planters.
Instead of purchasing planters for our newly propagated plants, we’ve taken to upcycling metal cans into plant pots. Not only does this divert waste from our recycling bin, but it also demonstrates to my kids that materials have value and, with a bit of creativity (and a few household supplies) can be transformed into something useful. In addition, these planters can make lovely gifts when filled with herbs, flowers, or houseplants. Read on to learn how to transform a simple metal can into your very own plant pot!
Materials Needed to Make a Metal Can Planter
Here is a list of the simple household items you’ll need to create your upcycled metal can planter.
- A clean, dry, small metal can with a smooth edge on the opened end
- Hammer
- Nail
- Safety goggles
- Potting soil
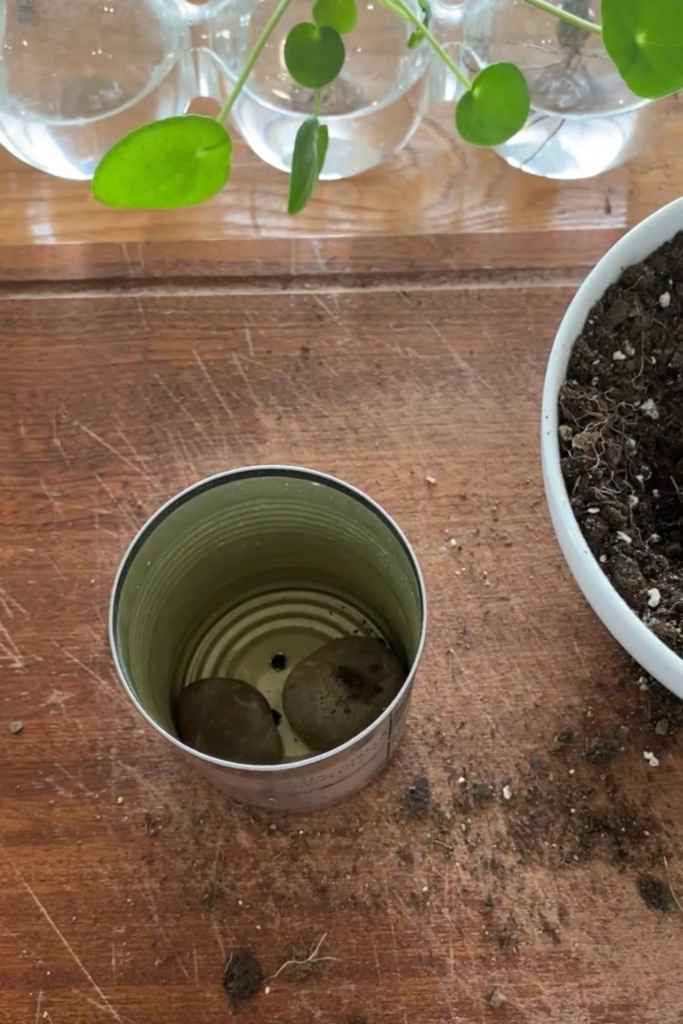
- Small rocks or pebbles
- A plastic, circular lid that is larger in diameter than the metal can
- Small plant
- Water
- Ribbon, twine, burlap, etc.
- Pliers (optional)
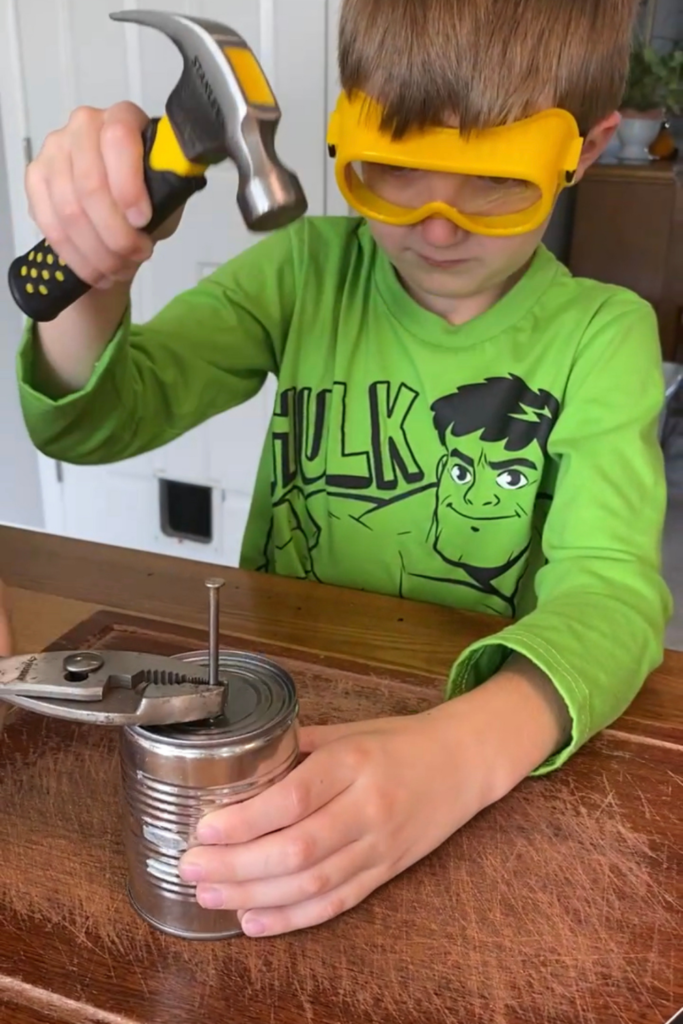
Note that I have included pliers as an optional item to the materials list. If you are making these planters with kids, I’ve found that it is much easier for my children to hammer holes into the bottom of the can if I hold the nail steady with a pair of pliers. This avoids the risk of them smashing their small fingers when attempting to make contact between the hammer and nail!
The small plants that I’ve recently planted have been trimmed from their adult plant and propagated in water. I love propagating, potting, and gifting Chinese money plants and Pothos plants, as they are easy to regrow and care for. Learn how to propagate your plants here.

How to Upcycle a Metal Can into a Planter
Once you’ve obtained the materials mentioned above, follow these simple steps to create a plant pot from a metal can.
- Put on safety goggles.
- Place your can on a flat surface, closed-end upward.
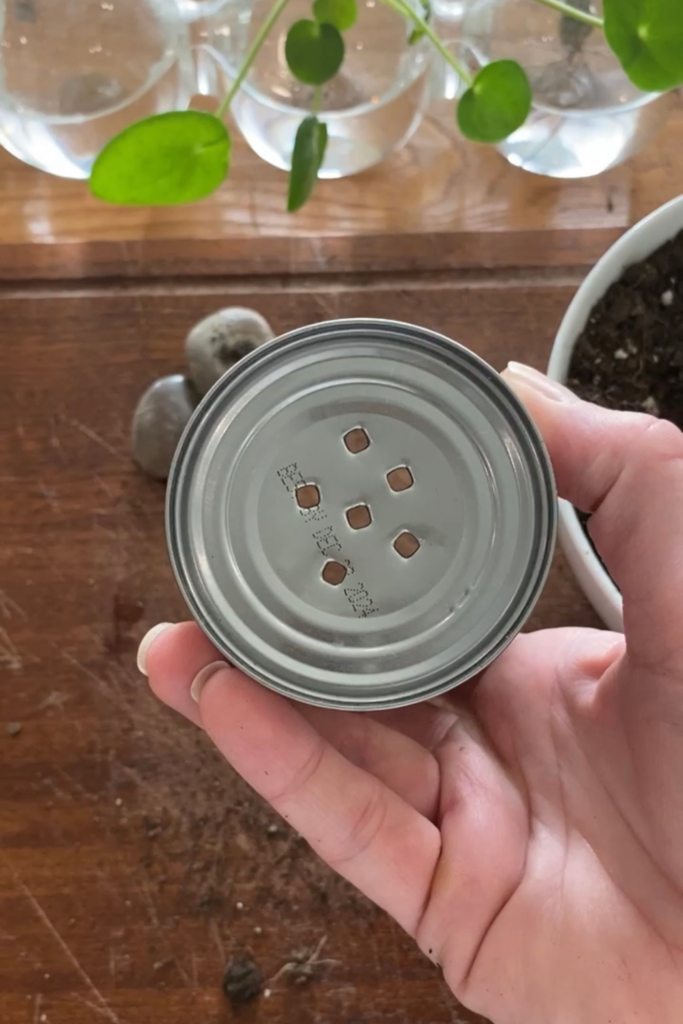
- Using a hammer and nail, create five to six water drainage holes in the bottom of the can.
- Turn the can right side up and add a few small pebbles to the bottom of the can.
- Fill the can ¾ full with potting soil.
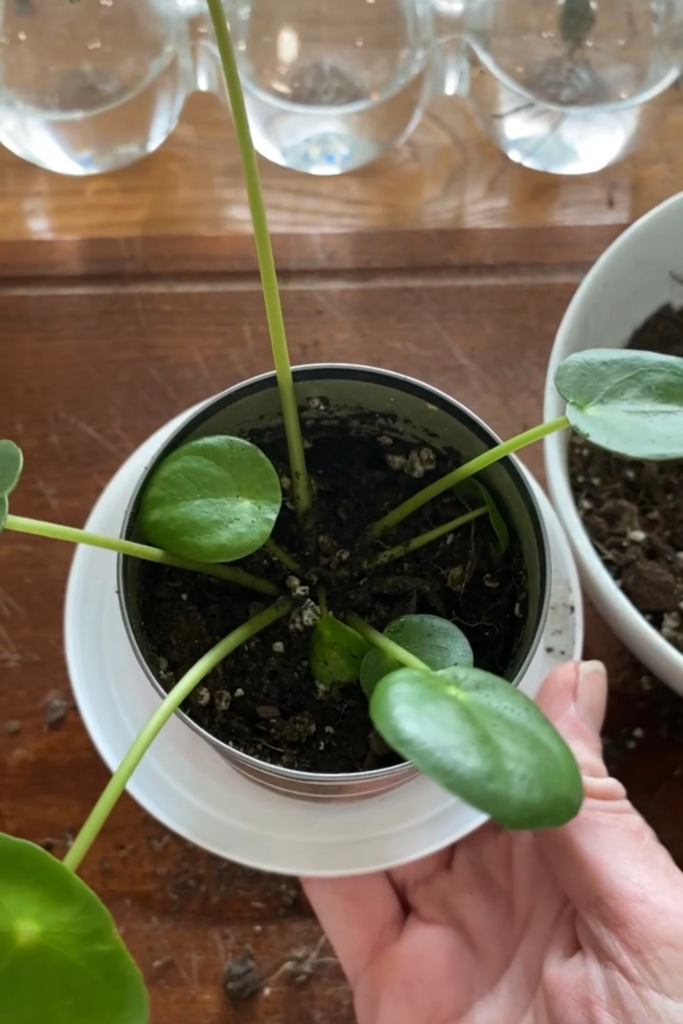
- Place your small plant in the soil, using your hand to gently cover the roots with soil.
- Fill the remaining space in the can with soil, gently pressing down the soil at the surface with your fingers.
- Place a plastic lid upside down beneath the can to serve as a coaster to catch any excess water that flows through the drainage holes.
- Gently water the plant.
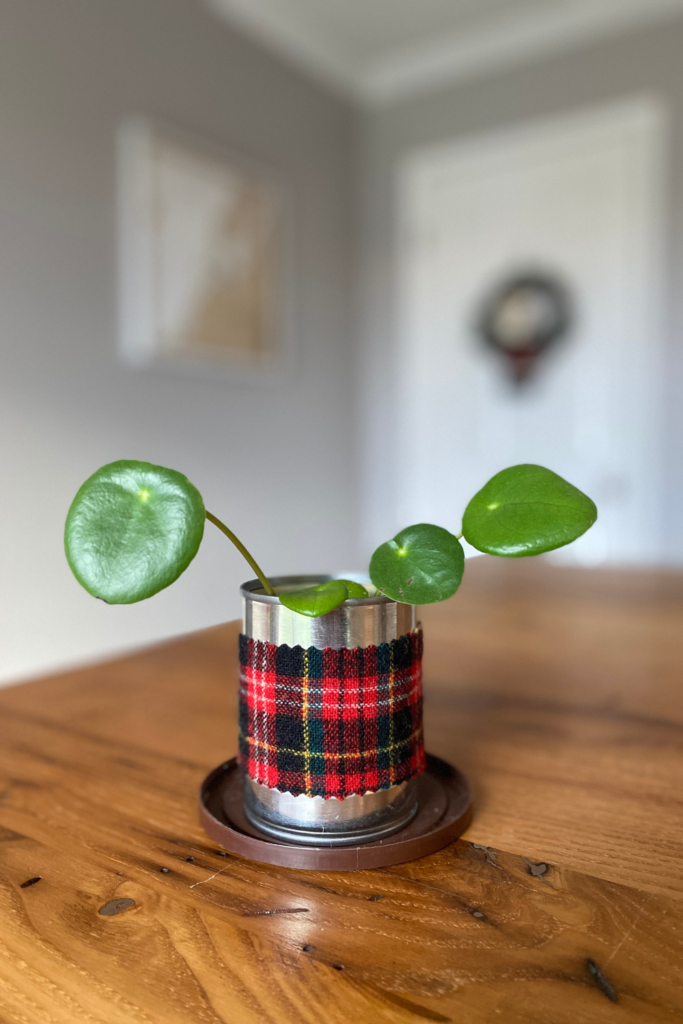
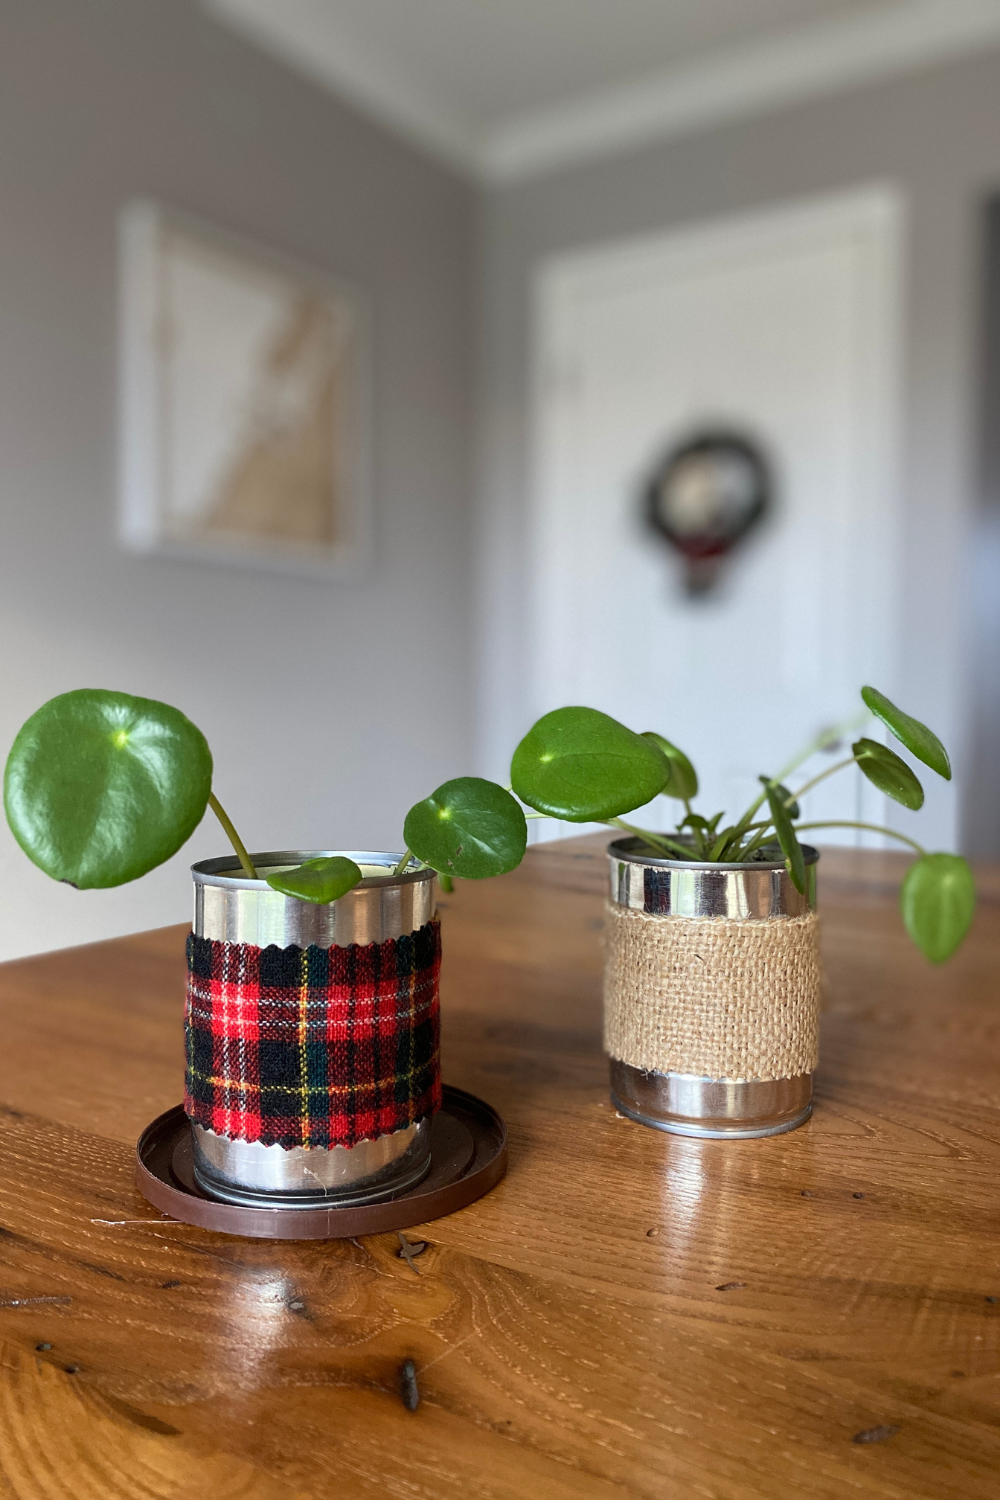
- Add embellishments to decorate the can if desired.
If you choose to gift your plant pot, be sure to include what type of plant your upcycled metal can contains, along with simple care instructions, such as watering frequency and type of sunlight needed (direct, indirect). Write these instructions in permanent marker on a clean, dry popsicle stick and place the stick in the plant pot for the new owner to discover.
I’d love to see what you create! Share your pictures on Instagram or Facebook and tag me @thoughtfullysustainable, or email them to me. And as always, if you have any questions, feel free to leave a comment below!
How to Transform a Metal Can into a Planter
In need of an indoor plant pot? Save yourself a trip to the store and upcycle a metal can into the perfect planter for your greenery!
Materials
- A clean, dry, small metal can with a smooth edge on the opened end
- Hammer
- Nail
- Safety goggles
- Potting soil
- Small rocks or pebbles
- A plastic, circular lid that is larger in diameter than the metal can
- Small plant
- Water
- Ribbon, twine, burlap, etc.
- Pliers (optional)
Instructions
- Put on safety goggles.
- Place your can on a flat surface, closed-end upward.
- Using a hammer and nail, create five to six water drainage holes in the bottom of the can.
- Turn the can right side up and add a few small pebbles to the bottom of the can.
- Fill the can ¾ full with potting soil.
- Place your small plant in the soil, using your hand to gently cover the roots with soil.
- Fill the remaining space in the can with soil, gently pressing down the soil at the surface with your fingers.
- Place a plastic lid upside down beneath the can to serve as a coaster to catch any excess water that flows through the drainage holes.
- Gently water the plant.
- Add embellishments to decorate the can if desired.
Notes
To make this activity easier for a child, I've found it helpful to use a pliers to hold the nail in place while my son and daughter hammered the nail into the base of the can. This avoided any accidentally hammered fingers!