
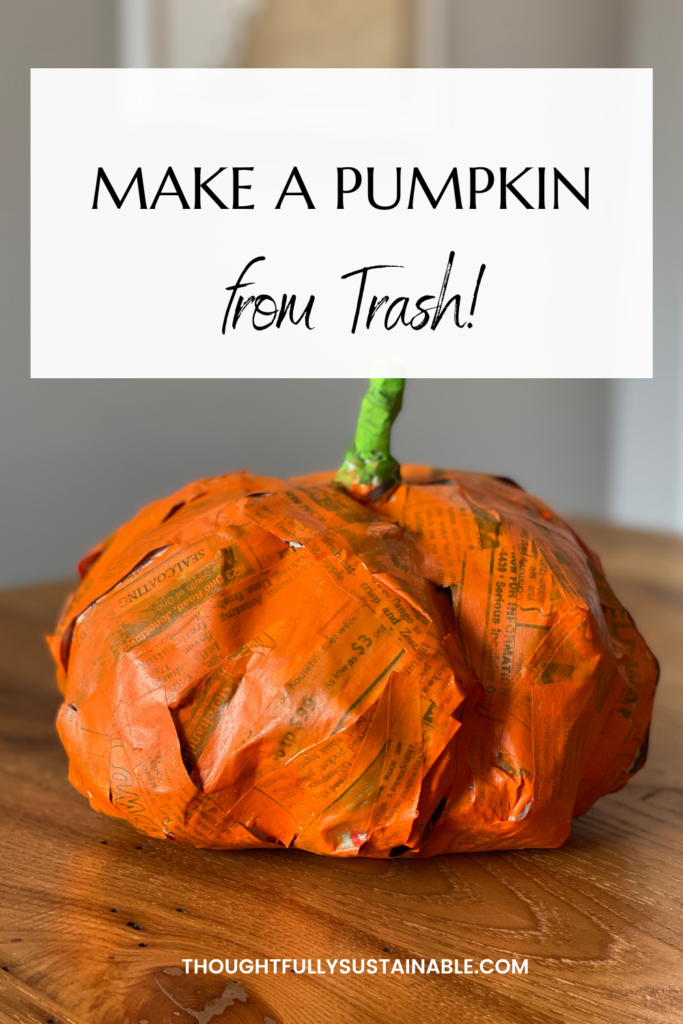
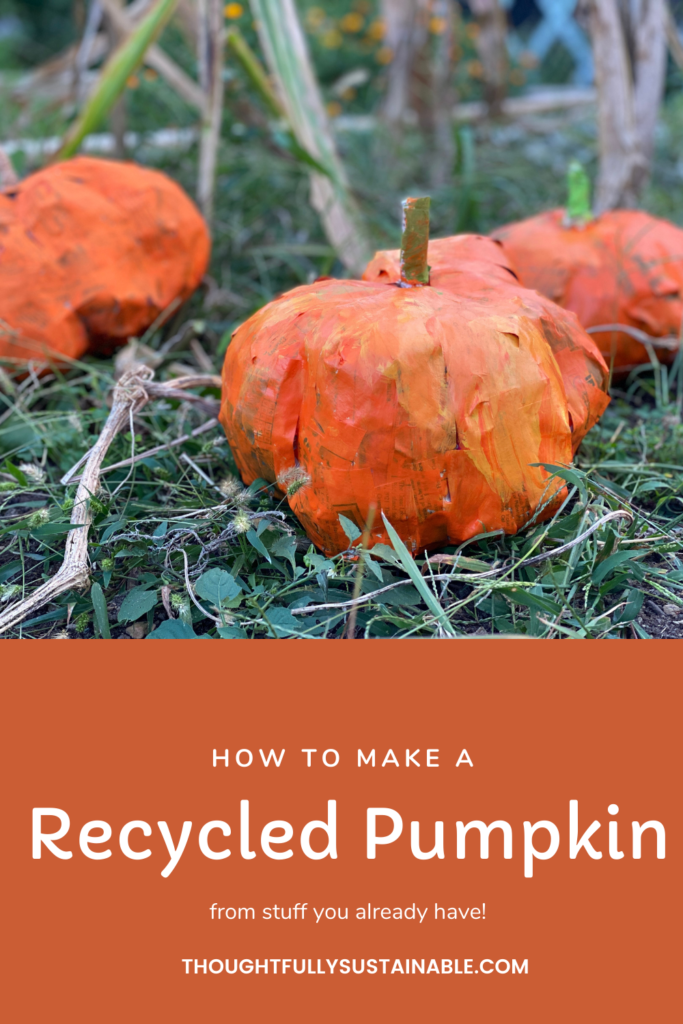
How to Make a Recycled Paper Mâché Pumpkin from Trash
Looking for an easy fall diy project for a fun family craft? Turn your trash into recycled pumpkin treasure with this simple paper mâché pumpkin art project!
‘Tis the season for fall decor to fill the shelves of every store. From plastic pumpkins to freshly picked gourds, it’s hard to miss that autumn has arrived. Needless to say, decorating for fall is a billion dollar industry in the United States.
Sadly, with that billion dollar industry comes an enormous amount of waste. Did you know that 1.3 billion pounds of edible pumpkin get thrown away annually in America? And that’s just the pumpkins! Think about all of the paper and plastic fall decorations that line the aisles of grocery and big box stores that don’t stand up to more than one season of use.
My kids love creating their own decorations for every season and holiday and I’ve learned to embrace the mess and let them have at it. And by embracing the mess I mean I usually direct their crafting outside, so that my kitchen and dining room remain somewhat intact! Not only does this save us time and money shopping for decorations, but it also fosters creativity, as the majority of our decorations are made from materials bound for our recycling or trash cans!

Benefits of Repurposing Materials to Make Fun Family Crafts.
There are a multitude of benefits to repurposing materials to create art projects with kids. Here are just a few:
- Teaches kids that raw materials have value
- Reduces the volume of waste that heads to a landfill or recycling center
- Saves money on purchasing art supplies
- Reduces carbon emissions by decreasing shopping trips for supplies
- Sparks creativity and ingenuity in learners of all ages
- May prompt conversations about where household waste goes and additional ways in which you can reuse materials that enter your home.
Making a Recycled Paper Mâché Pumpkin (a.k.a. Trash Pumpkin)
This year, my kids and I successfully made pumpkins out of….trash! I originally saw my friends Sarah Robertson-Barnes and Leslie Acevedo each make their own versions of recycled trash pumpkins. I knew I had to recreate this fun craft with my kids and then share it with all of you!
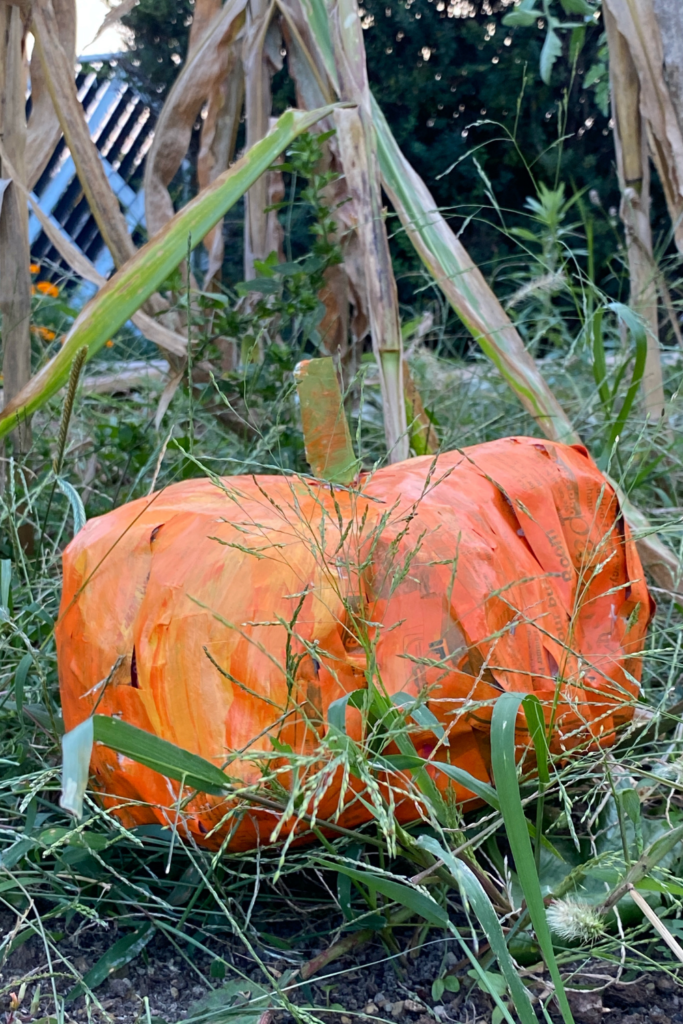
The best part about this low-waste craft are the multiple ways it can be adapted to make all sorts of festive pumpkin creations!
How To Make a Paper Mache Pumpkin Head
This activity can be easily adapted to make a one-of-a-kind pumpkin head for a diy costume. Following the instructions given, you’ll want to create a trash pumpkin that is large enough to fit over the wearer’s head. Once you’ve created the paper mâché pumpkin, cut away the bottom portion of the pumpkin and gently pull out the trash bags inside. Then, determine where the eyes and mouth of the wearer will be and sketch triangles on the face of the pumpkin. Using a sharp knife, cut away the paper mâché triangles. You may want to outline the triangles with black marker to give them a more realistic Jack O’Lantern look. Now you have the makings for a fun pumpkin head costume!
How to Make a Paper Mache Pumpkin Pinata
Making a paper mâché pumpkin pinata is easy with a few additional instructions. Once you’ve crafted your trash pumpkin and allowed it to dry completely, cut a small flap in the bottom of the pumpkin and gently pull out the trash bags inside. If any bags are stuck to the paper mâché, simply cut away some of the bags from the interior wall of the pumpkin. It’s okay if you need to leave some of the bags inside to ensure the stability of the structure. Fill the paper mâché pumpkin with whatever candy or trinkets you choose. Once the pumpkin is filled, seal the flap with packing tape. Attach a string to the top of the pumpkin and let the party begin!
Materials to Make a Trash Pumpkin
I made this activity as simple and kid-friendly as possible. The majority of these materials can be found in your home. If you happen to be missing a supply, I highly suggest you borrow from a friend or neighbor or reach out to your local Buy Nothing or Nextdoor group. It may even spark a conversation about what you’re doing with all those plastic grocery bags!
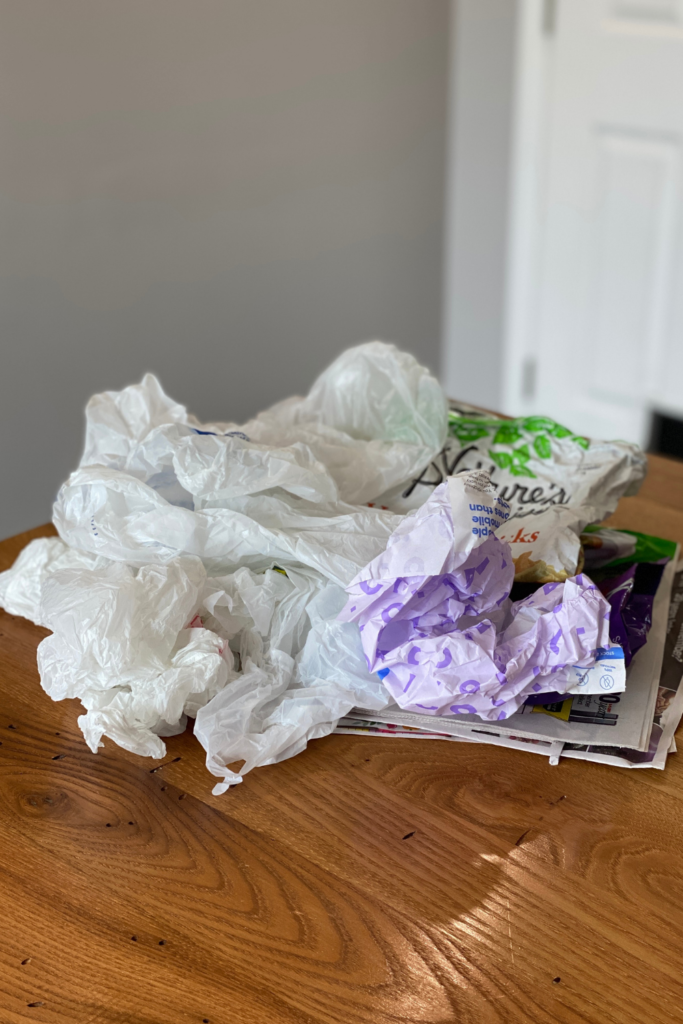
- Plastic grocery bags
- Clean, dry, soft plastic packaging, junk mail, scrap paper
- Newspaper or magazine pages
- Scissors
- White glue
- Water
- String, twine or yarn
- Medium bowl (we repurposed a plastic yogurt tub)
- Spoon
- Paint and paintbrush
Instructions to Make a Trash Pumpkin
Here are simple, step-by-step instructions to walk you through the process of making your own recycled paper mâché pumpkin. Below the list are images to accompany the steps, in case you’re a visual learner like myself!
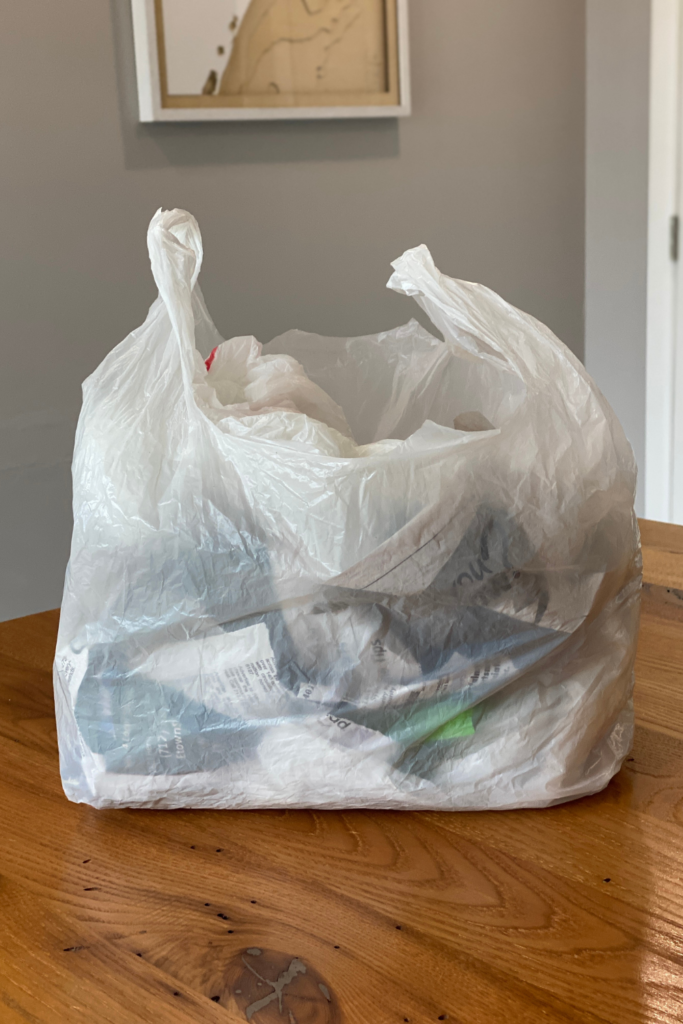
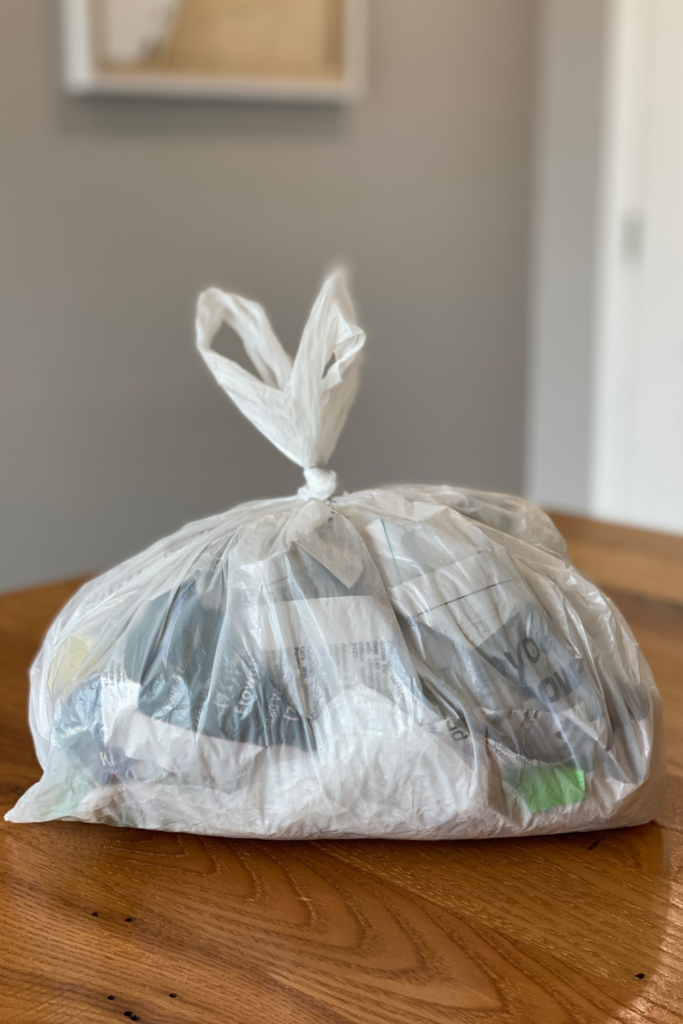
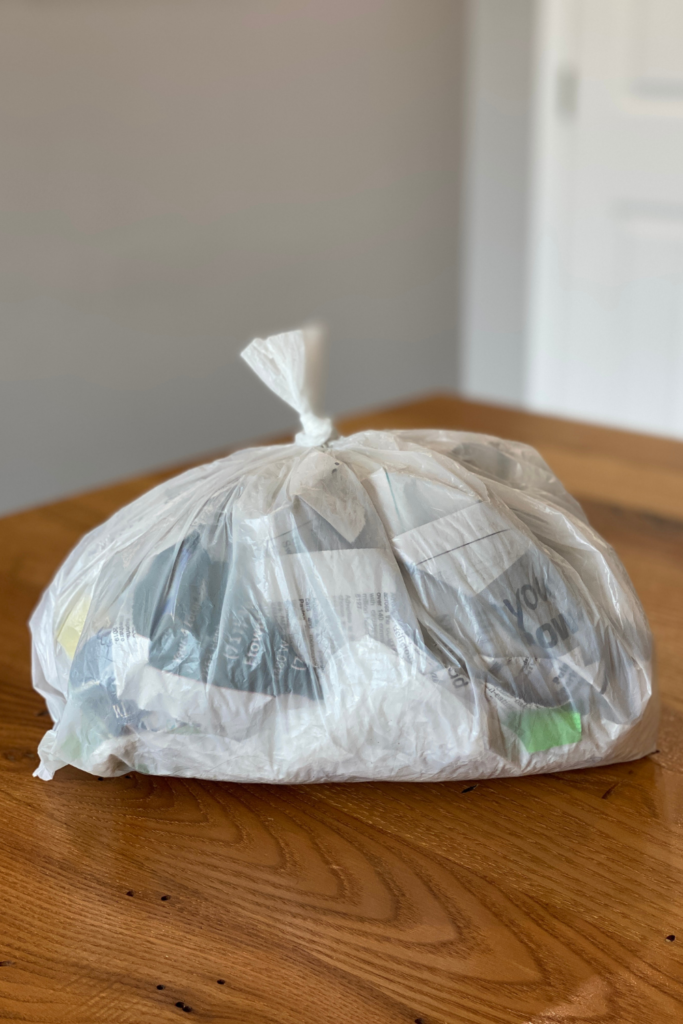
- Fill a plastic grocery bag with clean, dry “trash” – plastic bags, scrap paper, junk mail, brown paper, newspaper, etc.
- When the bag is full, tie it shut at the top. The trash-filled bag should have a round shape.
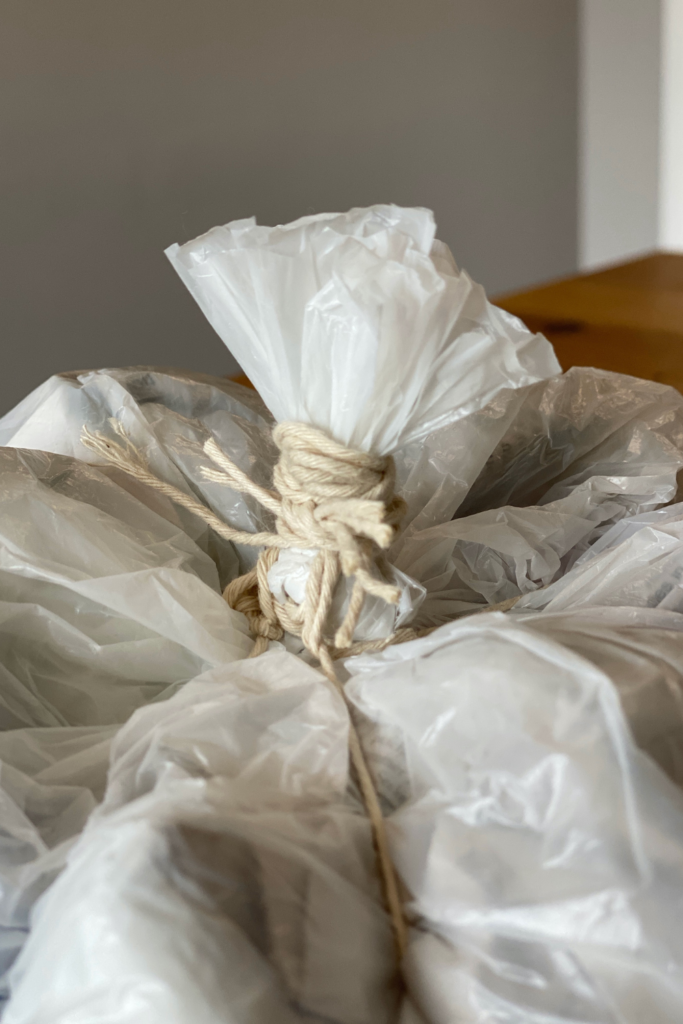
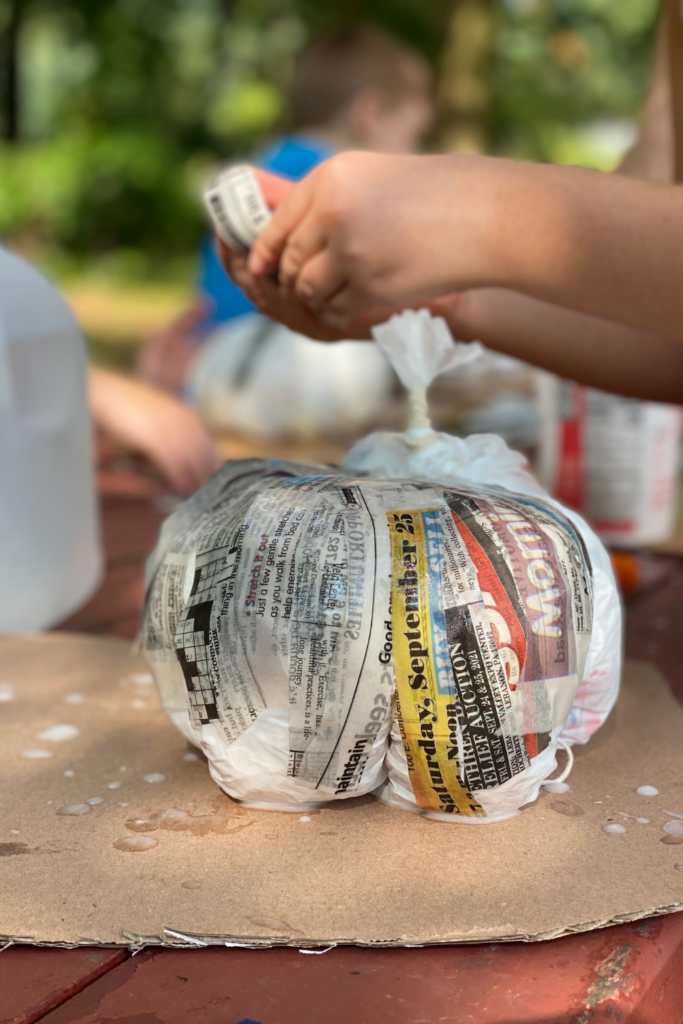
- Cut the top of the bag tie to create a stem for your pumpkin.
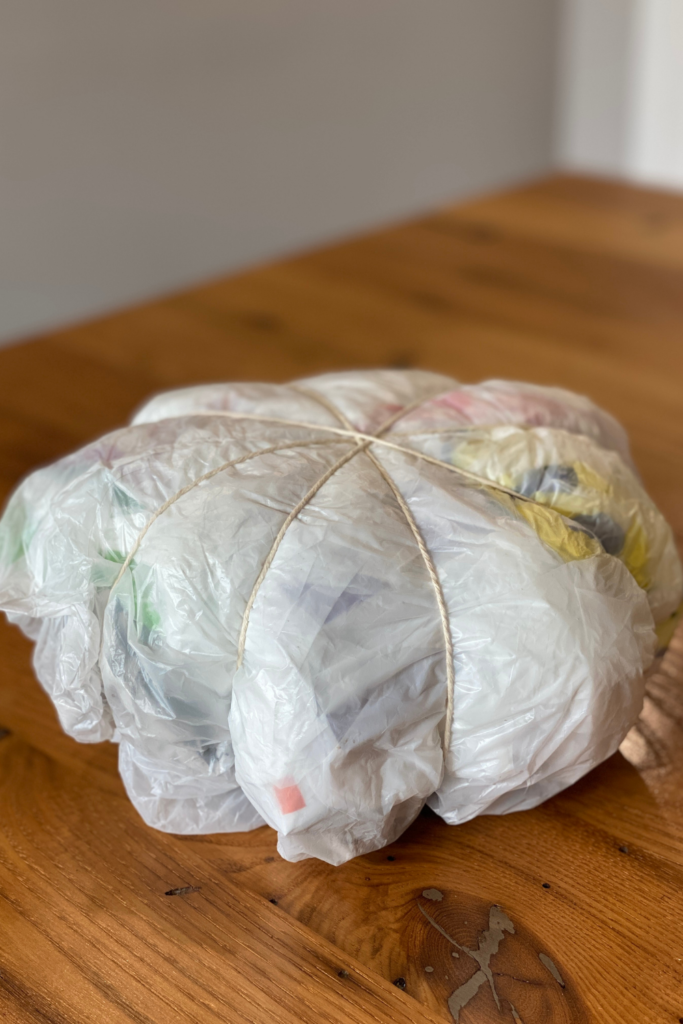
- Take four pieces of string and, one at a time, tie them around the trash-filled plastic bag, making two “X” patterns across the bag. These will create the ridges on your pumpkin. See step by step images for reference.
- Wrap the loose ends of the string around the stem of the pumpkin to provide more support to your stem. Then, cut the loose ends off of each string.
- In a medium bowl, add one part white glue to three parts water and mix with a spoon.
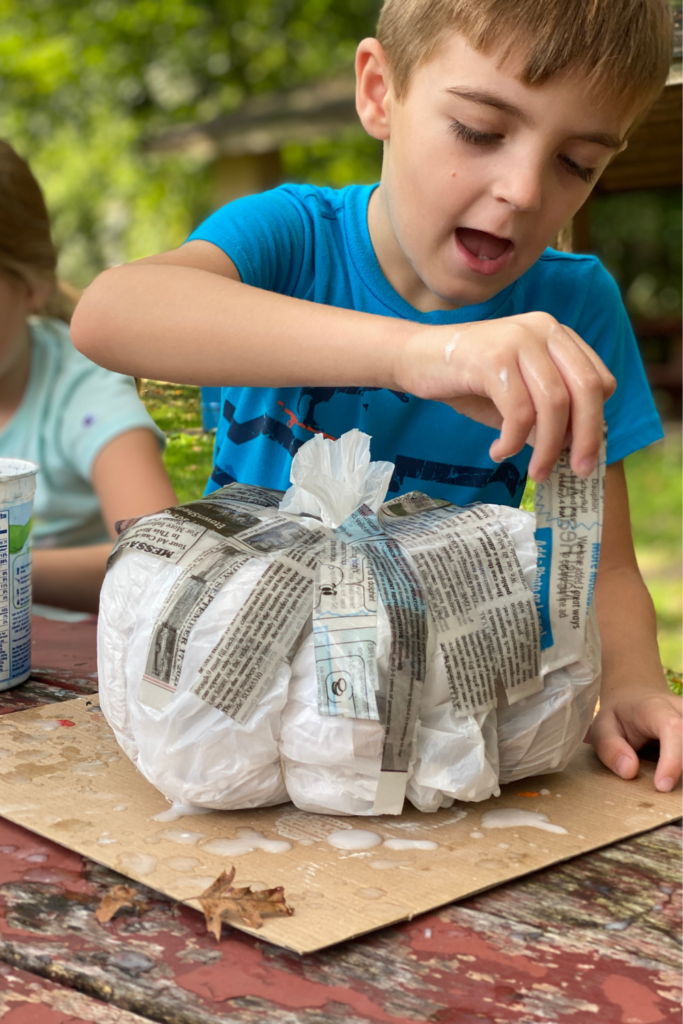
- Cut strips of newspaper or magazine (or both).
- Dunk the strips of paper into the glue solution and smooth onto the trash pumpkin. If you want to avoid sticky fingers you can use a paintbrush to apply the glue solution to the strips. Personally, we found dunking the strips into the watery glue faster and easier (however a bit messier)!
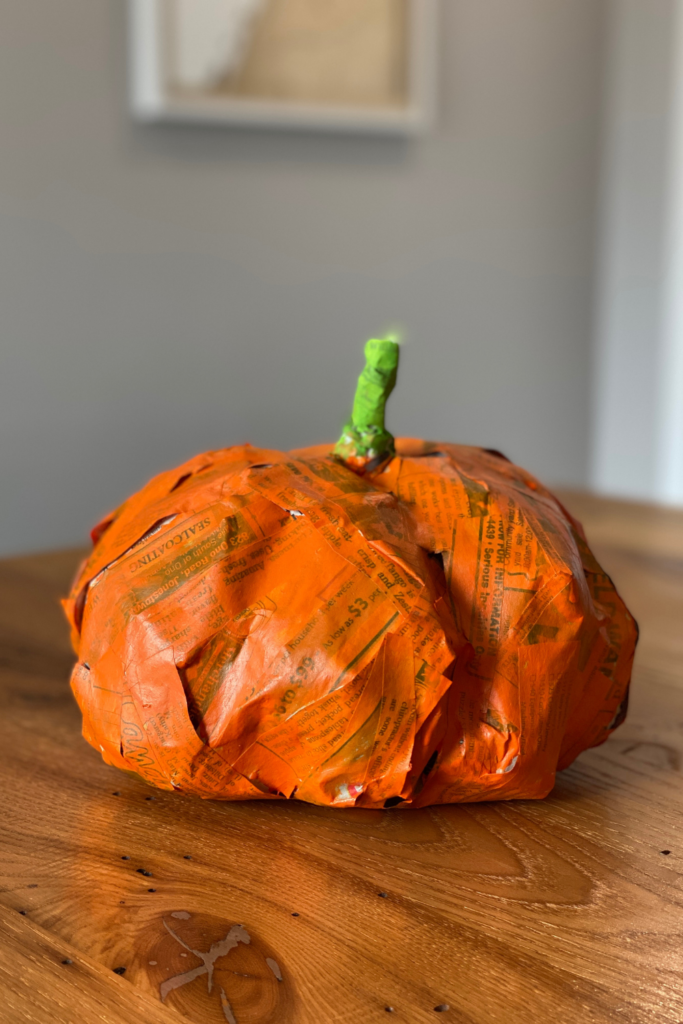
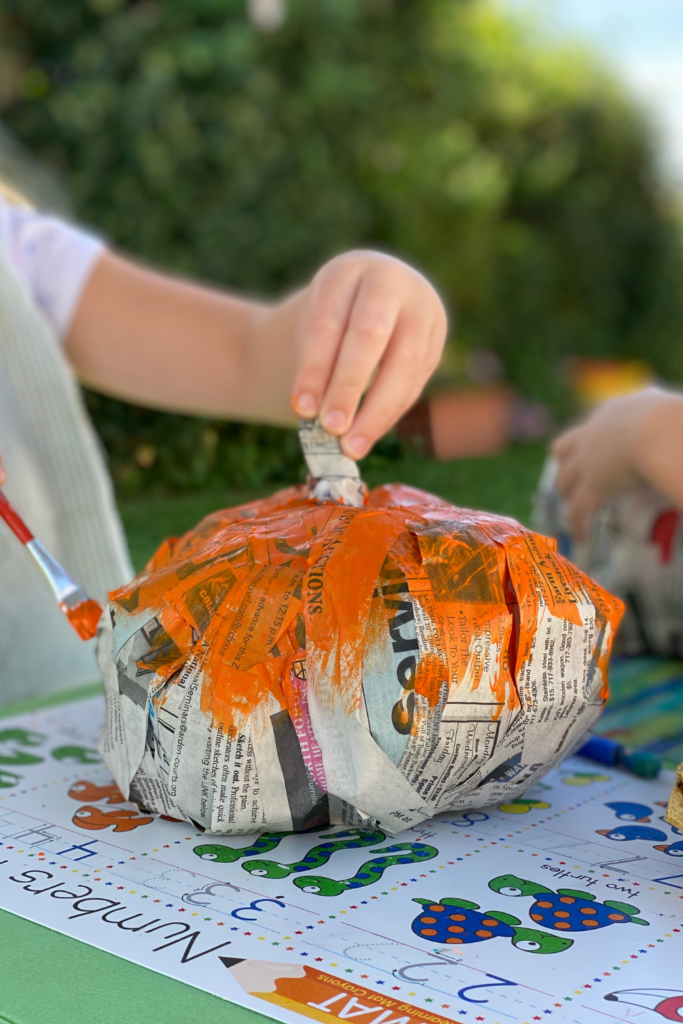
- Cover the pumpkin and stem with paper mâché. We covered the top first, let it dry in the sun, then flipped the pumpkin over and covered the bottom. Create as many layers of paper mâché as you like to get the effect you are looking for. We did one layer of newspaper for our pumpkins.
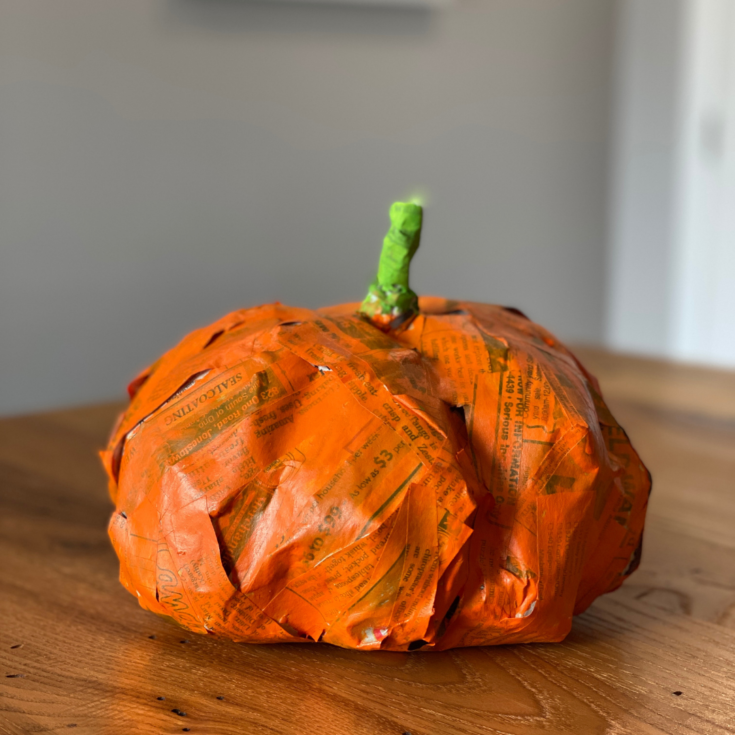
- Once the pumpkin is completely dry, paint it any color you like to make it come to life!
Step 1
Step 2
Step 3
Step 4
Step 5

Step 7
Step 8
Step 9
Step 10
We made these pumpkins at home, and then made them again with friends at an outdoor homeschool meet-up! If you decide to make one, let me know how it goes in the comments below, or share your creation on Instagram or Facebook and tag me @thoughtfullysustainable!
Interested in having me teach a virtual or in-person class on how to make a trash pumpkin? Reach out to me and let’s chat.
Want to save this to try making your own recycled pumpkin later? Pin this to your favorite Pinterest board!
Make a Recycled Paper Mâché Pumpkin from Trash
Ingredients
- Plastic grocery bags
- Clean, dry, soft plastic packaging, junk mail, scrap paper
- Newspaper or magazine pages
- Scissors
- White glue
- Water
- String, twine or yarn
- Medium bowl (we repurposed a plastic yogurt tub)
- Spoon
- Paint and paintbrush
Instructions
- Fill a plastic grocery bag with clean, dry “trash” - plastic bags, scrap paper, junk mail, brown paper, newspaper, etc.
- When the bag is full, tie it shut at the top. The trash-filled bag should have a round shape.
- Cut the top of the bag tie to create a stem for your pumpkin.
- Take four pieces of string and, one at a time, tie them around the trash-filled plastic bag, making two “X” patterns across the bag. These will create the ridges on your pumpkin.
- Wrap the loose ends of the string around the stem of the pumpkin to provide more support to your stem. Then, cut the loose ends off of each string.
- In a medium bowl, add one part white glue to three parts water and mix with a spoon.
- Cut strips of newspaper or magazine (or both).
- Dunk the strips of paper into the glue solution and smooth onto the trash pumpkin. If you want to avoid sticky fingers you can use a paintbrush to apply the glue solution to the strips. Personally, we found dunking the strips into the watery glue faster and easier (however a bit messier)!
- Cover the pumpkin and stem with paper mâché. We covered the top first, let it dry in the sun, then flipped the pumpkin over and covered the bottom. Create as many layers of paper mâché as you like to get the effect you are looking for. We did one layer of newspaper for our pumpkins.
- Once the pumpkin is completely dry, paint it any color you like to make it come to life!
Notes
I'd love to see your pumpkin creations! Please share on social media and tag me @thoughtfullysustainable !

2 Comments
Comments are closed.