How to Visualize Photosynthesis: A Simple Science Experiment
Looking for a simple science experiment for kids that visualizes how photosynthesis works? Check out this low-prep STEM project that requires few materials, can be done at home or school, and comes with a free printable packet for students!
What is Photosynthesis? A Kid-Friendly Explanation
If you’ve ever wondered how plants “eat”… you’re not alone. It’s one of the first questions kids ask when they start learning about nature!
Photosynthesis is the process plants use to make their own food using sunlight, water, and air. Instead of eating like we do, plants act like tiny food factories—using energy from the sun to create sugar and release oxygen.
And the best part? You can actually see this process happening with a simple experiment at home or in the classroom.
How Photosynthesis Works
Photosynthesis is the process by which green plants, algae, and some bacteria convert light energy from the sun into chemical energy in the form of glucose (sugar). It is a complex series of chemical reactions that take place in specialized organelles called chloroplasts, which contain the pigment chlorophyll.
During photosynthesis, carbon dioxide (CO2) from the atmosphere and water (H2O) from the soil is combined with light energy to produce glucose and oxygen (O2). This process is essential for life on Earth, as it provides the basis for the food chain and produces the oxygen we breathe.
How Photosynthesis Works (Simple Steps for Kids)
Here’s a simple way to explain it to your learners:
- Sunlight provides energy
- Water comes from the roots
- Carbon dioxide comes from the air
- Leaves (with chlorophyll) turn everything into food
The result?
- Sugar (plant food)
- Oxygen (what we breathe!)
What is the Chemical Equation for Photosynthesis?
If you’re teaching older students, or you have some high achieving learners in your classroom, introduce them to the chemical equation for photosynthesis.
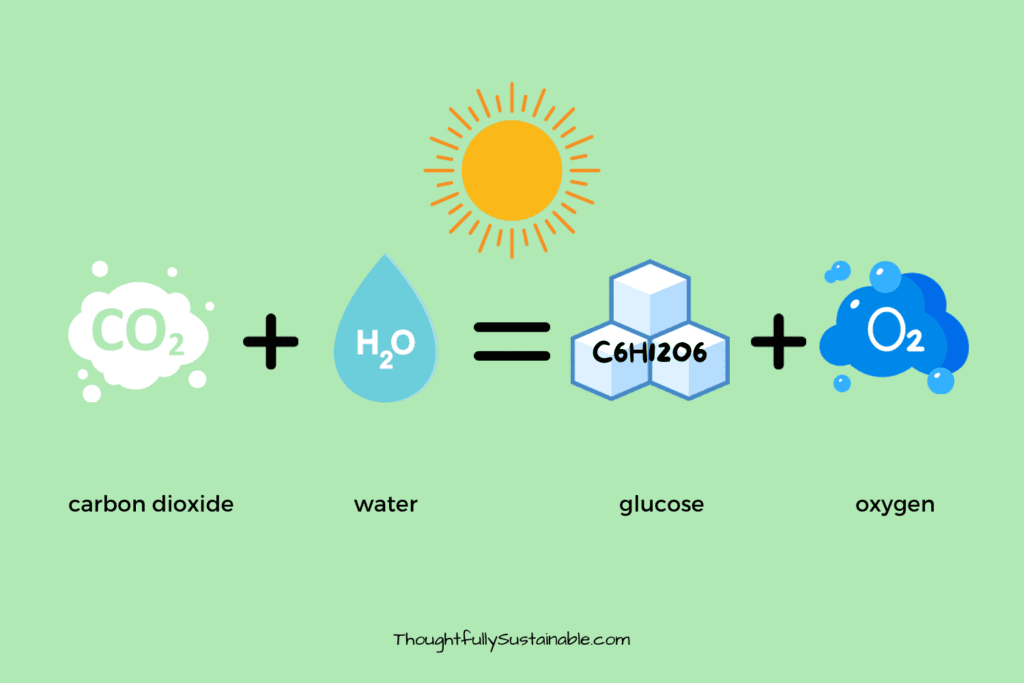
The overall balanced chemical equation for photosynthesis is:
6 CO2+ 6 H2O + light energy → C6H12O6 + 6 O2
where CO2 is carbon dioxide, H2O is water, C6H12O6 is glucose, and O2 is oxygen.
The coefficients in front of each chemical formula give us a bit more information about the “recipe” needed to produce food for the photosynthesizing organism. It takes 6 molecules of carbon dioxide combined with 6 molecules of water in the presence of sunlight to create 1 molecule of glucose and 6 molecules of oxygen.
How Does Photosynthesis Work? (High School Level)
As in most things in science, the process of photosynthesis can be described in even more detail than the general balanced equation shown above. Photosynthesis is a complex process that occurs in two main stages: light-dependent reactions and light-independent reactions (also known as the Calvin cycle). Typically this level of detail wouldn’t be taught to students until high school level biology. Here’s a brief overview of how photosynthesis works in more detail:
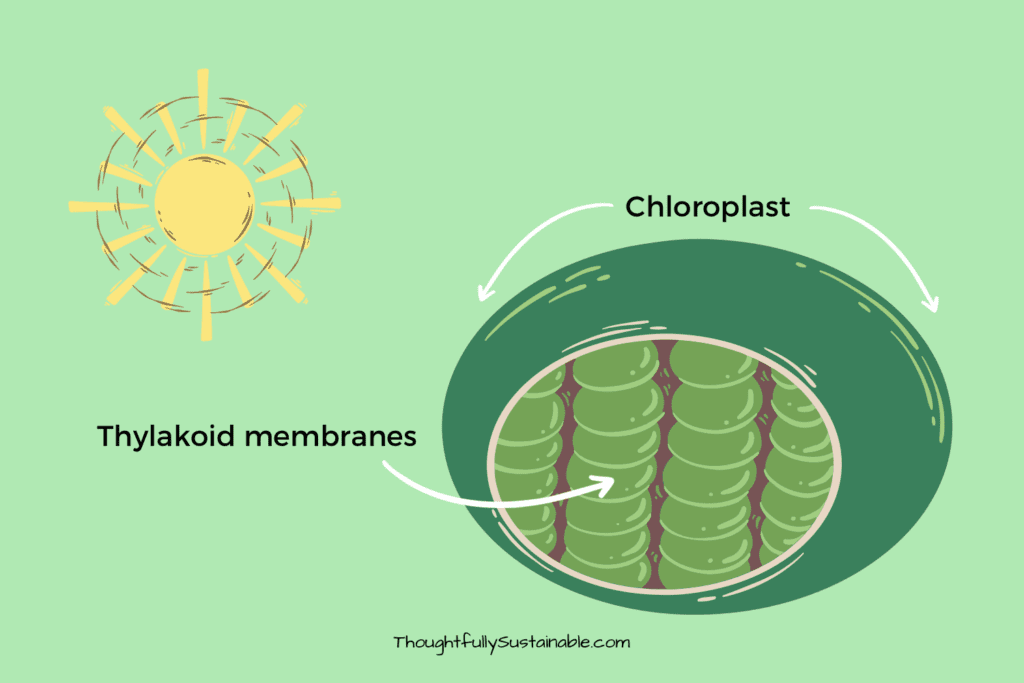
Light-dependent reactions:
The first stage of photosynthesis occurs in the thylakoid membrane of the chloroplasts, where light energy is absorbed by chlorophyll and other pigments. This light energy is used to create high-energy molecules such as ATP (adenosine triphosphate) and NADPH (nicotinamide adenine dinucleotide phosphate), which are needed for the second stage of photosynthesis.
Light-independent reactions (Calvin cycle):
The second stage of photosynthesis occurs in the stroma of the chloroplasts, where carbon dioxide is fixed into organic molecules such as glucose. This process is known as the Calvin cycle and requires the ATP and NADPH produced in the first stage. In the Calvin cycle, carbon dioxide molecules are combined with molecules of the 5-carbon sugar ribulose bisphosphate (RuBP) to form an unstable 6-carbon molecule. This molecule is then broken down into two molecules of a 3-carbon sugar, which can be used to create glucose and other organic molecules.
Overall, photosynthesis is a complex biochemical process that converts light energy into chemical energy, producing oxygen and organic molecules as byproducts.
Photosynthesis Experiment for Kids: Watch Plants Make Oxygen
Here is a simple, low-prep science experiment you can use with your elementary-aged learners to watch plants make oxygen!
Materials
- 5-7 freshly picked green leaves
- 5-7 small pebbles
- shallow dish or bowl
- water
- direct sunlight
- free Visualizing Photosynthesis printable for students
I have found that the results of this experiment are best when it is conducted outside with access to direct sunlight, as opposed to running the experiment inside in front of a window. However, if you have access to a greenhouse, or have old windows that are not double-paned, this experiment may do well indoors.
Instructions to Conduct the Visualizing Photosynthesis Science Experiment
The initial set-up of this science experiment is quite simple and, depending upon the time of year it is conducted, you may begin to see results within an hour.
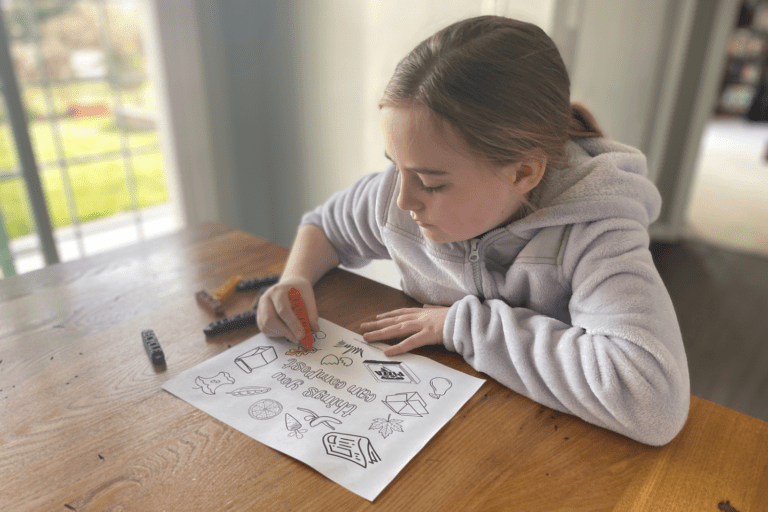
- On the free printable provided, make a hypothesis about what you think will happen to the surface of the leaves when left undisturbed in direct sunlight for an hour.
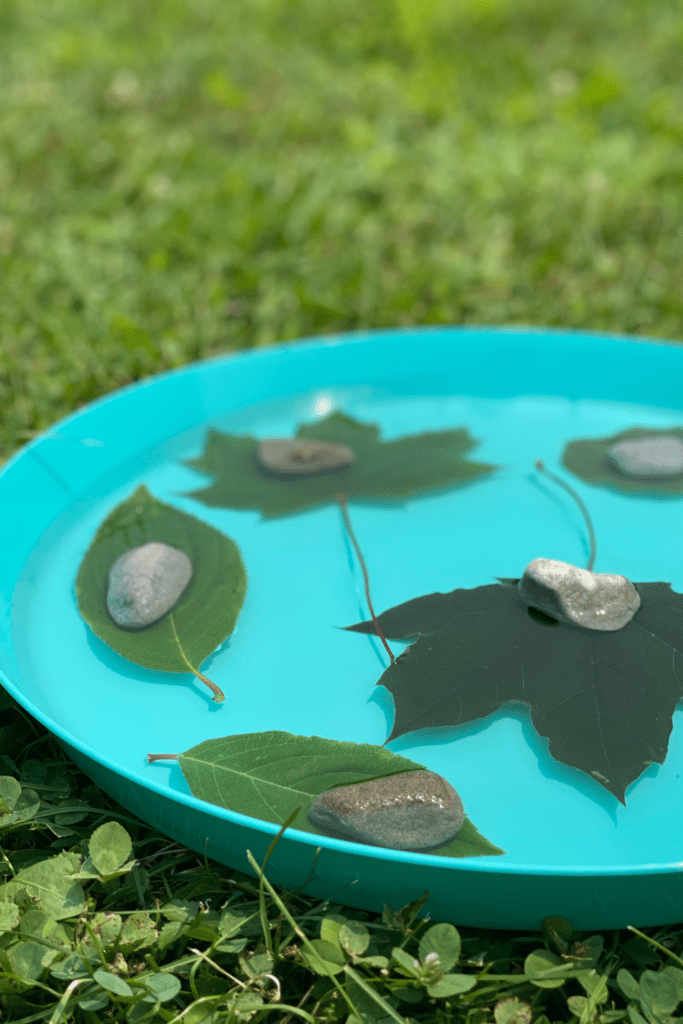
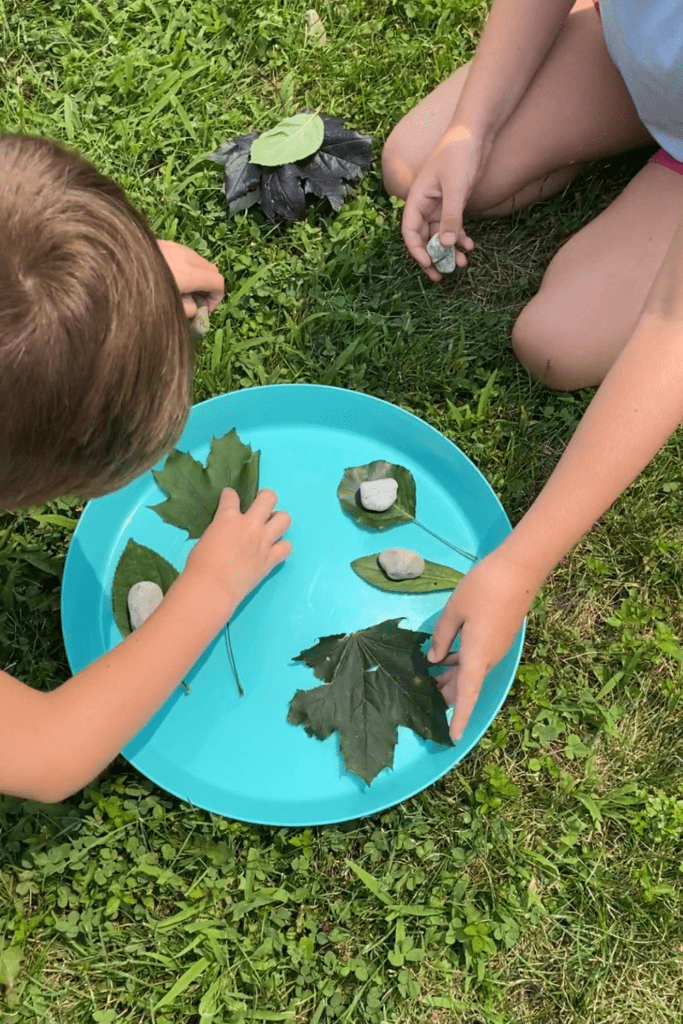
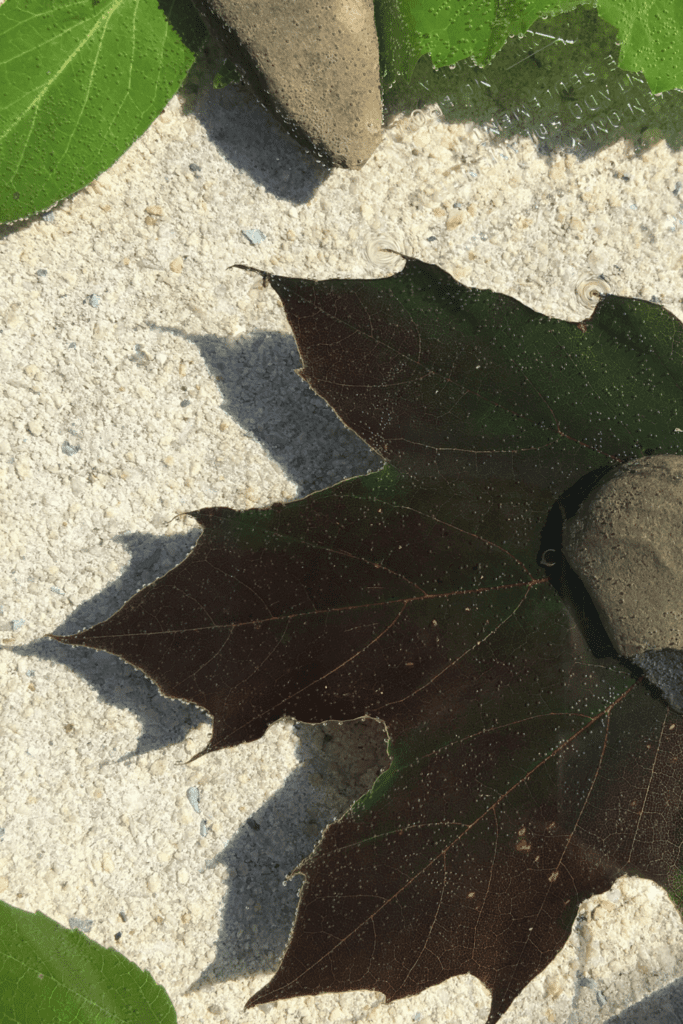
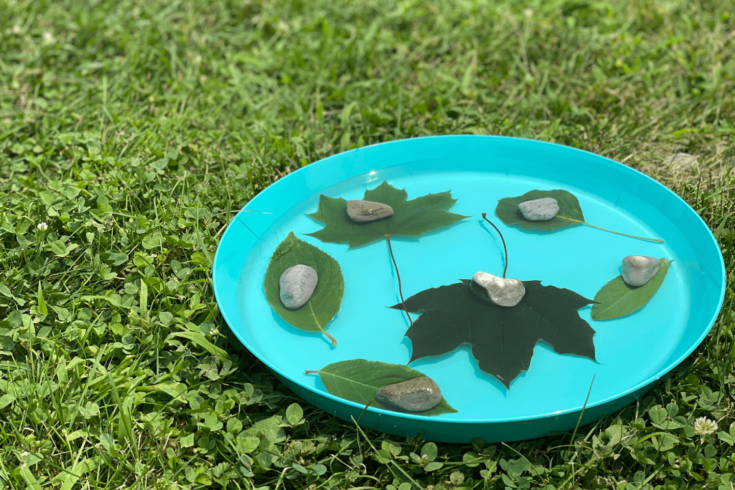
- Place 5-7 freshly picked leaves face up in a shallow dish or tray.
- Position the dish in direct sunlight.
- Sketch one or two of the leaves chosen for your experiment.
- Place a small pebble on the center of each leaf. Be careful not to cover the entire leaf with your object, as sunlight needs to be able to reach the leaf.
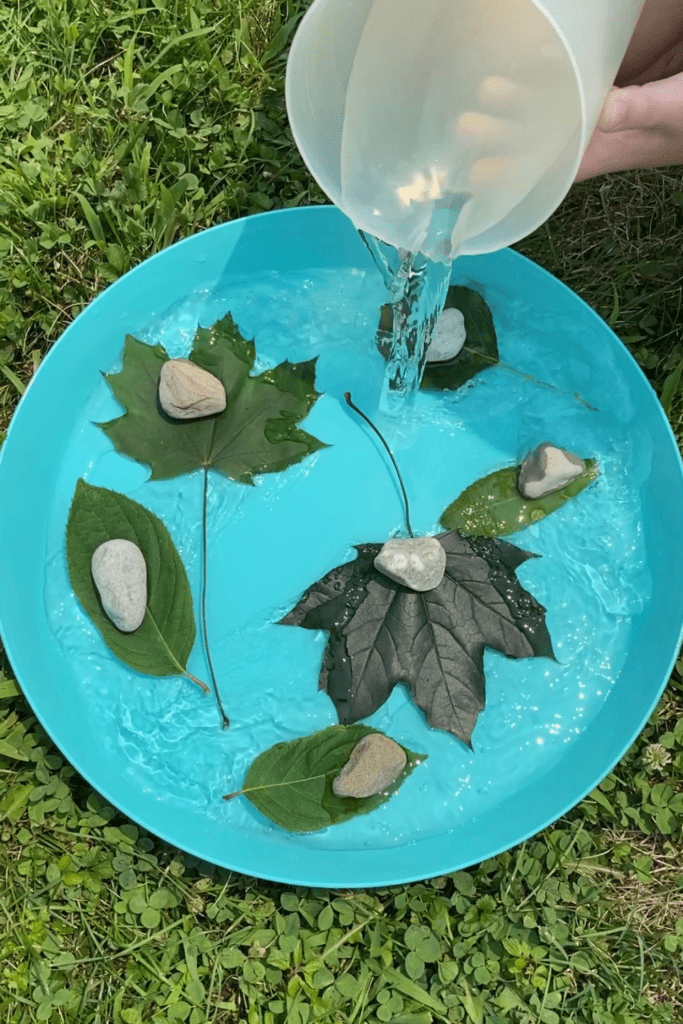
- Pour enough water into the dish to just cover all of the leaves.
- Allow the leaves to sit undisturbed for an hour in direct sunlight.
- After an hour, observe the leaves.
- Create a second sketch of the leaves you chose at the beginning of the experiment, noting any differences that have occurred. Make sure to take a close look at the surface and edges of the leaves.
- If no changes have occurred, allow the leaves to sit undisturbed for another hour in direct sunlight, then reobserve.
- Answer the questions that are found on the visualizing photosynthesis printable.

Typical Results of the Visualizing Photosynthesis Science Experiment
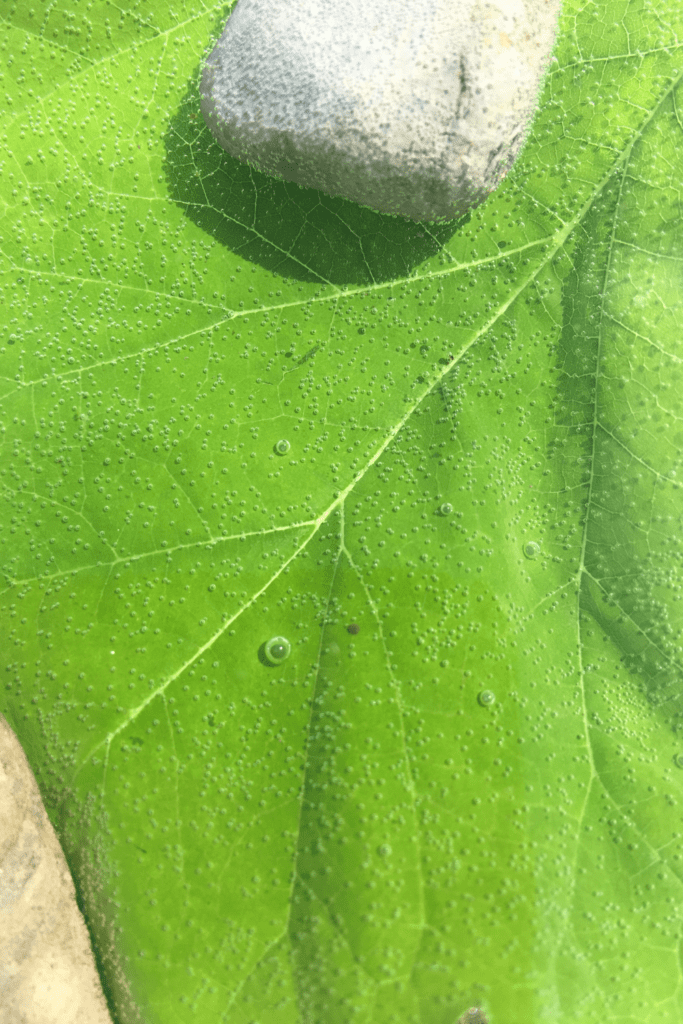
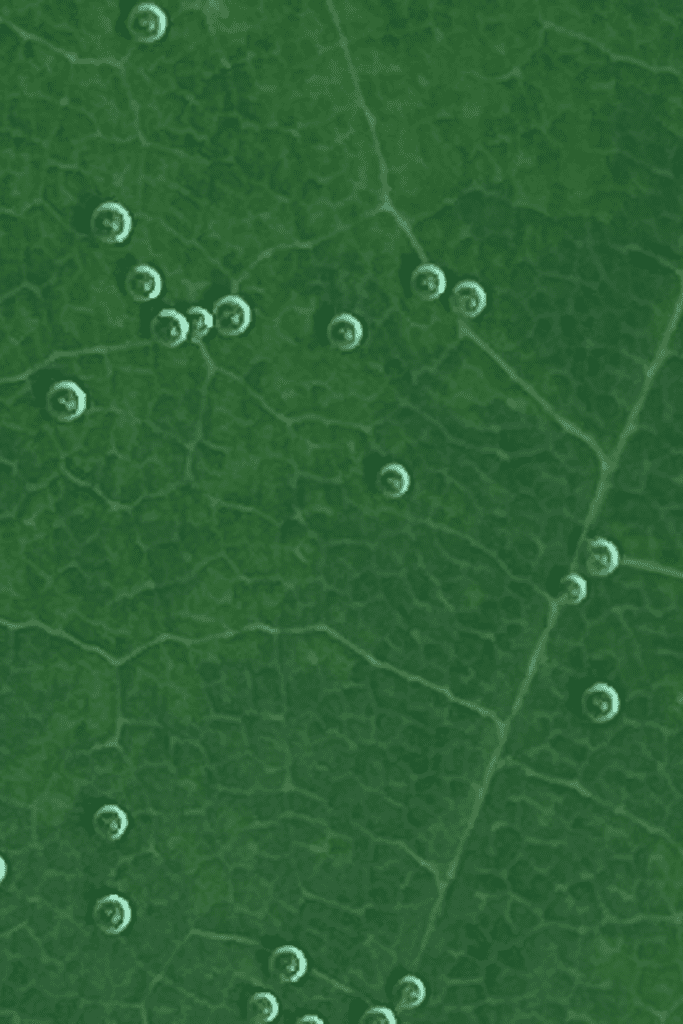
Once the leaves have sat undisturbed for one hour in direct sunlight, learners should see small bubbles form on the edges and tops of the leaves. These bubbles contain oxygen and are the direct result of photosynthesis. The purpose of the water in the experiment is to visualize the oxygen gas; without the water, the gas bubbles would not be trapped and would simply enter the air.
Be sure to have the students complete the questions on my free printable on their own or in small groups before discussing it as a class. It may be helpful to display the chemical equation for photosynthesis to remind students that the creation of oxygen gas is part of photosynthesis.
Why This Science Experiment Matters
This simple activity helps kids:
- See an invisible science process in action
- Understand where oxygen comes from
- Connect plants to everyday life
- Build observation and inquiry skills
And best of all—it requires almost no prep (my favorite kind of STEM activity!).
Extend the Learning
To extend the learning of this simple photosynthesis experiment, try asking your students the following:
- What happens if we move the dish of leaves to the dark?
- Do different leaves produce more bubbles?
- How long does it take for bubbles to appear?
This turns a simple activity into a full STEM lesson, with zero additional prep!
More Science Experiments About Plants
If you enjoyed this simple science experiment about plants, you may also like the following:
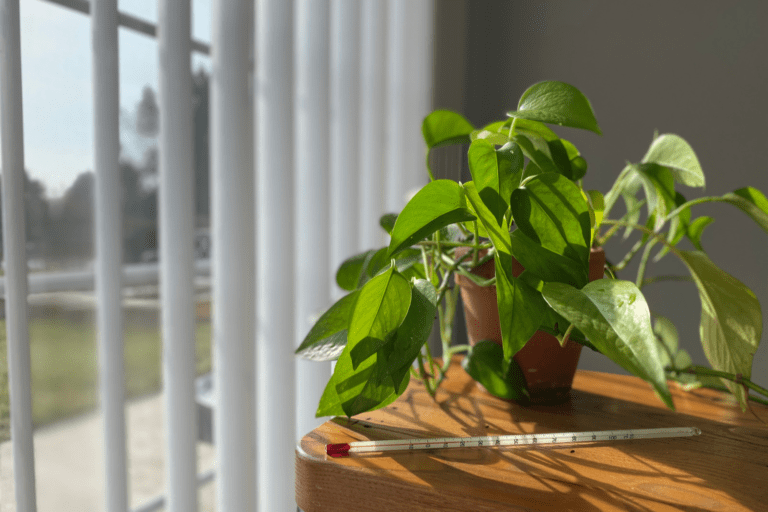
- How to Propagate Plants in Water with Kids
- How to Regrow Vegetables from Food Scraps
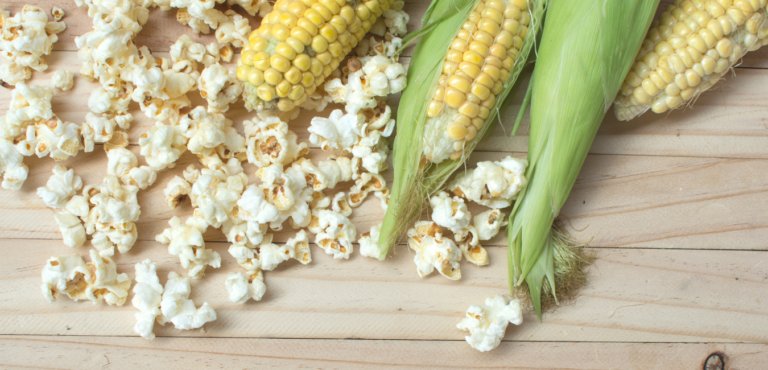
- How to Grow Your Own Popcorn
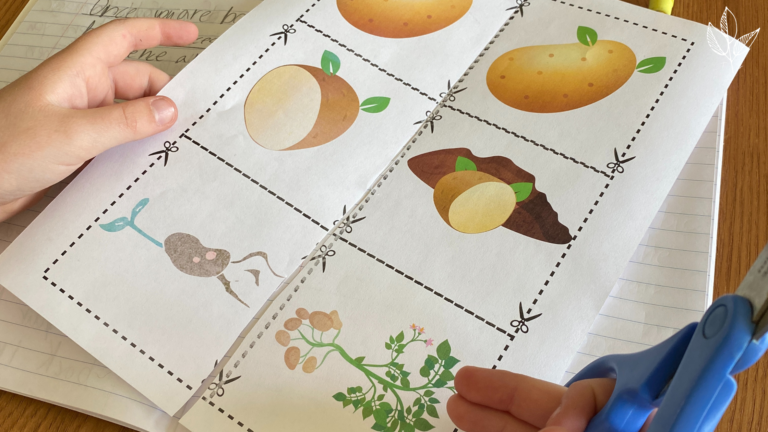
- Teaching Kids How to Grow Potatoes
How to Visualize Photosynthesis: A Science Experiment
Looking for a science experiment that visualizes how photosynthesis works? Check out this simple outdoor science project that requires very few materials and can be done at home or school!
Materials
- 5-7 freshly picked green leaves
- 5-7 small pebbles or other small objects to weigh down the leaves
- shallow dish or tray with sides
- water
- direct sunlight
- free printable “Visualizing Photosynthesis” student sheets
Instructions
- On the free printable provided, make a hypothesis about what you think will happen to the surface of the leaves when left undisturbed in direct sunlight for an hour.
- Place 5-7 freshly picked leaves face up in a shallow dish or tray.
- Position the dish in direct sunlight.
- Sketch one or two of the leaves chosen for your experiment.
- Place a small pebble on the center of each leaf. Be careful not to cover the entire leaf with your object, as sunlight needs to be able to reach the leaf.
- Pour enough water into the dish to just cover all of the leaves.
- Allow the leaves to sit undisturbed for an hour in direct sunlight.
- After an hour, observe the leaves.
- Create a second sketch of the leaves you chose at the beginning of the experiment, noting any differences that have occurred. Make sure to take a close look at the surface and edges of the leaves.
- If no changes have occurred, allow the leaves to sit undisturbed for another hour in direct sunlight, then reobserve.
- Answer the questions that are found on the visualizing photosynthesis printable.
Notes
I have found that the results of this experiment are best when it is conducted outside with access to direct sunlight, as opposed to running the experiment inside in front of a window. However, if you have access to a greenhouse, or have old windows that are not double-paned, this experiment may do well indoors.
To download the free printable for this science experiment, click here.