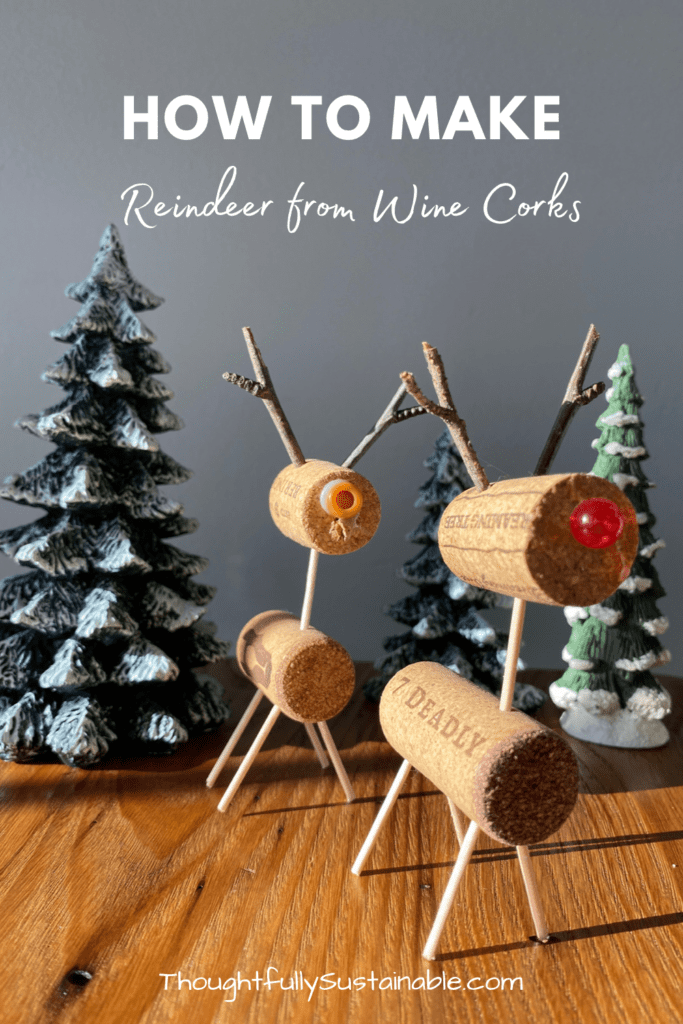
How to Make Reindeer With Natural Wine Corks + FREE Video Tutorial
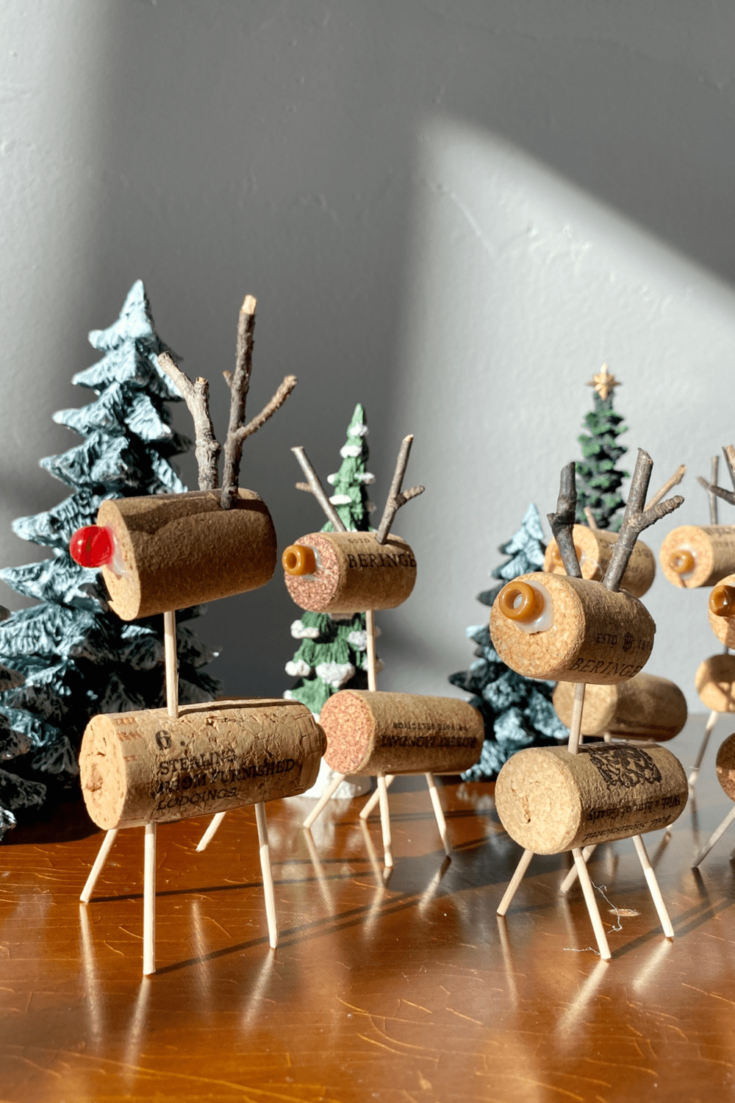
Looking for a festive way to repurpose natural wine corks? Try making these cute and simple DIY reindeer with your leftover wine corks to use for holiday table decor, Christmas ornaments, or stylish gift tags!

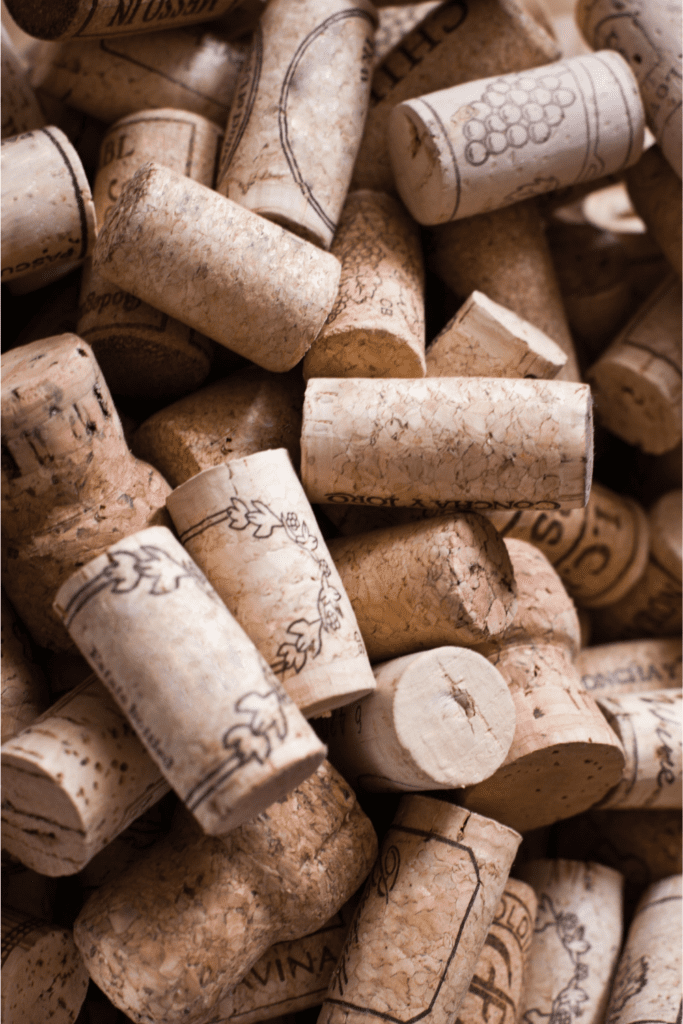
Natural wine corks are one of the best crafting materials in my opinion. They are light, easily shaped, and buoyant in water, and, when you’re done with them, natural corks can be composted! I keep a mason jar in my kitchen cupboard to collect them throughout the year. My kids and I use them for science experiments, STEM projects, and our latest creation – reindeer!
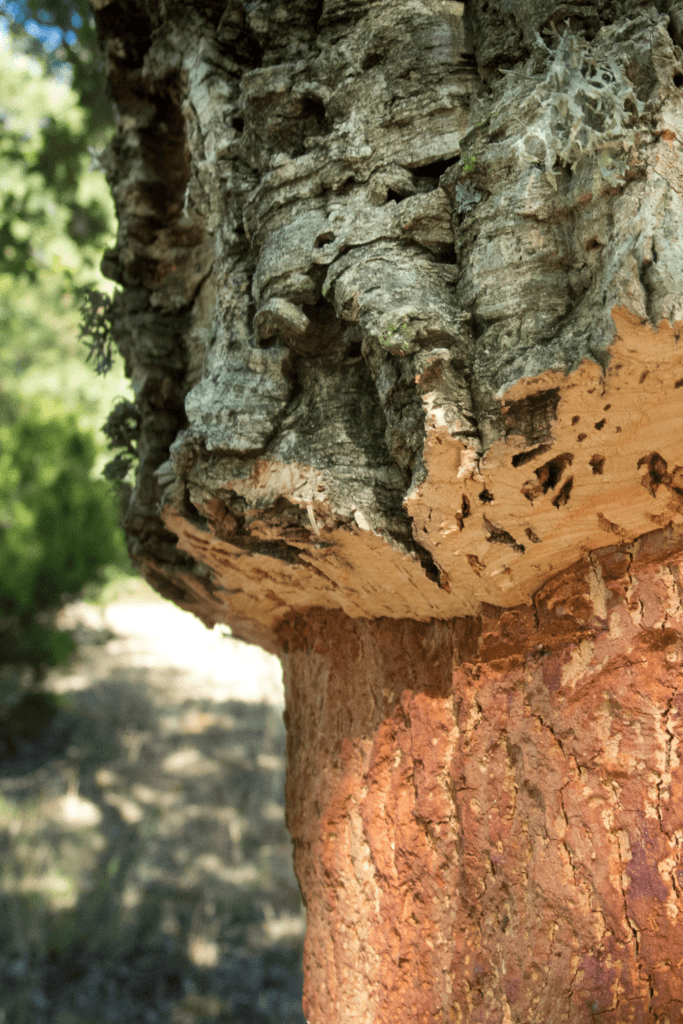
How are Natural Wine Corks Made?
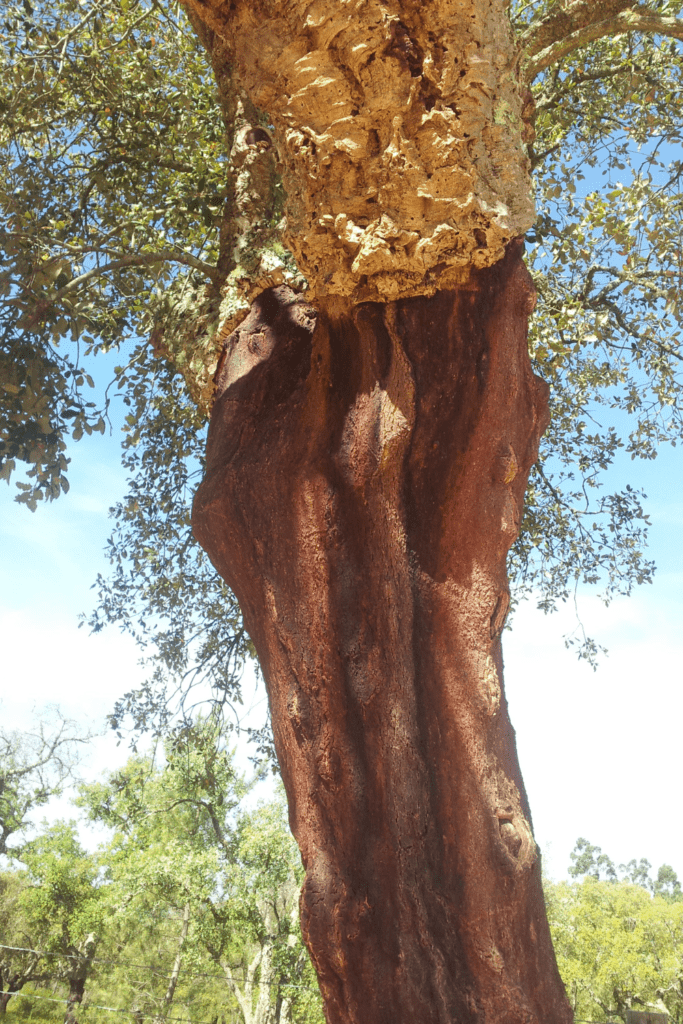
Traditionally, wine corks are made from the outer bark of cork oak trees, which grow predominantly in two regions of the world: the Iberian Peninsula of Europe and Northwestern Africa. Removing the outer bark of cork oak trees does not harm the tree, allowing it to continue to regenerate new bark to replace what is removed, which makes harvesting cork a sustainable practice. These corks are referred to as natural wine corks.
Natural cork is a very versatile material. Once a natural cork is used to seal a bottle of wine, it can be repurposed into materials for shoes, housing insulation, and acoustic paneling.
Why Are There Different Types of Wine Corks?
You may be wondering why many wine bottles come with corks made of plastic instead of natural cork. Natural wine corks are porous, which allows a small amount of air to pass through the cork. This can also allow for the chance of contamination of the wine. Additionally, natural cork can break apart when removed improperly from the bottle.
Some winemakers have chosen to use synthetic corks to replace natural corks to avoid any unwanted particles passing through the cork. Synthetic corks are not without problems. One issue is that they are made of a combination of plastics and cannot be recycled. Another problem is that they do not allow the wine to age, as the synthetic cork prevents any air from entering the bottle. Wine enthusiasts will tell you that wine must be properly aged and aerated to taste its best.
We will leave the discussion of cork types vs. wine-tasting profiles to the professionals and focus on the sustainability aspect of the materials! For this project of making reindeer with wine corks, we want to capitalize on the properties of natural corks.
Materials Needed to Make Reindeer With Natural Wine Corks
Here are the supplies I used to build a wine cork reindeer for the Christmas holiday season. I shopped at my house for the materials needed for this project. I’ve included some alternative supplies that could be used instead of what I had on hand, to encourage you to use what you have.
- 2 natural wine corks, not made of plastic
- 2 small branching twigs, each approximately 1 inch (2.5 cm) in length
- 3-5 wooden toothpicks
- 2 colored beads*
- box cutter or sharp knife
- cutting board
- hot glue**
*I used brown plastic beads from my daughter’s jewelry-making stash for a traditional reindeer and substituted one brown bead for a red bead to make a Rudolph.
**I used hot glue to attach the beads to the corks because it dries quickly. You can use whatever type of glue you have on hand.
Free Ways to Find the Wine Cork Reindeer Materials
If you don’t have some of the materials to make the wine cork reindeer statues, consider a few of the following sustainable alternatives to purchasing the necessary supplies.
Visit Your Local Vineyard
Patronize your local winemaker and inquire about any used wine corks they may be willing to part with. Better yet, offer to make them some wine cork reindeer to display in their tasting room over the holiday season in exchange for the corks!
Ask Your Friends, Family, and Neighbors
Did your grandmother ever tell you a story about how she went to the neighbor’s house to borrow a cup of sugar? As the pace of our modern lives has increased, we have forgotten or have never known what it’s like to walk across the street to ask to borrow something. Capitalize on the kindness of your neighbors, family members, and friends, and revitalize the simple act of borrowing!
Shop Your Local Buy Nothing Group or Facebook Marketplace
If you’re missing some materials to make the wine cork reindeer, consider putting a request on your local Buy Nothing Group or Facebook Marketplace. You’ll be amazed at how quickly your request is met by others looking to declutter their homes! Another option is to stop into your local secondhand or consignment shop and see what items they have available. I have successfully shopped secondhand for crafting materials more times than I can count.
Check With Your Local Library
Libraries are for borrowing much more than just books! My local library continually hosts children’s activities and craft sessions. Put a request into your librarian for extra crafting supplies they may have left over from a workshop. My good friend Jen, editor of Honestly Modern, has written an entire series based on ways you can capitalize on your local library’s resources.
Instructions to Make Reindeer With Natural Wine Corks
Once you’ve gathered your supplies, follow these instructions to construct a wine cork reindeer. Upcycling two wine corks into one reindeer took me approximately 10 minutes to complete.
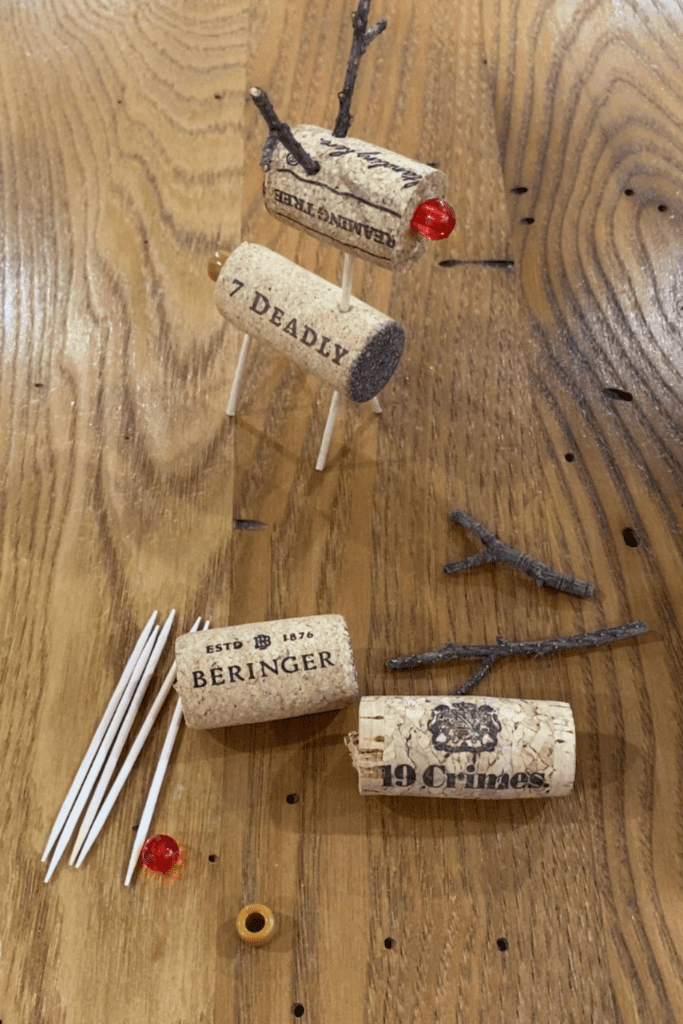
- Choose which wine cork you would like to use for the body and set it aside.
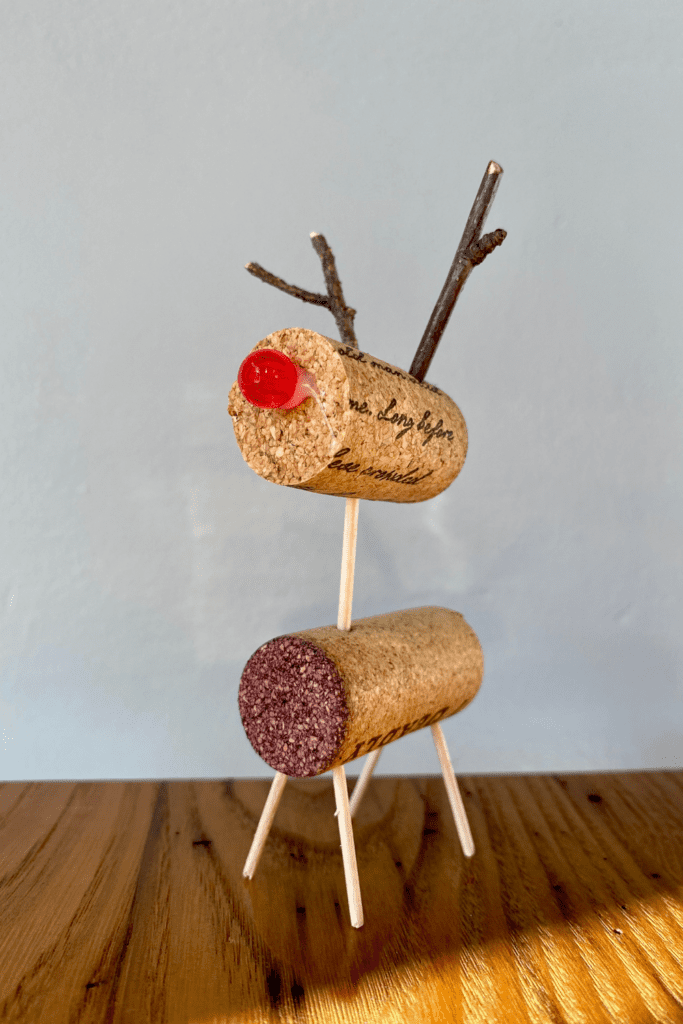
- Take the second cork and cut off about ¼ of the length. This will serve as the head of the reindeer.
- Lay both corks out lengthwise on a flat surface and position the shorter cork above the right end of the larger cork
- Cut a wooden toothpick in half and attach the head to the body by gently pushing each end of the cut toothpick into the corks. This toothpick will serve as the neck of the reindeer.
- Cut two more toothpicks in half. These will serve as the legs of the reindeer.
- Push the pointy end of each toothpick piece into the base of the body cork at 45-degree angles. You will need to play with the positioning and angle of your toothpick legs to ensure the weight of the cork reindeer is balanced and can stand freely.
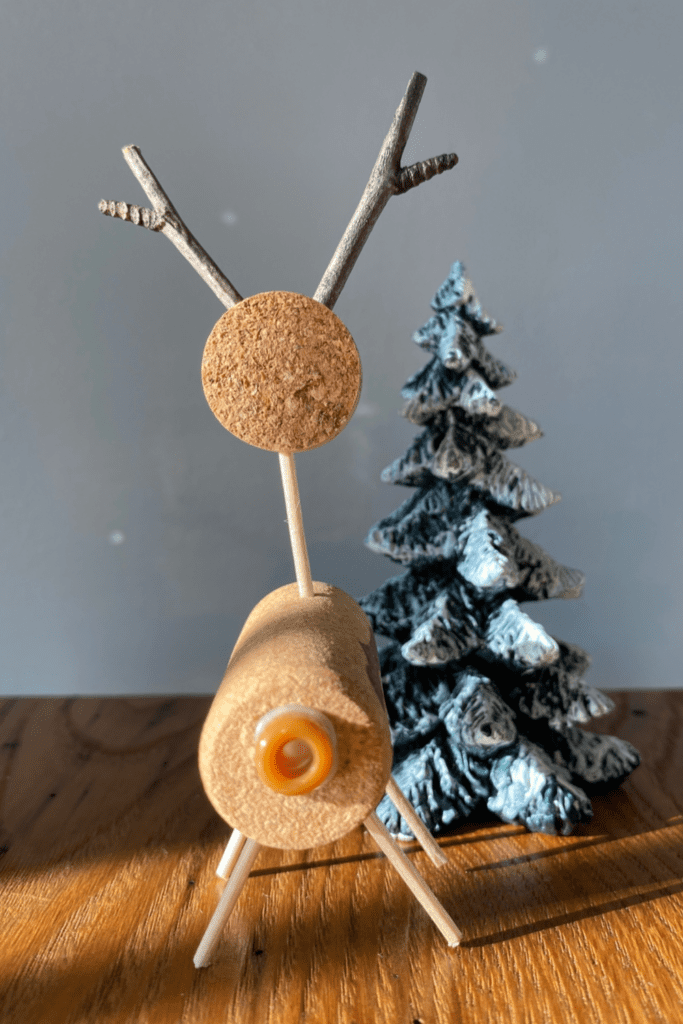
- Take the two small twigs and gently push them into the top of the reindeer’s head. You may need to use the sharp end of a toothpick to start a hole for the twigs to snugly fit into.
- Glue on one bead at the front end of the head to act as a nose.
- Glue on the second bead at the back of the body to act as a tail.
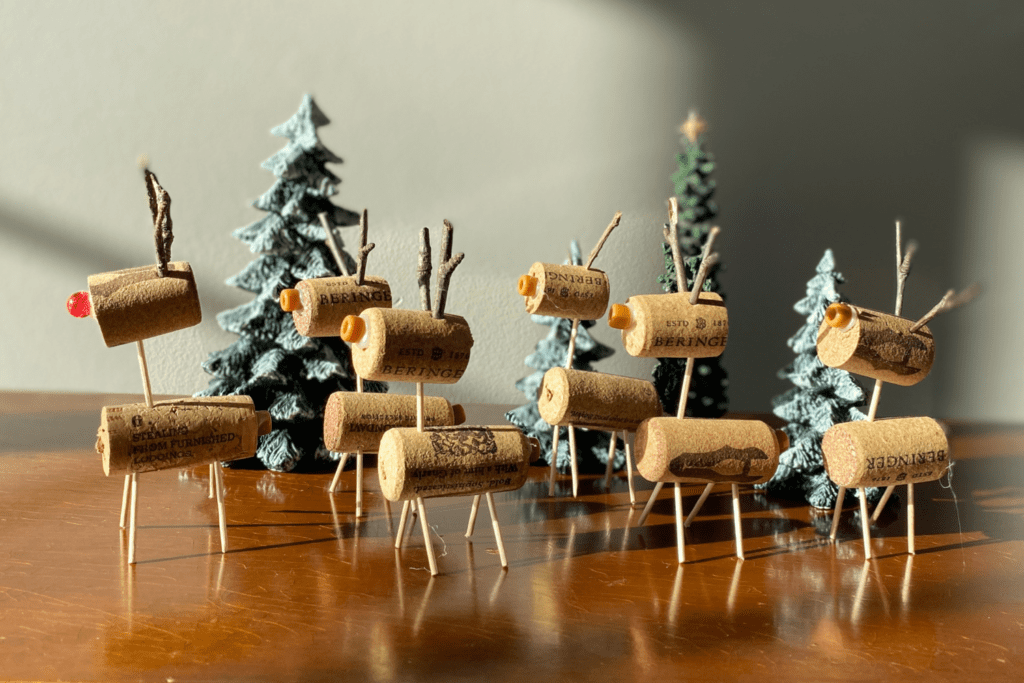
I wanted my reindeer to freely stand on a shelf. The longest part of this build was getting the proper positioning of the reindeer legs. You may need to try a few different locations for the toothpick legs before you can have your reindeer balance on his or her own! If for some reason you cannot get your cork reindeer to balance, or having freestanding wine cork reindeer is not your goal, you can always attach a string to the body and turn it into a hanging Christmas tree ornament!
Different Ways to Use Your Wine Cork Reindeer
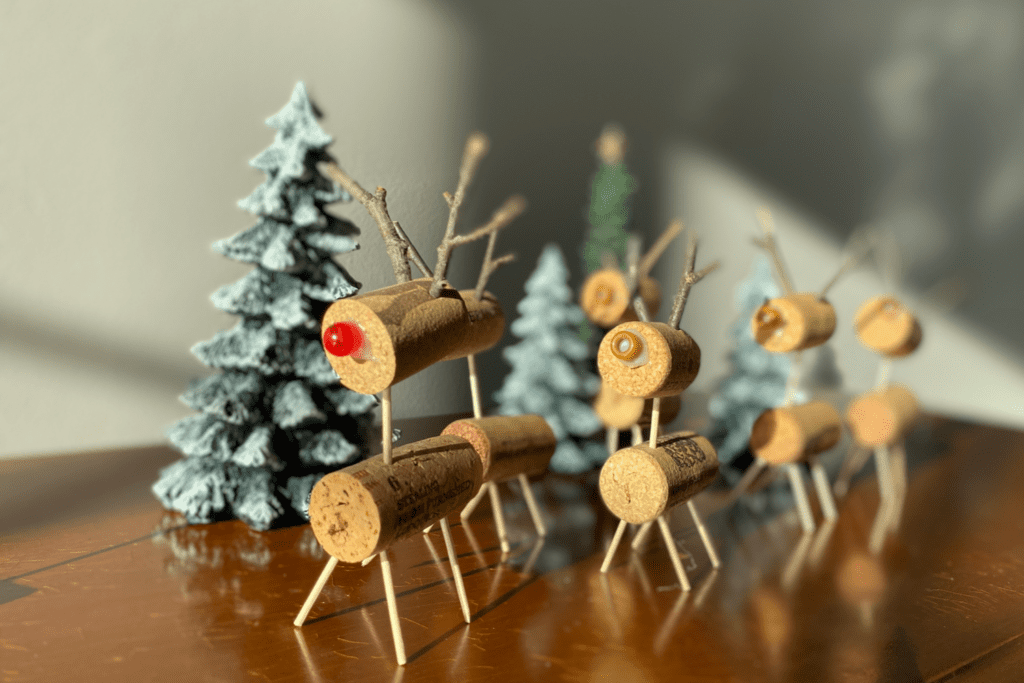
I stumbled upon a small wooden sleigh decoration at my local thrift store a few years ago and knew that I wanted to make these freestanding reindeer to add to my secondhand find on my kitchen shelf. However, there are many ways to incorporate these cute, upcycled reindeer into the Christmas season! Here are a few ideas to utilize your wine cork reindeer in and around your home.
- Tie a string around the body of your reindeer and create a Christmas ornament for your tree
- Use the reindeer as an accent charm when gifting a bottle of wine
- Gift a box full of Santa’s reindeer to a child on your Christmas list, along with a copy of the classic tale of “The Night Before Christmas”.
- Cut a small slit in the top of each reindeer to create place card holders for your holiday dinner guests
No matter how you incorporate your wine cork reindeer into your holiday celebrations, they’ll surely be a hit!
Free Video Tutorial on How to Make Reindeer With Natural Wine Corks
Here is a short video tutorial I made to walk you through the simple steps of creating wine cork reindeer for the Christmas holiday season. While you’re there, be sure to save the tutorial and follow me on Pinterest to be notified when I post new upcycled crafting tutorials or science projects.
How to Sustainably Dispose of Your Wine Cork Reindeer
Once the Christmas holiday is over, I store my upcycled wine cork reindeer with the rest of my delicate decorations to be used again the next year. However, if you decide to deconstruct your creation, here are some simple instructions to sustainably dispose of or repurpose your reindeer project.
- If you used plastic beads for the reindeer tail and nose, remove them and save them for another art project.
- Remove the hot glue and throw it in the trash.
- The natural cork, wooden toothpicks, and twigs are compostable. Take the remainder of your reindeer and throw it into a compost bin. If you do not have access to a compost bin or facility, consider burying it in your backyard soil. It will slowly decompose, returning its carbon stores back into the soil.
More Eco-Friendly Holiday Upcycled Crafts You’ll Love
If you liked this upcycled Christmas crafting project, you may enjoy the following homemade craft tutorials that rely on recycled or repurposed materials:
- How to Create Cardboard Tube and Star Ornaments
- How to Make A Thanksgiving STEM Project
- Make a Recycled Paper Mâché Pumpkin from Trash
- Simple STEM Bake and Build Gingerbread House

How to Make Reindeer from Natural Wine Corks
Looking for a festive way to repurpose natural wine corks? Try making these cute and simple DIY reindeer with your leftover wine corks to use for holiday table decor, Christmas ornaments, or stylish gift tags!
Materials
- 2 natural wine corks, not made of plastic
- 2 small branching twigs, each approximately 1 inch (2.5 cm) in length
- 3-5 wooden toothpicks
- 2 colored beads
- box cutter or sharp knife
- cutting board
- hot glue
Instructions
- Choose which wine cork you would like to use for the body and set it aside.
- Take the second cork and cut off about ¼ of the length. This will serve as the head of the reindeer.
- Lay both corks out lengthwise on a flat surface and position the shorter cork above the right end of the larger cork
- Cut a wooden toothpick in half and attach the head to the body by gently pushing each end of the cut toothpick into the corks. This toothpick will serve as the neck of the reindeer.
- Cut two more toothpicks in half. These will serve as the legs of the reindeer.
- Push the pointy end of each toothpick piece into the base of the body cork at 45-degree angles. You will need to play with the positioning and angle of your toothpick legs to ensure the weight of the cork reindeer is balanced and can stand freely.
- Take the two small twigs and gently push them into the top of the reindeer's head. You may need to use the sharp end of a toothpick to start a hole for the twigs to snugly fit into.
- Glue on one bead at the front end of the head to act as a nose.
- Glue on the second bead at the back of the body to act as a tail.
Notes
I wanted my reindeer to freely stand on a shelf. The longest part of this build was getting the proper positioning of the reindeer legs. You may need to try a few different locations for the toothpick legs before you can have your reindeer balance on his or her own! If for some reason you cannot get your cork reindeer to balance, or having freestanding wine cork reindeer is not your goal, you can always attach a string to the body and turn it into a hanging Christmas tree ornament!